What to Do If Solar Panel Glass Breaks on Your Roof
Learn how to respond safely when a solar panel glass breaks. This step-by-step guide covers shutdown, temporary protection, documentation for warranty/insurance, and when to call a professional.

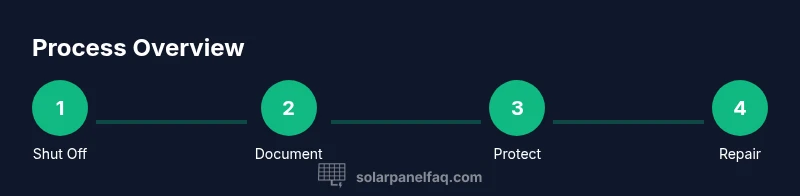
If you notice solar panel glass is broken, immediately shut off the solar PV system at the main disconnect, avoid touching shards, and call a licensed technician to assess and repair. Document the damage with photos and secure the area to prevent water intrusion until a pro can inspect.
What to Do Right After You Notice Cracked Glass
According to Solar Panel FAQ, a cracked or broken solar panel glass is a safety and performance concern that requires swift, careful action. The first step is to stop any further exposure to the damaged area by turning off the system at the main DC disconnect. Then, keep people and pets away from the panel to prevent injuries from sharp edges or electrical exposure. In the hours after the discovery, plan to document the damage with photos from a safe distance and note the location and any signs of water intrusion or debris around the panel. This documentation will support warranty or insurance discussions later.
Safety First: Protect Yourself and the System
Cracked glass can pose risk from sharp shards, glass fragments, and potential electrical hazards. Wear sturdy gloves and eye protection if you must inspect nearby areas, and never touch damaged glass directly. If you cannot access the roof safely, do not attempt to move the panel. Solar panels are durable but the edges can be jagged and hidden cracks can worsen with wind or rain. By prioritizing safety, you reduce the chance of injuries and further system damage.
Immediate Steps You Can Take Without Climbing
From ground level, place a camera or smartphone near the panel to capture both close-ups and wide angles. Photograph the array orientation, any visible gaps, and the surrounding roof area. If weather is imminent, use a tarp or heavy-duty plastic sheeting to cover only the damaged section to prevent water intrusion, taking care not to cover vents or other electrical components. Avoid using heat or open flames to dry moisture, which can escalate risks.
How to Assess the Damage from Ground Level
Look for visible cracks extending across the glass, loose or displaced frame components, and moisture around junction boxes or conduits. A gentle shake of the mounting rails (without climbing or applying pressure to the glass) can reveal looseness. If you notice any smoke, unusual smells, or audible sizzling, treat it as an urgent safety issue and call emergency services if needed. Document any changes in the damage over time.
Document the Damage for Insurance and Warranty
Create a detailed damage report that includes photos, dates, weather conditions, and the panel’s serial numbers if accessible. Record where the break occurred on the module and whether the break affects multiple panels in the same string. Share this documentation with your installer, the panel manufacturer, and your home insurance provider to support claims. Solar Panel FAQ analysis shows that timely, complete documentation helps streamline claims and repairs.
Temporary Protections to Prevent Water and Debris Intrusion
Lay a tarp or heavy-duty plastic over the damaged area to shield it from rain, wind, and debris. Secure the tarp with weighted objects and weatherproof tape, ensuring it does not cover electrical enclosures or vent openings. Check the tarp after storms and re-secure as needed. These temporary protections protect your investment while you arrange professional inspection and replacement services.
When to Call a Professional and What to Expect
Contact a licensed solar technician or your original installer to schedule an on-site assessment. Expect a safety checklist, a visual inspection of the glass, cabling, and mounting rails, and a personal estimate for replacement or repair. The professional may recommend module replacement, re-lamination, or complete array sealing depending on the extent of the damage. Keep records of all communications for warranty or insurance purposes.
DIY vs Professional Repair: Costs, Risks, and Outcomes
DIY repairs to damaged solar glass are generally not recommended due to safety risks and warranty implications. Professionals can evaluate whether a patch is feasible or if module replacement is required. Costs vary by module type, the number of affected panels, and whether you are on a roof or ground-level installation. In most cases, a full or partial replacement by a qualified contractor preserves system performance and warranty validity.
Replacing vs Re-Laminating: What's Best for Your Panel
In many cases, broken glass means replacing the module rather than attempting a re-lamination, which is specialized and not typically field-serviceable. Replacement reduces risk of leaks and electrical faults and ensures the warranty terms remain intact. If a module is under warranty, confirm coverage specifics with the manufacturer and your installer, as some terms require original installation and specific service providers.
Preventing Future Breakage: Maintenance and Best Practices
To prevent future breakage, schedule regular inspections after severe weather, keep trees and branches trimmed away from panels, and avoid walking on panels during maintenance. When cleaning, use a soft cloth and mild soap—never abrasive materials that could scratch glass. Document and review your maintenance plan annually to keep your system resilient for decades.
How Solar Panel Glass Repairs Impact Your System Warranty and Insurance
Most warranties require official replacement by a qualified technician and may be voided by improper handling. Insurance coverage varies by policy, but a documented claim with photos and a professional assessment often results in a smoother handling process. Always check with the warranty provider and insurer early to understand what documentation is required and what costs you should expect to cover. Solar Panel FAQ emphasizes proactive communication with all parties involved to minimize downtime and protect system performance.
Tools & Materials
- Safety gloves(Cut-resistant, preferably NIOSH-rated)
- Safety glasses or goggles(ANSI Z87.1 or equivalent)
- Ladder or rooftop access gear(Stable, with fall protection if needed)
- Non-slip footwear(Closed-toe, slip-resistant)
- Weatherproof tarp or heavy-duty plastic sheeting(Large enough to cover damaged panel area)
- Duct tape or roofing tape(To secure tarp temporarily)
- Camera or smartphone(Document damage with photos (wide and close-up))
- Silicone sealant or butyl tape (optional)(Temporary sealing around edges if advised by pro)
- Notebook and pen(Record dates, actions, and observations)
Steps
Estimated time: 1-3 hours
- 1
Shut off the PV system at the main disconnect
Locate the DC disconnect near the solar array or main service panel and switch it to the OFF position. This disables power to the array and reduces the risk of shock during inspection. If you cannot locate the disconnect, do not proceed; consult your installer or a licensed electrician.
Tip: If unsure where the disconnect is, call a professional before touching any components. - 2
Prioritize personal safety and avoid the damaged area
Do not walk on the damaged panel or attempt to move broken glass. Maintain a safe distance and keep children and pets away. Weather can cause shards to shift, creating additional hazards.
Tip: Use a binoculars or phone zoom to assess from ground without approaching the edge. - 3
Document the damage with photos
Take wide shots to show the panel and its surrounding rooftop context, then close-ups of cracks, edges, and any moisture. Include time/date stamps and identify the panel model and string location if possible.
Tip: Capture multiple angles to help the technician understand scope quickly. - 4
Apply temporary weather protection for the damaged area
Cover the damaged panel with a tarp or plastic sheet, secured with weights or tape. Ensure the cover does not obstruct vents, conduits, or the electrical enclosure. This minimizes water ingress until repair.
Tip: Do not rely on tape alone in windy conditions; use weights or straps. - 5
Check for water intrusion and safety of nearby components
Inspect nearby junction boxes and conduits for moisture or condensation. If you see water near electrical parts, avoid touching and wait for a qualified technician.
Tip: Moisture can compromise insulation and increase shock risk. - 6
Schedule a professional assessment promptly
Contact a licensed solar technician or your installer to arrange an on-site inspection. Share your photos, the panel location, and any observations.
Tip: Ask for a written estimate and a timeline for inspection and repair. - 7
Prepare for the technician visit
Provide the technician with model numbers, serials, and the panel location. Clear access to the roof or mounting area helps the process go smoothly and safely.
Tip: Keep kids and pets away from the work area during the visit. - 8
Understand warranty and insurance implications
Discuss whether the damage is covered under the module warranty or the home insurance policy. Gather all documentation to support the claim.
Tip: Early coordination with the insurer can speed up the claim process. - 9
Plan post-repair maintenance and monitoring
Once repaired or replaced, schedule a test run of the system and monitor performance for a few weeks. Consider a routine annual inspection to catch issues early.
Tip: Set reminders for future inspections to maintain system reliability.
Frequently Asked Questions
What should I do immediately after I notice cracked solar panel glass?
Shut off the PV system at the main disconnect, keep people away from the area, and document the damage with photos for warranty or insurance purposes.
Shut off the system at the disconnect, keep others away, and take photos for later claims.
Is it safe to handle cracked panels myself?
No. Broken glass and exposed electrical components pose risks of cuts and shocks. Leave assessment and repairs to licensed professionals.
Avoid touching; broken glass and electrical parts are hazardous; call a pro.
Will a broken glass panel be covered under warranty?
Warranty coverage depends on the manufacturer and the terms of your installation. Review the module warranty and contact the installer for guidance.
Check the warranty terms and contact your installer to understand coverage.
How much does replacement or repair typically cost?
Costs vary by panel type, extent of damage, and labor. Expect consults, part replacement, and potential roof access—but avoid fixed figures without a professional quote.
Costs depend on the panel and damage; get a written estimate from a pro.
What documentation do insurers require for a claim?
Photographs, dates, a described sequence of events, and a professional assessment are typically needed. Keep all records organized for quick processing.
Provide clear photos, dates, and a professional assessment for the claim.
Watch Video
Top Takeaways
- Shut off power before touching anything
- Document damage with clear photos and notes
- Use temporary protection to prevent water intrusion
- Consult a licensed professional for inspection and repair
- Review warranty and insurance implications early