Can a Cracked Solar Panel Be Repaired? A Homeowner's Guide
Explore whether cracked solar panels can be repaired, safety implications, warranty effects, and practical replacement options for homeowners seeking reliable solar performance.

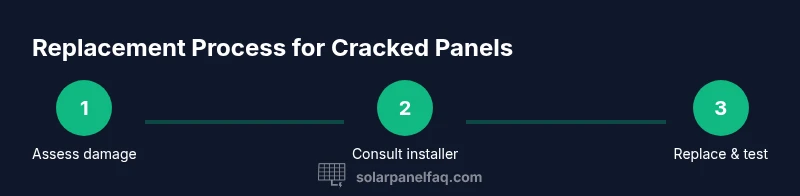
A cracked solar panel is generally not repairable or safe to fix. Structural glass damage and moisture risk make performance gains unlikely. The recommended path is to replace the damaged panel or the affected string, after consulting a licensed solar technician. In some cases, manufacturers may offer limited warranty coverage on certain defects, but a cracked glass usually voids most guarantees.
What happens when a cracked solar panel occurs?
Can a cracked solar panel be repaired? The short answer is often no. When the glass is cracked, moisture can reach the PV cells, insulation can degrade, and the panel's protective seal is compromised. According to Solar Panel FAQ, these failures threaten electrical safety and long-term performance, making field repairs impractical in most cases. The Solar Panel FAQ team found that the safest and most reliable path is to replace the damaged module or, if necessary, reconfigure the array to isolate the broken panel. While some minor surface scratches might seem repairable, significant cracks typically do not recover efficiency and can create new hotspots. If you depend on solar power for your home, consult a licensed installer before attempting any DIY fixes.
Why repairing a cracked panel isn't usually feasible
Repairing a cracked panel is rarely feasible because the PV cells are laminated behind tempered glass. Any attempt to "patch" the crack risks moisture ingress, delamination, and electrical arcing. Even if glass could be resealed, microcracks inside the laminate can propagate and reduce power output unpredictably. In practice, the cost, time, and risk often exceed the price and reliability of a replacement panel. Replacing the damaged module not only restores performance but also ensures proper junction box connections and frame integrity. If the array is still under warranty, contact the installer or manufacturer before making any changes, because coverage terms often require using authorized parts and certified installers. Solar Panel FAQ analysis shows that homeowners who pursue repairs generally end with inconsistent results and potential safety concerns.
What options exist if a panel cracks?
There are three broad paths: replace the entire panel, replace only the damaged module in a modular system if compatible, or reconfigure the array to bypass the cracked unit. Repair options marketed by some contractors (glass resealing or cell re-lamination) are uncommon and not generally recommended for residential systems. Replacement with an identical model or a compatible upgrade is usually the simplest path. If the array is under warranty, contact the installer or manufacturer before making any changes, because coverage terms often require authorized parts and certified installers. In some cases, a cracked panel can be repurposed for non-critical uses indoors or for testing where safety is not a concern, but this is not typical for active rooftop systems. The choice depends on cost, safety, warranty status, and local regulations. Solar Panel FAQ recommends weighing the long-term reliability and potential warranty implications before proceeding.
How to evaluate a cracked panel safely and efficiently
Start with a visual inspection from a safe perch to assess crack size and location. Note whether the crack spans the glass, the frame, or the junction box. Moisture or condensation around the edges signals potential seepage. Check your system's warranty status and the manufacturer's troubleshooting guide. If the panel is under warranty, a replacement or repair might be covered, but many warranties exclude damage from impact or neglect. Document the crack with photos, note the time and weather, and log the panel's model and serial number. Have a licensed solar technician inspect the site; do not attempt to remove or handle high-voltage components yourself. Finally, consult your installer about possible replacement options and whether a bypass can safely isolate the damaged unit without affecting safe operation of the rest of the string. This step minimizes downtime and preserves overall system safety.
Immediate safety steps and warranty considerations
If you discover a crack, turn off the system at the main disconnect and switch off the inverter before touching panels. Do not attempt to press on the glass or seal cracks with tape or sealant; field repairs can cause further damage or electric shock. Document the issue and contact your installer or the panel manufacturer. Many residential warranties cover manufacturing defects but exclude physical damage from impacts; check your contract for exact terms. For rooftop installations, ensure fall protection and PPE are used, and avoid working in wet conditions. In short, safety and warranty terms guide the next steps, not a DIY repair.
Replacement process: steps a pro may take
A licensed installer will typically remove the damaged panel by disconnecting wiring, carefully unmounting the module, and replacing it with a like-for-like unit. They will re-test the string with a multimeter, verify insulation and moisture seals, and ensure proper backsheet drainage. If the damage affects multiple modules or a whole string, the pro may reconfigure the array to optimize shading and voltage. Expect a site visit for measurement, parts order, and possible roof access permissions. Finally, confirm that the system is producing expected voltage under standard test conditions and verify warranty documentation for the new panel.
Maintenance and prevention to reduce future cracking
To minimize future cracks, choose panels with robust glass and frame materials, and ensure proper mounting using recommended torque and fasteners to withstand wind loads. Schedule regular inspections to catch microcracks early, especially after hail, heavy wind, or rooftop snowfall. Keep panels clean, but avoid abrasive scrubbing that could scratch the glass. When possible, provide protective barriers for roof edge exposure and ensure adequate clearance for thermal expansion. Consider adding a protective cover for off-season storage or long-term shading to prevent thermal cycling that weakens edges. A proactive maintenance plan saves time and money over the panel’s life.
When to call a professional and how to choose a contractor
If you’re unsure about the damage or the warranty terms, call a licensed solar installer rather than attempting DIY repairs. Compare multiple quotes, verify certifications, and ask for a written plan outlining replacement options, timelines, and guarantees. A reputable pro will inspect the array, confirm the integrity of the remaining modules, and help decide whether bypassing the cracked panel is safer than a full replacement. Solar Panel FAQ recommends requesting references and checking local licensing requirements before work begins.
AUTHORITY SOURCES
For safety and warranty guidance, rely on established sources:
- U.S. Department of Energy: https://www.energy.gov/eere/solar
- National Renewable Energy Laboratory (NREL): https://www.nrel.gov
- Occupational Safety and Health Administration (OSHA) rooftop safety guidelines: https://www.osha.gov
Tools & Materials
- Safety gear (gloves and safety glasses)(PPE rated for rooftop work; avoid cuts and eye injuries)
- Non-contact voltage tester(Verify no live circuits before handling modules)
- Digital multimeter(Check voltage and continuity during replacement)
- Roof access gear (ladder, harness, fall-arrest system)(Use fall protection when working above ground)
- Replacement panel (matched spec preferred)(Only if you plan to replace on-site)
- Weatherproof sealant compatible with PV installations(Optional for resealing edges after replacement)
- Marker and tape for labeling(Label wires and disconnections clearly)
- Camera or smartphone for documenting condition(Helpful for warranty and insurance records)
- Warranty documents and model/serial number(Keep on-site or accessible digitally)
Steps
Estimated time: 2-6 hours
- 1
Shut down and secure the site
Power down the system at the main disconnect and switch off the inverter. Confirm no voltage is present before touching any component. This reduces the risk of electric shock during inspection.
Tip: Always wear PPE and secure the ladder; never work on a wet roof. - 2
Inspect damage and document
From a safe vantage point, assess crack size, location, and whether moisture is present. Photograph the panel and note the model/serial numbers for warranty reference.
Tip: Take wide and close-up shots to capture all angles of damage. - 3
Check warranty and guidance
Retrieve the warranty terms and the manufacturer’s troubleshooting guide. If under warranty, document and contact the installer or manufacturer before any replacement.
Tip: Warranty often requires authorized service; avoid unauthorized DIY repairs. - 4
Decide on repair vs replacement
If crack is extensive or multiple modules are affected, replacement is typically safer and more cost-effective than repair. Consider system downtime and long-term energy goals.
Tip: When in doubt, favor replacement to restore reliability. - 5
Perform replacement with a pro
If proceeding, a licensed technician should remove the damaged module and install a like-for-like unit, ensuring proper seals and wiring connections.
Tip: Have the pro re-test the string and document the new panel’s warranty. - 6
Test and verify
With the replacement installed, re-energize the system and verify voltage output under standard test conditions. Check for any signs of moisture and confirm proper grounding.
Tip: Keep records of test results and new warranty paperwork.
Frequently Asked Questions
Can a cracked solar panel be repaired?
Generally not; repairs are uncommon and often unsafe. Replacing the damaged module is the recommended approach, especially for residential systems.
Cracked panels are usually not repairable; replacement is safer and more reliable.
Will a cracked panel still generate power?
It may produce some electricity, but output is reduced and hotspots can form, increasing safety risk and lowering efficiency.
A cracked panel might still work, but efficiency drops and safety concerns rise.
Does damage affect warranty?
Damage from impacts or improper handling often voids coverage. Warranty terms vary, so review your contract and contact the installer.
Warranty terms usually exclude physical damage; check with your installer.
Should I seal cracks myself?
No. DIY sealing can trap moisture or cause arcing and will typically void warranties.
Avoid DIY sealing; it's unsafe and can void warranty.
What are typical costs to replace a panel?
Costs vary by panel type and installation. Request quotes from multiple installers to compare options and warranties.
Costs vary; get quotes and compare warranties before replacing.
Watch Video
Top Takeaways
- Assess cracks with safety first.
- Repairs are rarely reliable; replacement is usually best.
- Check warranty terms before any action.
- Hire a licensed pro for replacement and testing.