Tips for Cleaning Solar Panels: Safe DIY Guide
Discover practical, safety-first tips for cleaning solar panels. Learn when to clean, which cleaners are safe, essential tools, step-by-step DIY methods, maintenance practices, and how to protect warranties while maximizing energy output in 2026.

You can safely clean solar panels at home by using cool water, a mild soap if needed, and non-abrasive tools. Avoid high-pressure washing, harsh chemicals, and climbing on wet roofs. Follow a calm, methodical approach: inspect, wet the surface, clean with a soft brush or sponge, rinse thoroughly, and dry any residual streaks. This guide provides the full steps and safety checks for a DIY clean in 2026.
Why cleaning solar panels matters
If you’re looking for tips for cleaning solar panels, this guide helps homeowners understand why routine cleaning matters for efficiency and longevity. A light layer of dirt—dust, pollen, bird droppings, or salt spray—can block sunlight and reduce energy output, especially on hot sunny days. Regular cleaning supports near-peak performance and protects your investment over time. According to Solar Panel FAQ, maintaining a simple cleaning rhythm can help retain power generation across seasons in 2026. A clear roofline also minimizes visual glare and makes inspections easier, allowing you to spot damage early and address it before it becomes costly. Keep in mind that weather conditions matter: dry, cool periods are ideal for cleaning, while wet or windy days increase risk. Bolded notes highlight best practices without changing the core guidance.
Safety first when cleaning solar panels
Safety should come before any cleaning project on a roof. Start by checking the manufacturer’s guidance for your exact panel model and mounting system. Wear non-slip shoes, gloves, and eye protection. Use a stable ladder and, if possible, work with a partner who can hold the ladder and observe from below. Never stand on the panel itself or apply excessive force with brushes or scrubbers, which can scratch coatings or loosen seals. Solar panels conduct electricity; treat any cleaning activity as a potential electrical task and avoid wetting exposed wiring or inverters. In 2026, Solar Panel FAQ emphasizes safety as the foundation of any DIY cleaning plan and recommends postponing cleaning during rain or after a storm when panels and rails are slick.
Cleaning methods: water-only vs soap-based cleaners
Two common approaches work well for most residential panels: water-only cleaning and a mild soap solution. For light dust or pollen, rinsing with cool water from a garden hose can remove most residue without soap. If grime is persistent, mix a small amount of mild dish soap in a bucket of water and use a soft microfiber cloth or sponge to lift residue. Rinse again to remove any soap film, which can reduce glare or cause streaks. Avoid ammonia-based cleaners, solvent-heavy products, or abrasive brushes that can scratch the panel surface or degrade coatings. Always test a small area first and work from the top down to prevent streaks.
Tools and cleaning supplies you’ll need
Prepare a simple, non-chemical toolkit to minimize risk and simplify cleanup. Essential items include a garden hose with a gentle spray nozzle, a soft-bristle brush or microfiber sponge, a non-abrasive squeegee, a bucket, mild dish soap (optional), and soft cotton towels for drying. Consider an extendable pole for reaching high panels without a ladder. Safety gear like gloves, non-slip shoes, and eye protection are important, especially if you’re cleaning on a warm day when surfaces can be hot. Keep a small towel handy to wipe away drips from nearby surfaces to prevent slippery walkways.
Scheduling cleanings by climate and roof conditions
Frequency should reflect local dust, pollen counts, bird activity, and weather patterns. In dusty or coastal environments, more frequent cleanings may be beneficial, while areas with regular rain can reduce buildup by natural washing. After seasonal events like pollen surges or wildfire smoke, a mid-season clean can help maintain performance. If you have a tilted roof with limited access, plan cleanings during cooler, dry mornings to minimize heat-related risks and ensure dry surfaces for better grip and visibility.
Step-by-step overview: safe, DIY cleaning approach
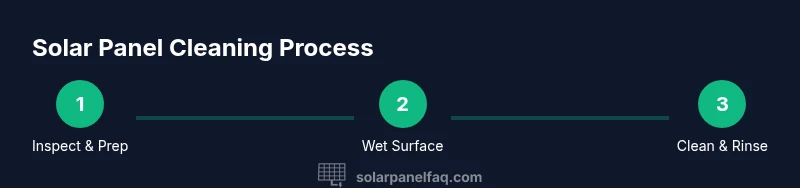
This high-level overview mirrors the detailed steps below without duplicating them. Begin with a quick inspection from ground level, ensuring the area around electrical components is dry. Wet the panel surface to loosen debris, then apply a gentle, circular cleaning motion with a soft brush or sponge. Rinse thoroughly using a broad sweep from top to bottom, avoiding direct jet pressure on seals or inverters. Finally, dry any remaining water with a microfiber cloth and inspect for streaks or residue. If you notice persistent marks or damaged coating, stop and reassess.
DIY vs professional cleaning: decisions and costs
DIY cleaning offers flexibility and can be cost-efficient for simple maintenance, but some installations or warranties may require professional service. Consider panel type, roof height, and access constraints before deciding. Pros of DIY include lower upfront costs and immediate action after heavy dust events; cons include higher risk if you’re not comfortable working on a roof or near electrical components. For complex systems, or if you lack proper safety gear, hiring a licensed technician can be safer and may protect your warranty.
Maintenance beyond cleaning: protecting panels and hardware
Keeping panels clean is just one part of long-term care. Periodically inspect mounting rails for corrosion, seals around edges for moisture ingress, and wiring connections for signs of wear. Gently wipe frames and glass with a microfiber cloth to remove fingerprints and smudges that could affect heat dissipation. Check the inverter display for warning indicators and review the manufacturer warranty terms to ensure your cleaning routine complies with any requirements. Solar Panel FAQ notes that a proactive maintenance approach helps preserve efficiency and safeguard investment through 2026.
Troubleshooting after cleaning: common issues and fixes
If streaks appear after cleaning, try a second rinse with clean water and a gentle pass with a dry microfiber cloth. Persistent white residues can result from hard water minerals; in such cases, consider using distilled water or a rainwater harvest system if feasible. If energy output does not recover after cleaning, inspect for shading from new branches, debris in the panel gaps, or underlying hardware issues. When in doubt, document the problem with photos and consult a professional to avoid unnecessary risk.
Callouts for warranty and safety: quick checks
Before you clean, review your warranty terms to confirm what cleaning methods are allowed. Many warranties require non-abrasive cleaning and the use of manufacturer-approved products. If your system is under warranty, consider documenting your cleaning steps with dates and photos to demonstrate adherence to guidelines. Remember: safety is the priority; if you’re uncertain about roof access or electrical risk, prioritize professional assistance.
Tools & Materials
- Garden hose with adjustable nozzle(Keep water pressure gentle; avoid direct jet on edges)
- Soft-bristle brush or microfiber sponge(Non-abrasive to prevent scratches)
- Non-abrasive squeegee(For drying and streak-free removal)
- Mild dish soap (optional)(Use sparingly if needed for stubborn grime)
- Bucket with clean water(Separate from dirty water)
- Extendable pole (for tall installations)(Safer than climbing; check weight limits)
- Non-slip gloves(Grip and hand protection)
- Safety glasses(Protect eyes from splashes)
- Microfiber towels(Drying and buffing to prevent streaks)
- Ladder with stabilizer (if needed)(Ensure it’s placed on a stable surface)
Steps
Estimated time: 60-90 minutes
- 1
Inspect from ground and prepare safety gear
Walk the perimeter of the installation to check for loose wiring, debris, or signs of damage. Put on gloves, eye protection, and non-slip footwear. If you must climb, ensure the ladder is level and secured; never stand on panels. This initial check reduces risk before any water touches the surface.
Tip: Always have a helper on the ground to stabilize the ladder and call for help if you slip. - 2
Wet the panel surface
Rinse the surface with a gentle spray to loosen dirt without forcing water into seals or edges. Use a broad, even motion and avoid blasting the glass. Wetting first helps prevent scratching when you wipe.
Tip: Let gravity do the work—start at the top and work down to minimize drips. - 3
Apply cleaning solution if needed
If residue persists, mix a small amount of mild soap in water and apply with a soft sponge. Do not apply concentrated cleaners or solvents directly to the panel. Rinse thoroughly to remove soap film that could cause streaks or reduce glare.
Tip: Test a small corner first to ensure no surface damage or staining. - 4
Gently scrub and rinse
Use light, circular motions with a soft brush to lift grime. Rinse again with a wide spray from top to bottom, ensuring all soap is removed. Avoid high-pressure jets on edges or corners where water can intrude behind seals.
Tip: Keep the nozzle at a distance and avoid scrubbing in one spot too hard. - 5
Dry and inspect
Dry panels with microfiber towels to prevent water spots. Inspect for streaks, smears, or missed areas. If needed, buff with a dry microfiber cloth until glass appears clear and uniform.
Tip: Look for shadow lines that indicate remaining residue or shading. - 6
Document and store tools
Return tools to their storage location and note any issues observed during cleaning. Update warranty records if required by the installer. Regular documentation helps track maintenance cycles and plan future cleanings.
Tip: Take photos of any damage to discuss with a professional if necessary.
Frequently Asked Questions
Is it safe to clean solar panels myself, or should I hire a professional?
DIY cleaning is safe for many residential setups if you follow safety guidelines and manufacturer recommendations. For complex roof configurations or high-install systems, hiring a professional reduces risk and helps protect warranties.
DIY cleaning is fine for many homes if you follow safety guidelines; for complex roofs, consider a pro.
What cleaning solutions are safe for solar panels?
Use plain water or a mild soap solution. Avoid ammonia, solvents, or abrasive cleaners that can damage glass coatings or seals.
Stick to water or mild soap; avoid harsh chemicals.
What’s the best time to clean solar panels?
Clean during cool, dry mornings or evenings when panels are not hot, reducing risk and avoiding water spotting as the panel surface dries quickly.
Choose cooler parts of the day to stay safe and reduce streaks.
Will cleaning void my solar panel warranty?
Some warranties require professional service or specific cleaning methods. Check your manufacturer’s guidelines and your installer’s terms before DIY cleaning.
Check the warranty terms to avoid inadvertently voiding coverage.
How often should I clean my panels in a dusty climate?
In dusty climates, more frequent cleaning may be beneficial. Start with a quarterly check and adjust based on energy output and debris buildup.
Dusty areas may need more frequent cleaning; monitor energy output.
What if I see streaks after cleaning?
Streaks often come from hard water minerals or soap film. Rewash with distilled water and dry with a microfiber cloth to restore clarity.
If streaks appear, re-wash with distilled water and dry carefully.
Watch Video
Top Takeaways
- Keep safety first and never rush on a roof.
- Use gentle cleaners and tools to avoid scratching coatings.
- Clean during cool, dry conditions for best results.
- Document maintenance to protect warranties and performance.
- Decide DIY vs professional based on access and risk.