How to Clean Solar Panels with a Pressure Washer
Learn safe, practical steps to clean solar panels with a pressure washer, including risks, best practices, and alternatives for homeowners.

Yes, you can clean solar panels with a pressure washer, but only if your panels and warranty permit it, and you must use a low-pressure, wide-spray setting. Start from the top, keep the nozzle moving, and avoid inverters or seals. Check manufacturer guidelines and consider safer alternatives for delicate roof installations.
Assessing feasibility and safety before cleaning
Cleaning solar panels with a pressure washer can help restore performance by removing pollen, dust, and bird droppings. However, not every system is a good candidate for high-pressure cleaning, and improper technique can void warranties or damage glass, frames, or seals. According to Solar Panel FAQ, the first step is to review your panel manufacturer’s guidelines and warranty terms. If the warranty prohibits pressure, use gentler methods or consult a professional. Before you begin, assess access to the panels: is the roof stable, is there a safe route for a ladder or harness, and can you avoid stepping on the panels themselves? Weather also matters: dry, calm conditions reduce slip risk and prevent water from pooling around electrical components. Finally, consider whether the cleaning task would be better handled after a professional inspection if you notice cracks, glazing cloudiness, or loose mounting hardware.
When pressure washing is appropriate and when to avoid it
Not all solar installations tolerate jetting water. Pressure washing can be effective for flat or low-slope systems with accessible panels and minimal risk to seals, frames, and wiring, but many manufacturers restrict or prohibit it. If your panels are multi-year aged, on a steep roof, or near sensitive electrical components, opt for gentler cleaning methods or hire a professional. Solar Panel FAQ notes that the safest approach is guided by the manufacturer’s instructions and the installer’s recommendations. Also consider environmental conditions, as wind can blow water into eaves or roof penetrations, and sun exposure can cause rapid drying that leaves streaks if water dries unevenly.
Preparation and workspace: setting up for safe cleaning
Begin by gathering appropriate tools and inspecting the site. Clear the work area of loose debris, ensure stable footing, and plan a path that keeps you off the panels as much as possible. If you must access the roof, use a harness and a secure ladder. Disconnect any external power sources where safe to do so, and protect inverters and electrical junctions with removable covers. Ensure the water source is clean and steady, and have towels or rags handy for drips. This preparation helps minimize the risk of electrical faults and mechanical damage during cleaning.
Choosing nozzle settings and spray patterns
Opt for a wide spray pattern and a low-pressure setting rather than a focused, high-pressure jet. A broad fan spray delivers cleaning power while reducing the risk of chipping glass or forcing water into seals. Keep the nozzle at a consistent, safe distance from the panel surface and avoid prolonged exposure to any single spot. Do not spray directly at edges where the glass meets the frame, and never direct water toward the inverter, wiring boxes, or conduit entries. If your equipment allows a gentle soap option, use it only if the panel manufacturer approves.
Cleaning technique: top-to-bottom rinse and safe motion
Begin at the top row and rinse downward with smooth, continuous motions to prevent dirty water from running into already-cleaned areas. Move the nozzle slowly enough to lift grime without buffing scratches into the glass. Work in narrow sweeps, pausing briefly to re-wet stubborn spots rather than applying aggressive pressure. After rinsing, re-check for remaining residue and ensure all seals and mounting hardware remain securely fastened. If you notice mineral deposits, switch to clean water and rinse longer to avoid streaks.
Roof-mounted panels: safety and access considerations
Roof access increases the risk of falls, electrical hazards, and damage to shingles or tiles. If you’re not comfortable working from height, hire a pro or use a ground-level approach with mirrors or telescoping tools for better visibility. Always wear non-slip footwear, keep the area clear, and avoid walking directly on the panels. Protective covers over electrical components and a partner spotter can help maintain safety. When in doubt, err on the side of caution and consult a certified technician.
Weather and environmental considerations: timing matters
Choose dry, wind-free days for cleaning. Moisture can embed dirt into micro-scratches or create streaks if sunlight dries water unevenly. Avoid cleaning during intense heat or when temperatures hover near freezing, as rapid drying or freezing water can cause cracking. Collect and reuse rinse water where possible to reduce environmental impact and to prevent runoff from carrying contaminants toward drainage or soil. Make sure to comply with local regulations on water use.
Alternatives to pressure washing for stubborn grime
For heavy grime or delicate installations, consider softer methods such as a low-pressure rinse, soft-bristle brush, or specialized solar panel cleaning solutions approved by the manufacturer. Use deionized or distilled water to minimize mineral deposits, and rinse thoroughly after any light soap application. In many cases, a manual wipe with a microfiber cloth or sponge, followed by a gentle rinse, achieves the same result with less risk.
Aftercare and ongoing maintenance: what to check next
Once cleaning is complete, inspect panels for any chips, cracks, or loose mounting hardware. Look for residual streaking and re-wipe if needed. Check the inverter and wiring connections behind any protective covers, ensuring seals remain intact. Document the cleaning date and any observations to help with future maintenance planning. Keeping a log supports warranty compliance and long-term performance monitoring.
Tools & Materials
- Pressure washer (low-pressure setting)(Choose the widest nozzle and avoid high-pressure jets.)
- Wide-angle spray nozzle or fan nozzle(Prefer a broad spray to minimize concentrated impact.)
- Extension wand or pole(Useful for reaching elevated panels without stepping on them.)
- Soft-bristle brush or microfiber pad(For gentle scrubbing on stubborn spots (no scrubbing on ceramic glass).)
- Safety gear (gloves, splash goggles, non-slip shoes)(Protect eyes from spray and slips on wet surfaces.)
- Ladder or roof access equipment(Only if safe access from ground is not possible; use harness.)
- Non-detergent cleaning solution (manufacturer-approved)(Only if the manufacturer permits; otherwise skip.)
- Water source and hose(Stable supply with good water pressure.)
- Protective covers for inverter/wiring(Remove or cover before cleaning if guidelines permit.)
- Deionized or distilled water (optional)(Reduces mineral deposits on panels.)
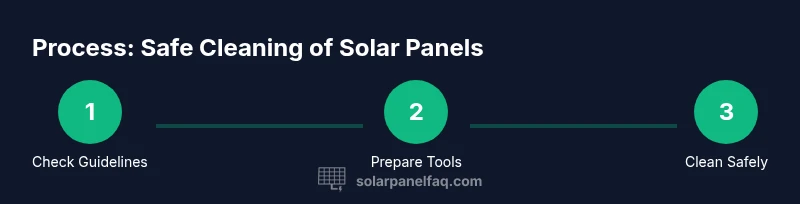
Steps
Estimated time: 60-90 minutes
- 1
Review warranty and manufacturer guidance
Before touching your system, read the warranty terms and panel manufacturer instructions to determine if pressure washing is permitted. If there is any doubt, contact the installer or manufacturer. This step helps prevent warranty voiding and potential panel damage.
Tip: Document the guidance you receive so future cleaners know what is allowed. - 2
Inspect for damage and safety risks
Visually inspect panels for cracks, chips, loose mounting hardware, or exposed wiring. Do not start cleaning if you notice damage; consult a professional.
Tip: Take photos for records and to share with a technician if needed. - 3
Prepare workspace and protect components
Clear debris around the panels, secure a stable ladder or access, and cover exposed electrical components if allowed by guidelines. Ensure you have a partner to assist with safety.
Tip: Wear a harness and use non-slip footwear on roofs. - 4
Set up low-pressure cleaning configuration
Attach a wide-angle spray nozzle and keep the spray at a safe distance. Do not engage high-pressure jets near seals or edges.
Tip: Test a small area on a less-visible panel first. - 5
Rinse from top to bottom with gentle motion
Begin at the highest row and move downward in smooth strokes to avoid runoff streaks. Keep the nozzle moving to prevent etched lines or hotspots.
Tip: Do not linger on any single spot; repeated passes distribute pressure evenly. - 6
Apply detergent only if approved
If the manufacturer approves a cleaning solution, apply sparingly and rinse thoroughly. Avoid harsh chemicals that can damage coatings or seals.
Tip: Rinse thoroughly after any soap to prevent residue that can attract more dirt. - 7
Rinse again and dry if possible
Follow with a full rinse to ensure no soap film remains. If you can, allow panels to air dry or dry with a soft microfiber cloth.
Tip: Avoid drying in direct sun if water streaks appear; use a shade area if possible. - 8
Inspect and document results
Look for any remaining grime, streaks, or damage. Record the date and any observations for future reference and warranty checks.
Tip: Create a simple maintenance log for seasonal cleaning cycles. - 9
Know when to call a professional
If access is risky, panels show damage, or you’re unsure about warranty guidelines, hire a certified technician.
Tip: Professional cleaning may be required for steep or slate roofs; safety should come first.
Frequently Asked Questions
Is it safe to use a pressure washer on solar panels?
Only if the manufacturer allows it and you use a low-pressure, wide-spray setting. Do not spray at inverters or seals, and avoid aggressive jets.
Pressure washing is safe only when your panel manufacturer approves it and you use a gentle spray away from electrical components.
Will cleaning with a pressure washer void my warranty?
Warranties vary by manufacturer. Always review terms and follow official guidelines; if unsure, consult the installer or manufacturer before proceeding.
Warranties vary; check guidelines and consult the installer if you’re unsure.
What cleaners are safe for solar panels?
Use only solutions approved by the manufacturer. In many cases, plain water is sufficient; avoid harsh chemicals that can degrade coatings.
Only use manufacturer-approved cleaners; often water is enough.
Can I clean roof-mounted panels by myself?
DIY is possible for simple, accessible roofs with proper safety equipment. For steep or complex roofs, hire a professional.
You can DIY if you can stay safe; otherwise hire a pro.
What are safer alternatives to pressure washing?
A gentle rinse with a soft brush or microfiber cloth, followed by a thorough rinse, is often effective and lowers risk. Consider deionized water to reduce mineral deposits.
Gentle brushing plus a thorough rinse is often enough and safer.
Watch Video
Top Takeaways
- Check warranty before cleaning
- Use low-pressure, wide spray
- Avoid spraying edges near inverters and seals
- Prefer gentler methods on riskier roofs
- Document maintenance for warranty and performance