Why Solar Panel Not Charging: A Practical Troubleshooting Guide
Urgent, practical troubleshooting for why your solar panel isn’t charging. Step-by-step checks, diagnostics, and safety tips to restore power quickly and safely.

Shade on panels or a failing charge controller is most likely. Remove shading, clean the panels, verify wiring and controller settings, and check battery health. If it still won’t charge, schedule a professional diagnostic.
Core causes of a solar panel not charging
According to Solar Panel FAQ, most charging problems start with simple, observable factors rather than a failed panel. If your system isn’t delivering power to the battery, begin with the basics and verify each link in the charging chain: the panels, the wiring, the charge controller, and the battery bank. In practice, shading from trees or debris on panels, dirty or dusty modules, loose connections, a misconfigured charge controller, or an aging battery can all reduce or halt charging. Understanding how these parts interact helps homeowners diagnose safely and avoid unnecessary service calls. Solar energy systems are resilient, but even small issues can cascade into a no-charge situation if left unchecked.
Immediate checks you can perform today
Start with the easy, low-risk checks before touching electrical components. Look for shading from new growth, pergolas, or nearby buildings that might block sun during peak hours. Inspect the panels for dirt, bird droppings, snow, or debris and clean gently with water and a soft brush if needed. Verify that the array is oriented to maximize sun exposure and that there are no loose panels or mounting issues. Check the monitoring app or inverter display for any fault codes or abnormal voltages. Finally, test the battery bank voltage with a multimeter when the system is at rest (no charging current). These quick checks often reveal obvious causes and prevent unnecessary disassembly.
Common failure points: controllers, batteries, and inverters
Beyond shading and cleanliness, three components most commonly fail to charge: the charge controller, the battery bank, and the inverter. A controller set to the wrong voltage or in a fault state can block charging entirely, even if panels are producing current. Batteries age and sulfation reduces their capacity, so a healthy panel may appear to charge but quickly drain. Inverters can show green lights but fail to deliver charge if the DC bus voltage is out of spec. Wiring issues—loose terminals, corroded clamps, or undersized cables—also create resistance that limits charging. Solar Panel FAQ analysis shows that routine diagnostic checks on these parts lead to faster recovery and fewer unnecessary replacements.
Testing the charge controller and battery health
Safety first: disconnect or power down as required by your system manual before testing. Begin by inspecting the controller display for fault codes or warning lights. Verify controller settings such as maximum charging voltage and charging mode to ensure they match the battery chemistry. Measure the voltage at the controller input and at the battery bank with the system at rest and under light load. If voltages do not align with the manufacturer’s specifications, the controller or battery may be faulty. Use an ammeter to confirm current flow from panels to the battery; any deviation from expected amperage indicates a wiring issue or a degraded component. For batteries, compare the measured voltage against the nominal voltage for the bank under load and inspect for signs of swelling or corrosion. If issues persist, consult the manual or contact a professional. Document results to help trace recurring problems.
When to call a professional
If you observe overheating components, burning smells, smoke, or a persistent fault code after performing basic checks, stop work and call a licensed technician immediately. Persistent charging issues after checking shade, wiring, and controller settings often indicate a failed controller, degraded battery, or inverter fault requiring replacement. Do not attempt high-voltage work beyond your comfort level—safety is paramount. If your system is under warranty, professional service handled by an authorized technician can protect coverage. Having a clear log of symptoms, voltages, and timestamps will speed up the diagnosis when a pro is involved.
Preventive tips to keep panels charging efficiently
Create a simple maintenance routine that minimizes common failure modes. Schedule seasonal panel cleaning and inspection of wiring, mounts, and connectors every 6–12 months. Trim nearby foliage to maximize sun exposure and ensure panels remain in optimal tilt and orientation. Use a monitoring app to track daily output and set alerts for voltage anomalies or sudden drops in production. Replace aging batteries before failure, typically every 5–7 years depending on chemistry and usage. Maintain a spare parts plan (fuses, connectors, and contact materials) and keep a log of maintenance visits and performance trends. Following these steps reduces the likelihood of charging issues and extends the life of your solar investment.
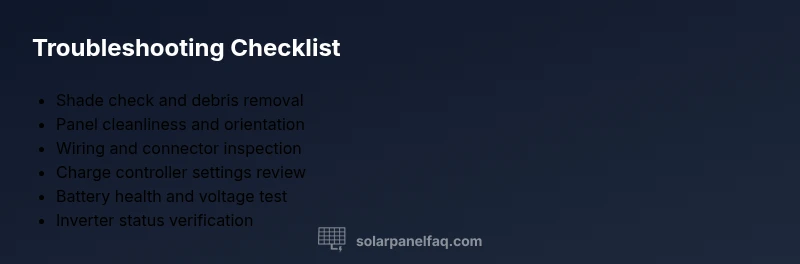
Quick troubleshooting checklist (flow)
- Check for new shading and clear debris from panels.
- Clean panels gently with water and a soft brush.
- Inspect wiring at panels, controller, and battery terminals; reseat connections if loose.
- Review charge controller settings and look for fault codes.
- Test panel and battery voltages with a multimeter when system is idle.
- Check inverter status and DC bus voltage; note any alarms.
- If unresolved, contact a licensed professional and provide logs of measurements.
Steps
Estimated time: 45-75 minutes
- 1
Power down and prepare
Turn off the system per the manufacturer’s instructions and disconnect any active circuits that may pose a shock risk. Gather a multimeter, flashlight, and a clean cloth for safe inspection.
Tip: Always start with safety; disabling the system reduces the chance of electric shock. - 2
Inspect shading and cleanliness
Look for new shade from growth or structures and clean any dirt, leaves, or snow from panels with a soft brush and water. Ensure no water is standing on the frame and that the module surface is dry before proceeding.
Tip: Even small debris can dramatically reduce output. - 3
Check panel-to-controller wiring
Visually inspect all cables for wear, looseness, or corrosion at connectors. Reseat connectors firmly and ensure clamps are tight. If you must test, use a multimeter to verify continuity.
Tip: Corroded or loose connections are a common source of voltage drop. - 4
Verify charge controller settings
Access the controller menu and confirm the correct charging profile for your battery chemistry (gel, flooded, Li-ion). Check that the maximum charging voltage matches the battery voltage and that there are no fault indicators.
Tip: Mismatched settings can prevent charging even when panels produce power. - 5
Test battery bank health
Measure open-circuit voltage and, if possible, under load voltage. Look for signs of sulfation, swelling, or leakage. Use manufacturer specs to judge whether a replacement is needed.
Tip: A weak battery can keep an otherwise healthy system from charging properly. - 6
Test system under load and verify inverter
With caution, test the system’s operation under normal load. Check inverter output and DC bus voltage; note any abnormal readings or fault codes.
Tip: Inverter faults can mask DC-side charging issues.
Diagnosis: Solar PV system not charging the battery bank
Possible Causes
- highShading or debris on panels
- highDirty panels reducing output
- mediumFaulty charge controller or inverter
- mediumBattery bank at end of life or sulfated
- lowLoose or corroded wiring
Fixes
- easyRemove shading and clean debris; trim nearby trees or branches
- easyReseat or replace wiring at controller and battery terminals
- mediumTest battery health and voltage; replace if below spec
- mediumTest/replace charge controller or inverter; consult the manual
- hardConsult a licensed electrician for complex wiring or safety concerns
Frequently Asked Questions
What is the first thing I should check if my solar panel isn’t charging?
Start with shading, debris, and panel cleanliness. If the sun is blocked or dirt is reducing output, cleaning and repositioning can restore charging.
First check for shading or dirt on the panels, then clean or adjust placement if needed.
Can a bad battery cause a solar panel to stop charging?
Yes. A degraded battery can prevent the system from accepting charge even when panels are producing power. Test the battery under load and replace if necessary.
A bad battery can stop charging even if the panels are fine.
How do I know if the charge controller is the problem?
Check controller indicators and settings. Look for fault codes and verify voltage settings match battery type; a faulty controller may block charging.
Check for fault codes and verify settings to rule out the controller as the cause.
Is professional help always required for solar charging issues?
Not always, but for complex wiring, high-voltage work, or warranty coverage, a licensed technician is recommended to ensure safety and compliance.
Often a professional is best for safety and warranty reasons.
What maintenance prevents charging problems?
Regular cleaning, wiring checks, battery maintenance, and monitoring system alerts help catch issues before they escalate.
Regular maintenance helps catch issues early and keeps the system healthy.
Watch Video
Top Takeaways
- Follow a safe, methodical flow when diagnosing charging issues
- Prioritize shading, cleanliness, and wiring checks first
- Test controller settings and battery health before component replacements
- Professional help is recommended for complex wiring or warranty-covered systems