Why Is My Solar Panel Not Charging My Camera? A Practical Troubleshooting Guide
Urgent, practical guide to diagnose and fix why your solar panel isn't charging your camera. Quick checks, diagnostic flow, and safe, proven fixes for homeowners.

The most likely causes are insufficient sun, a damaged cable, or a mismatched charger. Start by ensuring the panel gets direct sun, inspect cables for wear, and verify the charger is compatible with your camera battery. If the issue persists, test the panel's output under sun and try a known-good battery to isolate the fault. Safety first: unplug devices before testing.
The core issue: why a solar panel may fail to charge a camera
If you rely on a solar panel to keep your camera powered, a sudden failure to charge can be frustrating. The root cause is rarely one simple fault; more often, a combination of sun exposure, wiring, and device compatibility. The search query why is my solar panel not charging my camera is common among homeowners and outdoor enthusiasts. In this guide, we outline urgent, practical steps to validate power pathways, fix common faults, and prevent repeat failures. By working through a structured checklist, you’ll quickly determine if the issue is environmental, hardware, or configuration-related, and you’ll know exactly what to test next. Solar energy performance varies with weather, panel age, and load, so expect a few quick adjustments rather than a single magic fix. With careful testing, you can restore reliable charging for your camera.
Start with the basics: sun, orientation, and connections
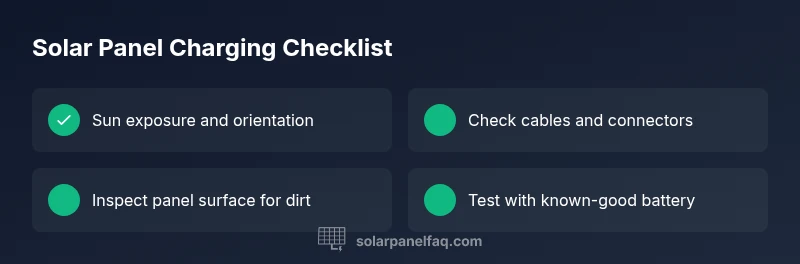
The first thing to verify is whether the panel is receiving adequate sunlight. Even a small shadow or misalignment can cut output dramatically. Position the panel at a 30- to 45-degree tilt toward the sun’s path in your location, and ensure there’s no debris between the panel and sun. Next, inspect cables and connectors for wear, corrosion, or loose connections. A damaged cable or loose connector can prevent charging even when the panel is producing power. Finally, confirm the camera’s charging port and battery status; if the camera requires specific input voltage or amperage, you may need a regulator or compatible charger. This is where a lot of charging problems originate: a great solar panel but a mismatched load.
Inspect the charging cable and connectors
Take a thorough look at every segment of the charging path: the cable, plug ends, and any adapters. Look for cracked insulation, exposed copper, bent or crushed pins, moisture ingress, or corrosion at the metal contacts. A cable can fail under load even if it looks fine in daylight. Replace worn cables and test with a known-good spare to confirm. Reseat all connectors firmly, and consider applying a small amount of dielectric grease on weatherproof connectors if recommended by the manufacturer. If you own a multimeter, verify continuity and check for short circuits. Also inspect inline fuses if your setup includes them. A micro-fracture in the wire or a loose jack is a common culprit behind intermittent charging failure.
Check the solar panel output and battery status
Power generation varies with sun intensity and temperature. Use a multimeter to measure the panel’s voltage and current under full sun, and compare readings to the panel’s rated output. If the numbers are far from spec, issues like shading, dirt, or aging cells could be the culprit. Also verify that the camera battery isn’t fully charged or damaged, which would stop further charging. If possible, test with a spare battery or a separate small device to confirm that the panel is delivering usable power.
Examine the charge controller and regulation setup
If you use a charge controller or voltage regulator, ensure it is configured for the camera’s battery type and voltage. Incorrect settings or a failing controller can prevent charging even when the panel is producing power. Check for firmware updates if the device supports them and re-seat any internal connections as recommended by the manufacturer. A faulty regulator may require replacement rather than simple resets.
Environmental and hardware factors that degrade charging efficiency
Extreme heat, moisture ingress, and aging hardware can reduce charging efficiency over time. Check for signs of moisture near connections, inspect seals and enclosures, and replace aging components as needed. Keep cables organized, away from sharp edges, and sheltered from direct weather when possible. Even small environmental changes can dramatically affect performance, so document conditions during testing for future reference.
Step-by-step quick fixes you can try safely
Follow a short, safe sequence: clean panels and connectors, reorient toward the sun, test with a known-good cable and battery, verify regulator settings, and, if available, test with a different panel. Each step should be done with the system powered down to avoid shocks or short circuits. If it still doesn’t charge after these checks, proceed to professional help.
Prevention and safe charging habits for the long term
Create a maintenance routine: clean panels monthly, inspect cables quarterly, and refresh firmware on regulators. Use weatherproof enclosures and proper strain relief to extend life. Document readings over time to spot gradual declines in performance before a total failure.
Steps
Estimated time: 30-60 minutes
- 1
Check sun exposure and panel orientation
Place the panel where it receives direct sunlight and adjust tilt toward the sun. Confirm there are no shadows across the surface. Re-check the camera’s charge status after a few minutes of sun.
Tip: Do this in the middle of the day when sun is strongest - 2
Test the charging cable and connectors
Inspect cables for wear and firmly reseat connectors. If you have a spare, swap in a known-good cable to isolate faults.
Tip: Avoid bending the cable near the connector - 3
Measure panel output under sun
Use a multimeter to measure voltage and current under full sun and compare with the panel’s rating. Look for significantly reduced readings that indicate dirt, shade, or aging cells.
Tip: Document readings for trend tracking - 4
Verify battery or camera status
Make sure the camera battery isn’t full or damaged and that the camera accepts the panel’s voltage. Try charging another device or battery with the panel to confirm compatibility.
Tip: If the battery is swollen or damaged, discontinue use - 5
Check the charge controller settings
If you use a regulator, confirm correct voltage, amperage, and battery type. Update firmware if available and re-test.
Tip: Save current settings before changing - 6
If all else fails, seek professional help
A licensed electrician or solar technician can diagnose internal faults, wiring harness issues, or panel aging beyond DIY troubleshooting.
Tip: Prepare readings and equipment list for the visit
Diagnosis: Camera not charging from solar-powered setup
Possible Causes
- highInsufficient solar irradiance or shading reducing panel output
- mediumBattery or power bank dead or low
- highFaulty charging cable or connectors
- lowCharge controller or regulator misconfiguration
Fixes
- easyCheck sun exposure and panel angle; clean dust; ensure panel faces sun
- easyTest with a known-good battery/power bank, confirm output using a multimeter
- easyInspect cable and connectors for wear; reseat connections; replace damaged cable
- mediumReset/verify charge controller settings, ensure proper voltage and amperage, update firmware if applicable
Frequently Asked Questions
What is the most common reason a solar panel won't charge a camera?
Most often the issue is insufficient sun exposure or a damaged charging cable. A mismatched load can also prevent charging even if the panel is producing power.
The most common reason is insufficient sun or a bad charging cable.
How can I test whether my solar panel is producing power?
Use a multimeter to measure voltage and current in direct sun, and compare to the panel's rated output. If readings are near zero or far below spec, there’s likely a shading, wiring, or panel-age issue.
Test with a multimeter under sun to confirm power.
Does the camera battery affect solar charging?
Yes. A completely charged or faulty camera battery can prevent the panel from showing a charging status. Try a different battery to confirm charging behavior.
A bad camera battery can confuse charging status.
Should I use a regulator or charge controller?
If your setup includes a regulator, ensure it’s set for your battery type and voltage. A wrong setting can block charging even when the panel works.
Ensure regulator settings match your battery.
When should I seek professional help?
If after basic checks you still can’t charge, a solar technician can diagnose panel aging, wiring faults, or controller failures.
Call a pro if basics fail after checks.
Can temperature or weather affect charging?
Extreme heat or cold can reduce panel efficiency and battery performance. Try testing across different conditions when possible.
Weather affects panel performance.
Watch Video
Top Takeaways
- Verify basics before blaming the panel
- Test with known-good components first
- Use a diagnostic flow to isolate faults
- Call a pro for hardware faults or regulator issues