Why Is Ring Solar Panel Not Charging? Quick Troubleshooting
Urgent, step-by-step guide to diagnose Ring solar panel charging issues with quick checks, common causes, a diagnostic flow, and when to seek professional help.

Most Ring solar-panel charging issues are caused by sun exposure, dirt, or loose connections. Start by inspecting the panel for shade and debris, confirming the mounting is secure, and re-seating the connecting cables to the Ring device/power module. If cleaning and reseating doesn’t fix it, follow the diagnostic flow to identify a wiring, weather, or warranty-related problem before requesting help.
Why Ring Solar Panel Not Charging: Key Factors
According to Solar Panel FAQ, homeowners frequently encounter charging problems with Ring solar panels when three core factors collide: exposure to sunlight, surface cleanliness, and reliable wiring. Even a small shade footprint or a layer of dust can dramatically reduce output, especially during morning hours when the sun angle is low. Additionally, loose or corroded connectors between the solar panel, the Power Kit, and the Ring device can interrupt the charging circuit. Understanding these common factors helps homeowners quickly triage without pricey replacements. Beyond the obvious, degradation of mounting hardware or degraded insulation on cables can silently sap performance over time. The best approach is a systematic check, starting with simple visibility and connection tests, then moving toward more detailed diagnostics if the issue persists.
According to Solar Panel FAQ, these early observations are typically the most actionable for Ring solar panel owners. A stable mounting position, free of shade or debris, and secure, clean cables are the foundation of reliable charging. If you cannot confirm these basics, the issue is unlikely to be resolved by software tweaks or app settings alone.
Quick At-Home Checks for Immediate Results
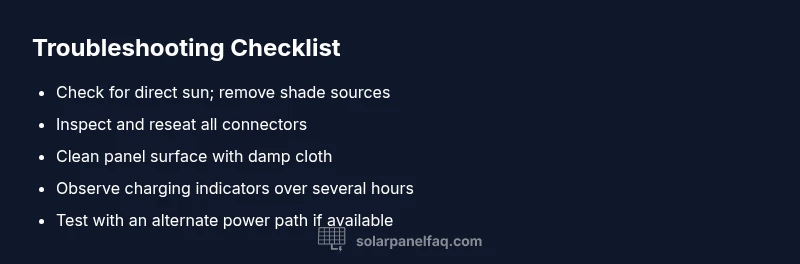
Before diving into deeper troubleshooting, perform a quick circuit of checks that require no special tools. First, ensure the panel has an unobstructed sky view and is not shaded by leaves, branches, eaves, or snow. Next, wipe the panel surface and the mounting area with a damp microfiber cloth to remove dust and bird droppings that can reduce light absorption. Inspect all cables for signs of wear, nicks, or loose connectors and reseat every connection firmly. If your Ring device shows charging indicators intermittently, note the times of day when charging seems to kick in and out—this can point to angle-related sun exposure or temporary shading. Finally, confirm the Power Kit is functioning, and the battery inside is not fully charged or at a state that prevents receiving a charge.
Verifying Power Components and Wiring
A Ring solar panel is part of a powered charging loop that includes the solar panel, the Power Kit, and the device itself. Start by unplugging and re-plugging connections in a controlled sequence: panel to Power Kit, Power Kit to the Ring device, and any intermediate adapters. Look for bent pins, corroded contacts, or frayed insulation. If possible, test the Power Kit with another compatible device to confirm it accepts and passes power correctly. Keep an eye on charging LEDs if your setup includes them—these indicators can reveal intermittent connectivity rather than a total failure. If the indicators show steady charging only under one orientation, consider re-mounting the panel at a more optimal angle for your latitude and seasonal sun path.
Environmental and Installation Considerations
Outdoor solar installations perform best in steady sun exposure and clean conditions. Evaluate how the installation angle affects performance; many Ring panels are optimized for a specific tilt and orientation relative to your roof or mounting bracket. If you recently moved the panel or replaced mounting hardware, reevaluate the tilt and ensure the frame is rigid and not vibrating in wind. Nearby obstructions like satellite dishes, metal gutters, or reflective surfaces can cause shading reflections that confuse the panel’s micro-regulators. Weather influences also matter: snow or ice, heavy rain, or persistent overcast days can dramatically reduce charging. In regions with seasonal variability, expect fluctuations but aim for consistent sun during peak hours.
Step-by-Step Troubleshooting Guide for Common Scenarios
This section provides a practical workflow for the most frequent Ring solar panel charging problems. You’ll find the high-level steps here, followed by a more detailed, actionable guide in the dedicated Step-by-Step block below. Remember to perform checks in a safe, methodical order and to document changes for warranty purposes if needed. If any step involves electrical components with signs of damage, or if you smell burning, discontinue work and seek professional assistance immediately.
In many cases, customers resolve charging issues with straightforward actions like cleaning, reseating connectors, and adjusting placement to capture more direct sun. If none of these fixes work, the problem may lie with the Power Kit, the device’s charging circuitry, or the need for a warranty replacement.
Prevention, Maintenance, and When to Call for Help
Preventive maintenance keeps Ring solar panels charging reliably. Schedule a biannual inspection to remove debris, check that the panel is securely mounted, and test the charging indicator over a full sun cycle. Trim nearby branches that cast shade, and inspect cables for wear at regular intervals. If the system has been exposed to water intrusion, corrosion, or physical damage, or if the power indicators show unusual patterns after all basic checks, contact warranty support or a professional technician. When in doubt, err on the side of caution and escalate to professional help sooner rather than later.
Steps
Estimated time: 30-60 minutes
- 1
Power down and inspect connections
Turn off any power source if applicable. Check all cable connections between the panel, Power Kit, and Ring device. Look for bent pins, obvious wear, or loose adapters and re-seat securely.
Tip: Use a flashlight to clearly inspect contact pins and insulation. - 2
Clean panel and mounting area
Wipe the panel face and mounting surface with a damp microfiber cloth. Remove dust, bird droppings, or debris that can block light or create micro-scratches that affect performance.
Tip: Avoid harsh chemicals that could degrade coatings or hardware. - 3
Re-seat and test charging
Reconnect all cables firmly, ensuring a clean interface at each connection. Re-enroll or reset the device if required and observe charging indicators for several hours in direct sun.
Tip: If possible, align the panel to capture peak sun for a meaningful test. - 4
Evaluate shading and weather conditions
Check for temporary shade from trees, awnings, or snow. Monitor charging as conditions change and perform a side-by-side test on a clear day.
Tip: Morning sun can be less intense; test again at midday.
Diagnosis: Ring solar panel not charging
Possible Causes
- highShade or obstruction blocking sunlight
- highDirt, dust, or residue on panel surface reducing output
- mediumLoose, damaged, or corroded connectors between panel, Power Kit, and device
- lowFaulty Power Kit or internal device charging circuitry
- lowExtreme weather or seasonal sun angle limiting charging
Fixes
- easyClear obstructions and clean the panel surface; reseat all connectors securely
- easyRe-mount the panel for optimal sun exposure and check tilt/orientation
- easyTest Power Kit with a known good device or substitute a compatible unit to isolate the power path
- mediumIf issues persist, consult warranty coverage or contact support for device-level diagnostics
Frequently Asked Questions
Why won't my Ring solar panel charge my device?
Most often, shading, dirt, or loose connections interrupt charging. Start with a sun exposure check, clean the panel, and reseat cables. If it still fails, proceed through the diagnostic steps to identify whether the issue is wiring, weather, or hardware.
Shading or dirt usually causes charging failure. Begin with cleaning and reconnecting cables, then run the full diagnostic flow if needed.
How can I check for shading affecting charging?
Inspect for nearby trees, buildings, or awnings that cast shadows on the panel during peak sun. If present, adjust orientation or trim obstructions to maximize exposure.
Shadows reduce charging; look for objects blocking direct sunlight.
Does weather impact Ring solar charging?
Cloud cover, rain, and cold temperatures reduce solar output. Compare charging on clear versus cloudy days to gauge impact and adjust expectations accordingly.
Clear sun often yields better charging; compare with cloudy days to understand changes.
Should I replace the Power Kit if charging fails?
Only after ruling out simpler causes. Test the kit with another compatible device if possible, and consider warranty when issues persist after basic checks.
If basic checks fail, test the Power Kit path and check warranty before replacing hardware.
When is professional help recommended?
If you notice electrical smells, heat, water exposure, or the issue persists after all basic fixes, seek professional help or contact the manufacturer’s support.
If you see signs of danger or the problem continues, get professional help.
What maintenance reduces future charging issues?
Regular cleaning, secure mounting checks, and periodic inspection of cables and connectors help prevent shading, corrosion, and wear from weather exposure.
Keep the panel clean, check connections, and monitor mounting to prevent future issues.
Watch Video
Top Takeaways
- Prioritize unobstructed sun exposure and clean surfaces.
- Securely reseat all cables and test in direct sun.
- Follow the diagnostic flow before replacing hardware.
- Check for warranty options if problems persist.
- Schedule proactive maintenance to prevent future issues.