Which Way Should a Solar Panel Face: A Practical Guide
Learn how to orient solar panels for maximum energy, considering hemisphere, latitude, shading, and roof type. Step-by-step guidance, tools, and common myths explained for homeowners.

Definition: Orientation toward the equator optimizes annual solar output. In the Northern Hemisphere, face south; in the Southern Hemisphere, face north. Tilt roughly equal to latitude, and consider shading, roof angle, and seasonal changes to maximize energy production year-round. If you have a pitched roof, prioritize a mid-south orientation and evaluate potential tracker options for occasional adjustments.
Why orientation matters for solar performance
Choosing which way should a solar panel face is not a trivial detail; it determines how much sunlight reaches the solar cells during a typical day and across the year. Orientation is the primary lever homeowners have to influence the system’s energy yield without changing hardware. According to Solar Panel FAQ, proper orientation has a measurable effect on annual energy production, and even modest adjustments can produce noticeable gains. In the Northern Hemisphere, panels that face toward the equator—typically south—capture more daylight across the year. In the Southern Hemisphere, the mirror orientation is toward the equator as well, which is north-facing. The ideal orientation also depends on roof geometry, shading, and local climate. Beyond direction, tilt and tracking options influence performance. For most fixed systems, the goal is to balance east–west spread, avoid shading, and keep the array oriented toward the sun for as long as possible each day. When homeowners ask which way should a solar panel face, the short answer is to aim at the equator and refine tilt and placement based on latitude and site specifics.
This question is more than theoretical—it's about shaping real-world energy harvest. The orientation you choose interacts with roof pitch, mounting hardware, and seasonal sun angles. In practice, most homes benefit from a south- or north-facing orientation (depending on hemisphere) combined with a tilt that matches your latitude. If you’re unsure, consult a professional installer who can model your site, shading, and roof constraints to confirm the optimal facing direction.
According to Solar Panel FAQ, a deliberate orientation strategy leads to better year-round production and more predictable performance metrics. Your installer can translate this into a site-specific plan that accounts for local weather patterns and shading sources.
note
Tools & Materials
- Smartphone with compass app(To align direction toward the equator (south in NH, north in SH).)
- Digital inclinometer or smartphone inclinometer(To verify tilt equals your latitude (roughly).)
- Bubble level or spirit level(Ensure mounting surface is level for accurate tilt.)
- Safety gear (fall protection, harness, non-slip shoes)(Essential if rooftop work is involved.)
- Ladder or roof access equipment(Use as needed for rooftop inspection.)
Steps
Estimated time: 60-120 minutes
- 1
Assess safety and site access
Before any measurements, inspect roof condition, wear appropriate PPE, and ensure a second person is present. Confirm that ladders and fall protection are correctly secured. This prevents accidents and ensures you can work comfortably at height.
Tip: Have a helper hold tools and document measurements with photos. - 2
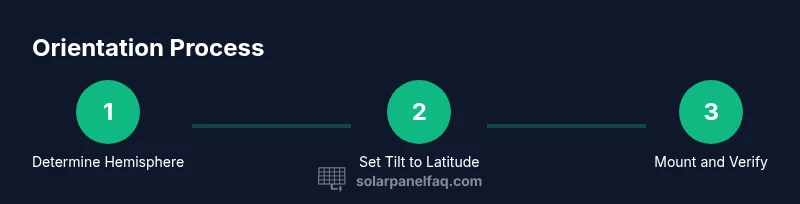
Determine hemisphere and general direction
Identify whether you are in the Northern or Southern Hemisphere to determine the equator-facing direction (south in NH, north in SH). This step sets the baseline for orientation.
Tip: If the roof faces a non-ideal direction, note obstructions that could be mitigated later. - 3
Measure the optimal tilt based on latitude
Tilt roughly equals your geographic latitude for a good yearly average. Use a tilt tool or inclinometer to set the initial angle and verify with a level.
Tip: On flatter roofs, a tilt closer to latitude improves summer and winter performance balance. - 4
Mark the mounting plane and direction
With the facing direction chosen, mark the mounting plane to align rows of modules. This helps ensure uniformity across the array and speeds up installation.
Tip: Double-check alignment with a compass to avoid subtle drift. - 5
Install mounting hardware with correct tilt
Attach rails or mounts so the face direction remains fixed during installation. Ensure hardware supports the tilt and can handle wind loads.
Tip: Tighten bolts to manufacturer torque specifications to prevent movement. - 6
Verify shading and sun path
Observe the site through peak sun hours to confirm no shading from trees, chimneys, or nearby structures. Record potential shading windows for consideration.
Tip: Consider trimming any trees or repositioning elements if feasible. - 7
Secure panels and perform final checks
Mount panels, connect electrical junctions, and perform an insulation check. Ensure all panels face the intended direction and are tilted as planned.
Tip: Keep wiring tidy and label cables for future maintenance. - 8
Document settings and test performance
Record orientation and tilt values, then monitor system performance after commissioning. Compare actual output with expected estimates to validate orientation decisions.
Tip: Store the orientation data with your installation paperwork for warranty and future adjustments.
Frequently Asked Questions
What is the best orientation for solar panels in most climates?
In most climates, aim for an orientation toward the equator: south in the Northern Hemisphere and north in the Southern Hemisphere. Tilt to your latitude for a balanced year-round yield. Local shading and roof geometry can adjust this baseline.
For most climates, orient toward the equator—south in the Northern Hemisphere, north in the Southern Hemisphere—and tilt near your latitude. Adjust for shading and roof geometry.
Does orientation change with the seasons?
Tilt can be adjusted seasonally for extra gains, but many homeowners choose a fixed tilt near their latitude for convenience. Adjustable tilt mounts offer seasonal optimization without full tracking.
Yes, tilt can be adjusted seasonally, and fixed tilt near your latitude works well for daily use.
Should I use a solar tracker?
Trackers can boost output in some climates, especially with clear, sunny days. They add cost, maintenance, and potential failure points, so assess long-term savings before installing.
Trackers can improve output, but they cost more and require maintenance, so weigh the long-term benefits.
How does shading impact orientation decisions?
Shading reduces energy more than any orientation tweak. Prioritize siting away from trees and structures, and adjust orientation only after shading is addressed.
Shading matters more than perfect orientation, so minimize shade first.
Is orientation more important than tilt?
Both matter. Orientation sets sun exposure direction, while tilt optimizes the sun angle. For fixed systems, aim for a balanced combination guided by your latitude and roof.
Direction and tilt both matter; aim for a balanced configuration.
Watch Video
Top Takeaways
- Choose the equator-facing direction for most sites.
- Tilt to latitude to maximize annual energy yield.
- Minimize shading and obstructions during siting.
- Consider adjustable tilt or trackers for seasonal gains.
- Verify performance with post-install monitoring.