How to Test for a Bad Solar Panel: A Troubleshooting Guide
A practical, safety-focused guide to test for a bad solar panel, diagnose common causes, and fix issues quickly—covering inverter checks, panel testing, and wiring.

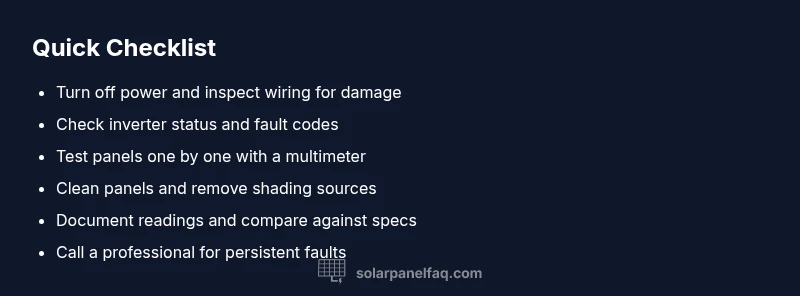
According to Solar Panel FAQ, this quick guide outlines how to test for a bad solar panel: start with inverter status, shading and cleanliness checks, and basic panel voltage tests with a multimeter. If performance remains poor, isolate panels and test wiring and connectors. This fast flow helps you pinpoint the problem safely.
Understanding the risk and symptoms of a failing panel
A solar array relies on consistent exposure, clean surfaces, proper wiring, and a healthy inverter. When performance drops, one or more panels may be the root cause or the issue could be systemic. Typical symptoms include lower kilowatt-hours than expected, visible module damage, browning or discoloration, uneven performance across strings, or an occasional fault message on the inverter. The Solar Panel FAQ team notes that early symptom recognition improves chances of a quick fix. This section helps you interpret signs, distinguish between panel-level faults and system-level faults, and set up safe testing steps.
In many homes, a single underperforming panel drags down overall output without obvious external clues. Recognizing subtle changes—like gradual declines across a season—can save time and reduce the need for invasive testing later. Throughout this process, keep safety at the forefront and document findings as you go. By the end, you’ll know what to test first, and what to escalate if readings don’t align with expectations.
Safety-first checks you can perform safely
Before touching energized hardware, switch off the main disconnect and keep everyone away from the DC side. Wear insulated gloves and eye protection as a precaution against arc faults. Check for obvious hazards: loose mounting, exposed wiring, and signs of moisture. This stage isn’t about diagnosing but about creating a safe environment for testing. Use a non-contact voltage tester on accessible circuits and verify that the inverter is in a safe mode. Solar Panel FAQ emphasizes safety as the top priority.
How to isolate and test panels individually
To locate a bad panel, isolate modules one at a time. With the system powered down, disconnect a panel or string from the junction box and measure its output separately. If your inverter supports string checks, compare the isolated string voltage to the expected value. Replace the suspect panel temporarily with a known-good unit to observe whether the system output recovers. This approach helps confirm whether a single panel is defective or if the problem lies elsewhere in the array.
Measuring with a multimeter: voltage, current, and short-circuit tests
A basic multimeter can reveal many failure modes. In light to moderate shade, measure open-circuit voltage (Voc) and short-circuit current (Isc) from the panel’s terminals. Compare readings to the panel’s rated specifications; significant deviation indicates degradation, internal disconnection, or bypass diode faults. Record environmental conditions (temperature, irradiance, time of day) as they affect readings. If you don’t see the expected values after two simple tests, proceed to the next steps or consult a pro.
Diagnostic flow: symptom to diagnosis to solution
Start with the symptom (reduced output, string imbalance, or no output from a panel). If the symptom is shading or dirt, clean and re-test. If readings are low but consistent, investigate wiring, connectors, and bypass diodes. If inverter fault codes appear, focus on the inverter and monitoring equipment. For each potential cause, perform a targeted test and swap components conservatively to confirm the culprit. When in doubt, escalate to a professional to avoid safety risks.
Step-by-step fixes for common causes
- Clean dirt and debris from the panel surface; gently rinse with water and a soft brush. Tip: do this during cooler parts of the day to minimize thermal shock. 2) Remove shading obstructions (branches, dirt, or snow) and re-evaluate. Tip: trim back trees if shade is persistent. 3) Check all connectors and wires for corrosion, looseness, or damaged insulation; reseat connections and re-tighten clamps. Tip: photograph connections for reference. 4) Test panels individually with a multimeter and compare to the rated output; swap with a known-good panel to verify. Tip: keep a log of readings. 5) Inspect the inverter and monitoring equipment for fault codes; reset if appropriate and verify communications. Tip: consult the inverter manual before resets.
Safety, maintenance, and prevention tips
Preventive care reduces the likelihood of recurring problems. Schedule annual inspections of mounting hardware, wiring, and the inverter. Clean panels at least twice a year using soft brushes and water only; avoid abrasive cleaners. Monitor for unusual drops in output and compare current performance to baseline. Keep a documented log of readings and weather conditions to spot trends. If you suspect panel degradation or bypass diode failure, plan for professional testing. The goal is consistent performance and long-term reliability.
Solar Panel FAQ’s verdict and next steps
Based on Solar Panel FAQ analysis, the most reliable approach is systematic testing, starting with simple, safe checks and moving to panel-level tests when needed. If the issue persists or involves the inverter, a licensed technician should be consulted promptly. The Solar Panel FAQ team recommends documenting results and scheduling preventive maintenance to protect your investment. By following the workflow, homeowners can isolate faults, maximize output, and maintain system safety.
Steps
Estimated time: 60-120 minutes
- 1
Power down and secure the system
Switch off the main disconnect and cover live components to prevent shock. Verify that all DC circuits are de-energized before handling wiring or panels. This reduces risk during testing.
Tip: Always wear PPE and double-check with a non-contact tester before touching anything. - 2
Isolate the suspect panel or string
Disconnect the panel or string you want to test from the junction box. Ensure you can measure outputs safely without back-feeding power into other strings.
Tip: Label each disconnected conductor to keep track of the configuration. - 3
Measure Voc and Isc
Use a digital multimeter to measure open-circuit voltage (Voc) and short-circuit current (Isc) at the panel terminals. Compare with the panel’s rated specs under similar ambient conditions.
Tip: Take readings at the same time of day and similar temperature for consistency. - 4
Compare readings and swap components
If the isolated panel’s readings diverge significantly from spec or from a known-good panel, it’s likely faulty. Swap in a good panel to see if the system output improves.
Tip: Document results with photos and notes for future reference. - 5
Check the inverter and wiring again
If all panels test fine, re-inspect the inverter, fuses, and combiner boxes for fault codes or loose connections.
Tip: Consult the inverter manual for fault-code definitions before resetting.
Diagnosis: System shows reduced output or a panel underperforms
Possible Causes
- highShading or soiling on the affected panel
- mediumElectrical fault in wiring or connectors
- lowInverter fault or misconfiguration
Fixes
- easyClean the panel surface and remove debris that could shade it
- easyInspect wiring, connectors, and panel clamps for corrosion or loose contacts
- mediumTest individual panels with a multimeter and isolate units, then swap in known-good panels to compare outputs
- mediumCall a professional if inverter faults or underperforming panels persist
Frequently Asked Questions
What are the most common signs of a bad solar panel?
Common signs include reduced output, voltage drop along a string, visible damage, hotspots, or fault messages on the inverter. These symptoms warrant targeted testing to confirm the fault.
Look for reduced output, voltage drops, or visible damage; then test with a meter to confirm.
Can dirt, pollen, or shading cause a panel to underperform?
Yes. Dirt and shading limit light reaching the cells, lowering current and voltage. Cleaning and trimming shading often restores performance; if not, move to electrical tests.
Dirt and shading can cause underperformance; cleaning is the first step, then check electricals if needed.
Should I test panels while the system is online or offline?
For safety and accuracy, perform tests with the system offline and power disconnected. In some cases, isolated panel testing is appropriate if you follow proper procedures.
Test with the system offline to stay safe and get accurate readings.
What tools do I need to test a solar panel?
A digital multimeter, insulated gloves, protective eyewear, and the panel’s datasheet for Voc and Isc values are essential. Keep notes for comparison.
You’ll need a multimeter, gloves, and the panel datasheet for safe testing.
When should I call a professional?
If you identify persistent abnormal readings, inverter fault codes, or exposed wiring, stop testing and contact a licensed solar technician. Electrical work on PV systems can pose serious hazards.
Call a licensed technician if readings stay abnormal or wiring looks unsafe.
Is it safe to test solar panels yourself?
Testing can be safe if you follow strict electrical safety practices, de-energize the system, and wear protective gear. If you’re unsure, don’t proceed; a professional can perform the tests safely.
It can be safe if you follow safety steps; if unsure, hire a pro.
Watch Video
Top Takeaways
- Test panels individually to isolate faults
- Prioritize safety and shut down power before handling
- Document readings and compare against specs
- Use a systematic, repeatable testing flow
- Call a professional for persistent inverter or wiring faults