Troubleshooting: Solar Panel Won’t Charge Battery
Urgent, step-by-step guide to diagnose why your solar panel won't charge the battery, with safety checks, a diagnostic flow, practical fixes, and maintenance tips for homeowners.

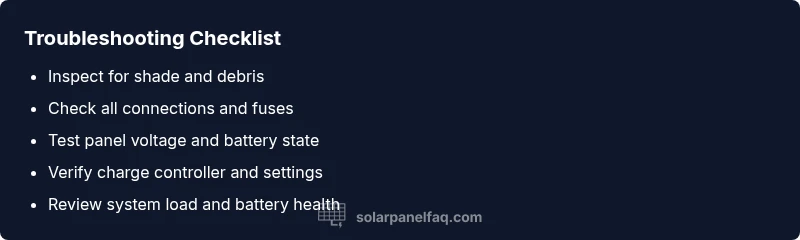
Common causes for a solar panel won't charge battery include shading, dirty panels, loose wiring, a failing charge controller, or a weak battery. Start with simple checks: ensure full sun exposure, clean panels, and tighten all connections; test the battery voltage and controller settings. If the issue persists, consult your system schematic and plan a deeper test or professional help.
Common causes of a solar panel not charging a battery
When the symptom solar panel won't charge battery appears, most people first check obvious things before diving into equipment specifics. According to Solar Panel FAQ, many failures come from simple, correctable issues rather than expensive replacements. In most residential setups the issue is not a magical defect; it’s a chain reaction involving shade, debris, wiring, controller, and battery health. Start by evaluating the most common culprits:
- Shading and insufficient sun: Even partial shade or a parked vehicle casting a shadow on the panel can drop current enough to stop charging. Movement of trees or seasonal changes that reduce exposure can cause the system to stall.
- Dirty panels: Dust, pollen, bird droppings, or pollen reduce light reaching the cells. A quick wash with a soft brush and mild soap can recover a surprising amount of output.
- Wiring and connections: Loose lugs, corroded terminals, or damaged insulated wires increase resistance and cause voltage drop that prevents charging.
- Faulty charge controller: A controller can fail or misread panel voltage, especially after weather events or power surges; settings may drift too.
- Battery health: A sulfated or aged battery can accept little to no charge; a healthy charge profile depends on good electrolyte and correct SOC.
- System sizing and integration: Under-sizing panels for the battery bank or incorrect MPPT/PWM configuration can prevent charging, particularly at low sun angles.
- Temperature and voltage regulation: Extreme heat or cold can affect controller efficiency and battery chemistry, cutting charging efficiency.
Understanding these areas helps you prioritize checks quickly and safely. This is the core reason homeowners see the symptom of a solar panel not charging a battery and guides a practical, methodical approach.
Safety and Basic Checks
Safety first matters most when troubleshooting electrical systems. Before accessing panels or batteries, switch off the main disconnect and wear eye protection. The energy stored in battery banks can be hazardous; never short terminals or use metal tools that could bridge connections. Start with low-risk checks you can do safely:
- Verify the main system disconnect is in the off position.
- Visually inspect all visible wiring for cracks, chafing, or loose connections.
- Check that there is no pooling water around the battery area and that venting is adequate.
- Confirm the panels are free from heavy shading and debris. If a tree branch or structure is consistently shade-producing, note it for long-term planning.
- Do not attempt to bypass fuses or alter the controller’s safety limits. If you smell burning insulation or see corrosion, stop and contact a qualified technician.
Always refer to your system schematic or manual for safe handling guidelines, and document any changes for future service visits.
Understanding System Components and Their Roles
A solar power system is only as strong as its weakest link. The panel converts sunlight into DC electricity, the charge controller regulates voltage and current to the battery bank, the battery stores energy for later use, and the inverter converts DC to AC if you need household power. Common configurations use 12V or 24V battery banks, and the right controller type (MPPT vs. PWM) matters for efficiency. When one part underperforms or is misconfigured, charging can fail even if the rest of the system appears healthy. Regular inspection of connections, controller settings, and battery health is essential for steady charging. If you’re seeing voltage at the panel but not at the battery, the issue is likely between the panel and battery—often the controller or wiring. Remember: a healthy system depends on precise matching of components and correct safety configurations.
Diagnostic Flow: Symptom → Diagnosis → Solutions
This section walks through a practical, symptom-driven path to identify the root cause and apply fixes in a structured way. Start with the symptom: no charging occurs even when the sun is bright. Move through diagnosis steps: (1) verify sun exposure and panel cleanliness; (2) measure open-circuit panel voltage; (3) test battery voltage and its state of charge; (4) inspect charge controller indicators and wiring; (5) check any fuses or breakers; (6) test with a known-good battery if available. Each step has recommended solutions so you can proceed methodically. If you encounter any hazardous conditions or large voltage readings beyond the system’s rating, stop and seek professional assistance. This flow helps you isolate whether the problem lies with shade, panel output, controller, wiring, or the battery itself. Sticking to a flow reduces guesswork and protects your equipment.
Step-by-Step Fixes for the Most Common Cause
- Clear shade and reposition panels to maximize sunlight. Ensure no new obstructions will develop. Tip: note optimal midday shade-free windows and verify seasonally.
- Fix: Trim branches or relocate if feasible. Difficulty: easy.
- Clean panels and check for dirt buildup. A dirty surface significantly impacts light absorption.
- Description: Use a soft brush and mild soap with clean water; rinse thoroughly and avoid abrasive cleaners. Tip: clean on a cloudy day to prevent rapid cooling and potential cracking. Difficulty: easy.
- Inspect all wiring and connections at the panel, controller, and battery terminals. Look for loose lugs, corrosion, and damaged insulation.
- Description: Tighten connections to manufacturer torque specs; replace any corroded lugs. Tip: apply dielectric grease sparingly on clean terminals to reduce future corrosion. Difficulty: easy.
- Check fuses, breakers, and the charge controller status indicators. A blown fuse or tripped breaker will halt charging.
- Description: Reset or replace fuses as required; verify controller is configured for the correct battery type and voltage. Tip: note any warning codes in the controller’s log. Difficulty: easy.
- Test the battery health. A sulfated or aged battery may accept little charge even when panel output is normal.
- Description: Use a multimeter to verify resting voltage and perform a load test if you have the equipment. Tip: compare to the manufacturer’s healthy voltage range. Difficulty: medium.
- Reassess panel output with a known-good battery or a different controller if available. This isolates controller or battery issues.
- Description: Swap components where feasible to determine the limiting factor. Tip: label wires to prevent miswiring after testing. Difficulty: medium.
If you still see no improvement after these steps, the fault likely lies in a failed controller, a degraded battery, or a more complex interconnection issue. In that case, documenting exact readings and contacting a professional with your system’s schematic will save time and reduce risk.
Prevention Tips and Maintenance
Proactive maintenance helps prevent the common causes of charging failure. Establish a simple, recurring routine to keep your solar charging system reliable:
- Schedule seasonal checks: clean panels, inspect wiring, and verify controller settings at least twice a year.
- Keep panels clean and free from shade-inducing debris; consider a gentle rinse after heavy dust seasons or pollen surges.
- Monitor performance trends: track daily charging current and battery state of charge; a sudden drop signals a potential issue.
- Maintain battery health: check electrolyte levels if using flooded lead-acid batteries, keep terminals clean, and ensure proper ventilation.
- Ensure proper system sizing: review whether your panels still meet your energy needs as weather patterns or consumption changes occur.
- Store safety equipment and read manufacturer manuals to stay compliant with warranty requirements and safety standards. Following these guidelines reduces the likelihood of future outages and extends system life.
When to Seek Professional Help and Safety Reminders
If you cannot locate the problem after the diagnostic flow or you encounter high voltages, exposed wiring, or signs of battery distress (hissing, swelling, leaking), contact a licensed solar installer or electrician immediately. Working with live DC systems can be dangerous; never bypass safety features or operate without the proper protective gear. Keep a detailed log of tests, readings, and corrective actions to share with the professional. Remember, safety comes first, and professional help mitigates risk to you and your home while ensuring code compliance.
Quick Summary and Next Steps
- Start with the simplest, safest checks: sun exposure, cleanliness, and secure wiring.
- Use a structured diagnostic flow to identify whether the issue is panel output, controller behavior, or battery health.
- Implement fixes in a logical order, testing after each step.
- If the problem persists, involve a professional to avoid safety risks and prevent damage to components.
Confidence and Final Thoughts
The solar system’s reliability hinges on proper maintenance and accurate diagnosis. A methodical approach minimizes downtime and protects your investment. The Solar Panel FAQ team recommends documenting each step and using a standardized troubleshooting flow to restore charging quickly and safely.
Steps
Estimated time: 30-60 minutes
- 1
Assess sun exposure and panel cleanliness
Confirm the panel is receiving direct sunlight during peak hours and inspect for shade, dust, or debris. If shadowing is present, adjust or remove the obstacle. Ensure panels are clean and free of obstructions.
Tip: A quick midday check helps detect shading issues that vary by season. - 2
Inspect wiring and connections
Look at all visible connections from panel to controller to battery. Tighten lugs to manufacturer torque specs and look for corrosion. Replace any damaged insulation.
Tip: Use a non-contact voltage tester to safely verify presence of voltage near connectors. - 3
Check the charge controller status
Read the controller’s indicators or logs. Look for warning codes or abnormal voltages that indicate misconfiguration or failure.
Tip: Consult the manual for the exact meaning of any error code before taking action. - 4
Test the battery health
Measure resting voltage and perform a load test if you have the equipment. A healthy battery should show a stable voltage with minimal sag under a small load.
Tip: A sulfated battery often fails to hold a charge even when other components are functional. - 5
Validate system compatibility
Ensure the panel array size matches the battery bank and that the MPPT/PWM configuration is correct for your voltage. Mismatches can prevent charging at certain sun angles.
Tip: If you recently changed components, re-run the system sizing calculation. - 6
Re-test after fixes
Reconnect everything and observe charging behavior over a full sun cycle. Compare voltage at the panel, controller, and battery to verify consistency.
Tip: Document readings to track improvements or ongoing issues.
Diagnosis: Battery not charging when solar input is available
Possible Causes
- highShading or debris blocking panel output
- mediumLoose or corroded wiring and connections
- mediumFaulty or misconfigured charge controller
Fixes
- easyRemove shade, reposition, or trim obstructions to maximize sun exposure
- easyTighten and clean panel, controller, and battery connections; replace damaged wires
- mediumVerify controller settings (battery type, voltage, MPPT/PWM mode) and replace if defective
Frequently Asked Questions
Why won't my solar panel charge the battery even when it’s sunny?
Common causes include shading, dirty panels, loose wiring, a faulty charge controller, or a weak battery. Systematic checks typically reveal the failure source without expensive replacements.
Common causes are shading, dirty panels, loose connections, a bad controller, or a weak battery; testing steps reveal the issue.
How do I test the voltage of the solar panel?
Use a multimeter to measure open-circuit voltage at the panel terminals under full sun. Compare the reading to the panel’s rated voltage and look for a significant drop under load.
Use a multimeter to check the panel’s open-circuit voltage in bright sun, and compare to its rating.
Can a bad battery prevent charging even if the panel and controller are fine?
Yes. A degraded or sulfated battery can prevent accepting a charge, even when panel output and controller are healthy. Test the battery health and, if needed, replace it.
A bad battery can stop charging even if the panel and controller are good.
What should I do first if the charge controller shows an error?
Refer to the controller’s manual to interpret error codes, reset the device if appropriate, and re-check wiring. If the error persists, contact support.
Check the controller’s error codes in the manual and reset if possible.
When is it necessary to call a professional?
If you encounter high voltage, battery gas emission, or persistent faults after basic checks, hire a licensed technician to diagnose and repair safely.
Call a professional if hazards appear or fixes don’t resolve the issue.
Watch Video
Top Takeaways
- Start with shading and cleanliness checks to quickly regain charging.
- Use a structured diagnostic flow to isolate the fault.
- Prioritize safe handling and proper documentation during troubleshooting.
- If issues persist, involve a professional to protect equipment and warranty terms.