Solar Panel Battery Installation: A Practical Guide for Homeowners
Learn how to perform solar panel battery installation safely and effectively with this comprehensive, step-by-step guide. Coverage includes sizing, wiring, safety, testing, and maintenance for homeowners seeking reliable backup power.

This guide helps you achieve solar panel battery installation safely and effectively, covering sizing, wiring, and system integration. Gather essential tools, follow safety protocols, and verify compatibility before starting. According to Solar Panel FAQ, selecting a compatible battery and following safe installation practices is essential for long-term performance.
Understanding Battery Installation Basics
Installing a solar panel battery requires more than connecting wires. It starts with understanding battery chemistry (lead-acid, AGM, lithium, and others), the concept of depth of discharge, charging profiles, and how the battery interacts with your inverter and charge controller. This knowledge helps homeowners set realistic expectations about capacity, backup power, and long-term reliability. In addition, plan for ventilation, heat management, and safe handling of hazardous materials. For context and best practices, Solar Panel FAQ Analysis, 2026 provides an overarching framework for responsible battery installations and system integration.
Safety First: Codes, Permits, and Precautions
Safety is non-negotiable in battery installations. Before touching any equipment, confirm local codes and permit requirements, and consider hiring a licensed electrician for high-voltage tasks. Always disconnect DC sources before work, wear PPE (safety glasses, gloves, and non-conductive footwear), and keep a clean, dry workspace. Use approved enclosures and weather-rated components if installing outdoors. Keep fire extinguishers accessible and know evacuation steps in case of an emergency. Involve the utility or a solar installer early if you plan to interconnect or export power.
Sizing Your System: Battery Chemistry, Capacity, and Inverter Compatibility
Sizing is the most critical step to ensure reliable performance. Start by selecting the battery chemistry that matches your goals and budget, then determine usable capacity, depth of discharge, and recommended charging windows. The inverter and solar charge controller must support the selected battery’s voltage, capacity, and charging profile. A well-sized system reduces wear on the battery, improves efficiency, and increases the likelihood of meeting backup power needs during outages. Always maintain a margin for aging and seasonal variations. Solar Panel FAQ analysis shows that homeowners value safety, compatibility, and proper sizing when planning storage.
Choosing the Right Battery Type for Solar
Battery choice shapes cost, longevity, and performance. Lithium chemistries, including LFP, offer high cycle life and better depth of discharge, but higher upfront costs. Lead-acid options (including AGM and gel) are cheaper upfront but require more maintenance and have shorter lifespans. The best choice depends on priorities: total cost of ownership, space, maintenance willingness, and climate. In many residential setups, a hybrid approach or staged replacement can balance upfront costs with long-term reliability.
Wiring Fundamentals: DC Cabling, Fusing, and Enclosures
DC wiring must be sized correctly to handle continuous current without overheating. Use cables rated for the system voltage, with proper insulation and strain relief. Place fuses or circuit breakers close to the battery terminal to protect conductors. Route cabling through approved conduit or trays, keeping runs short and avoiding sharp bends. Install a dedicated battery enclosure or ventilated cabinet to contain heat and, where appropriate, vent gases. Label all connections and components clearly for maintenance and safety.
Mounting, Cooling, and Ventilation Considerations
Where you place the battery matters as much as the wiring. Indoor installations should be in a dry, ventilated space with sufficient clearance for airflow and access to service panels. Outdoor installations require weather-rated enclosures, a protective base, and sun exposure considerations. Batteries generate heat during charging; provide adequate ventilation and heat dissipation to avoid thermal runaway. If you’re in a tight space, consider a purpose-built cabinet or rack that maintains air flow while protecting components from dust and moisture.
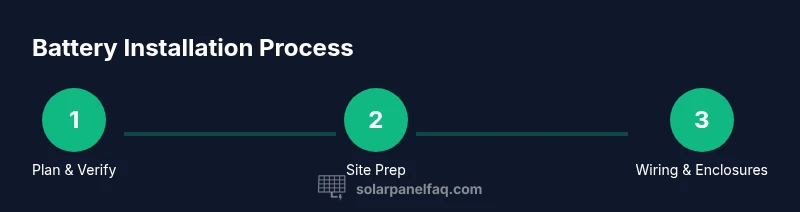
Step-by-Step Installation Overview
This section provides a high-level roadmap to guide your planning and execution. 1) Verify compatibility details of the solar panels, charge controller, inverter, and battery. 2) Prepare the installation site, disconnect power, and ensure you have the right tools and PPE. 3) Mount enclosures, secure mounting hardware, and route cables with proper strain relief. 4) Connect the battery to the charge controller following polarity and voltage requirements. 5) Integrate the battery with the inverter, configure protections, and enable the system. 6) Perform a controlled test, verify voltages, and monitor for abnormal readings. 7) Document the configuration and update your maintenance plan. 8) Schedule professional checks if you are unsure about any step.
System Testing and Commissioning
Testing validates that the installation functions as intended and safely. Start by confirming all safety interlocks are enabled and the DC disconnect is accessible. Measure open-circuit and loaded voltages with a multimeter, verify charge and discharge profiles in the controller, and confirm proper inverter operation under load. Check temperature readings and ensure cooling paths are clear. If any alarm or fault occurs, consult the manufacturer’s guidelines and discontinue use until issues are resolved. Keep a log of test results and settings for future maintenance.
Authority Sources
- Energy.gov: Solar energy storage and safety guidance for residential systems
- NREL.gov: Battery storage technology and system integration
- DOE Solar Energy Technologies Office: Best practices for home storage installations
These sources provide foundational context for the recommendations in this guide and help homeowners understand the broader regulatory and technical landscape.
Tools & Materials
- Safety gear (ANSI-approved gloves, goggles, non-conductive footwear)(Wear PPE during all handling of batteries and live circuits)
- Multimeter or voltmeter(To verify voltages during and after installation)
- Battery enclosure or ventilated cabinet(Properly rated for the battery chemistry and local climate)
- DC wiring (appropriately rated for system voltage)(Include proper insulation and heat resistance)
- Fuses or circuit breakers (near battery terminals)(Protect conductors and equipment)
- Conduit, cable trays, and clamps(Route and shield cables safely)
- Battery charger/charge controller compatible with chosen battery(Check voltage, current, and communication compatibility)
- Inverter compatible with battery voltage and load profile(Ensure surge rating matches peak loads)
- Electrical tape, labeling supplies(Label connections and components for maintenance)
- Fire extinguisher (Class ABC)(Keep accessible near installation site)
Steps
Estimated time: 3-6 hours
- 1
Verify system compatibility
Confirm battery chemistry, voltage, and capacity match the charge controller and inverter specifications. Review manufacturer guidelines and local codes to ensure the components can work together safely.
Tip: Create a component compatibility matrix before starting to prevent backtracking. - 2
Shut down and isolate the system
Power down the solar array, disconnect DC sources, and isolate the battery area from AC loads. Use lockout-tagout practices where applicable.
Tip: Double-check that all sources are fully de-energized before handling cables. - 3
Mount the enclosure and plan routing
Secure the battery enclosure in a dry, ventilated location with clear access. Plan cable routes to minimize length, bends, and exposure to moisture or heat.
Tip: Avoid placing the enclosure near heat sources or in confined spaces. - 4
Install cabling and fusing
Route DC cables through conduit, install fuses close to the battery terminals, and secure with clamps to prevent movement.
Tip: Use oxygen-free terminals and torque values recommended by the battery manufacturer. - 5
Connect battery to charge controller
Connect the battery positive to the controller and battery negative to the controller ground, following the polarity and voltage requirements exactly.
Tip: Verify polarity with a quick resistance check prior to energizing the controller. - 6
Integrate with inverter and initialize protections
Link the battery bank to the inverter, configure protection settings, and confirm communication between devices if supported by the system.
Tip: Enable over-discharge protection and temperature compensation as recommended. - 7
Perform initial tests
With safety protocols in place, perform a controlled charge and discharge test, monitor voltages, and observe for abnormal heat or alarms.
Tip: Record baseline readings for ongoing maintenance. - 8
Document and plan maintenance
Create an installation log, capture wiring diagrams, and schedule routine inspections and battery health checks.
Tip: Keep a copy of warranty terms and labeling for future service.
Frequently Asked Questions
What battery types are best for solar installations?
Common options include lithium-ion, AGM, and gel; each has trade-offs in cost, life, and depth of discharge. Lithium batteries often offer longer life and higher efficiency, while lead-acid options tend to be cheaper upfront.
Lithium batteries last longer and work efficiently with solar, but cost more upfront; AGM and gel are cheaper but need more maintenance.
Is professional electrical work required to install a solar battery?
Local codes often require a licensed electrician for high-voltage work. Consult your utility and local regulations before proceeding.
Yes. For safety and code compliance, work with a licensed professional.
How do I size a solar battery for my home?
Determine daily energy use, desired backup duration, and inverter compatibility. Leave headroom for aging and seasonal changes.
Start with your daily energy use to estimate capacity and leave room for growth.
Can I install a battery indoors?
Yes, if the space is dry, ventilated, and accessible for maintenance. Ensure sufficient clearance and avoid moisture exposure.
You can install indoors, but ensure ventilation and safety clearances.
What maintenance does a solar battery require?
Check terminals for corrosion, monitor state-of-charge, and follow manufacturer guidance for equalization and cleaning.
Keep terminals clean, monitor charge levels, and follow the battery maker's maintenance schedule.
What warranties apply to solar batteries?
Warranty terms vary by chemistries and brands; review cycle life and coverage for abuse or temperature limits.
Warranties differ; read the terms for cycle life and environmental protections.
Watch Video
Top Takeaways
- Plan the system layout before installation start.
- Safety and code compliance are non-negotiable.
- Choose compatibility and sizing first to protect longevity.
- Document configuration and maintenance for long-term reliability.