How to Remove Solar Panels from Roof
Learn how to remove solar panels from the roof safely, with planning, PPE, electrical isolation, and storage tips. This guide covers tools, step-by-step removal, and post-removal considerations for homeowners.

By following this guide, you will learn how to safely remove solar panels from your roof, including planning, safety gear, disconnection steps, and proper storage for future reinstallation. This process emphasizes caution, teamwork, and documentation to protect your roof and system warranty. Use the step-by-step approach and refer to authoritative sources for best practices.
Before you start: assess necessity and plan
According to Solar Panel FAQ, removing solar panels should be planned to preserve roof integrity and allow for safe reinstallation. Begin by confirming whether removal is truly needed (for roof repairs, replacement, or relocation) and whether your warranty permits it. Check the system’s age, the mounting approach, and any installation notes from the original contractor. A clear plan helps you estimate time, coordinate helpers, and minimize roof disturbance. If you’re unsure, contact a licensed solar installer for a quick consult. This initial assessment frames every subsequent decision and reduces the chance of costly mistakes.
Safety and permits: PPE, fall protection, and electrical isolation
Safety comes first. Wear a properly fitted hard hat, non-slip footwear, safety goggles, and a full-body harness if your roof pitch requires fall protection. Set up anchor points and a stable ladder system. If the system is grid-connected or has exposed DC wiring, coordinate with your utility or electrician to safely isolate power before touching any cables. Never work on live circuits or with damaged wiring. Document your safety plan and ensure a second person is available to assist. When in doubt, hire a pro—the risk of fall or shock is high on pitched roofs.
Roof and weather considerations: access, conditions, and prep
Choose a dry, calm day with minimal wind and clear access to the roof area. Remove loose debris and clear pathways for panel removal. Place ground mats or protective plywood to distribute weight and prevent roof damage during handling. Confirm that adjacent vents, skylights, and flashings are shielded from potential impact. If weather changes mid-task, pause the operation and secure tools and panels to prevent wind damage or slips. Planning weather windows reduces delays and protects both crew and roof.
Tools and materials you will need
Assemble a focused toolkit to support safe removal. Essential items include a harness with fall-arrest capability, a stabilized ladder, non-conductive gloves, safety glasses, labeling tape, a torque wrench, a cordless drill with appropriate bits, and a panel lifting aid or suction cups if available. Keep a labeled storage container and a racking plan ready for panels. Have extra zip ties, soft protective blankets or foam, and a camera or smartphone for documentation. Optional but helpful are a second set of hands and a wheeled cart to move panels without twisting/dragging.
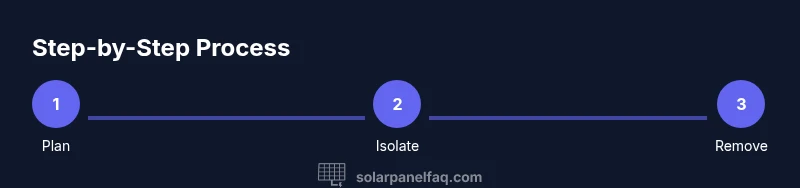
Step-by-step removal approach: high-level sequence
This section outlines the overall sequence you’ll follow, while the STEP-BY-STEP block provides the exact actions. Start with planning and safety checks, isolate power, prepare the site, and document each panel’s position. Next, loosen mounting hardware, disconnect electrical connections at the racking, and carefully lift panels away from the roof. Finally, store panels securely and inspect mounting rails for damage. A well-structured sequence minimizes panel shattering and roof stress while enabling efficient reinstallation later.
Disconnecting electrical connections safely (high priority)
Electrical safety is non-negotiable. Before any physical movement, isolate the DC and AC connections according to the system design and local regulations. Use insulated tools, label every connector, and secure loose cables so they don’t snag on rails. Take close-up photos of junctions, signpost them to help with reinstallation, and double-check that all conductors are de-energized using a suitable meter. If you are uncertain about the proper disconnection points, consult the installer documentation or hire a licensed electrician. Keep non-conductive mats under work areas and maintain a clear working envelope to reduce trip hazards near energized equipment. Also verify that tools and manuals are free of moisture before handling any exposed connectors.
Tools & Materials
- Safety harness with fall-arrest(Full-body harness rated for your weight; anchor points on roof)
- Ladder (stabilized)(Stable ladder rated for your height and weight)
- Non-conductive gloves(Electrical hazard protection)
- Safety glasses(Impact protection)
- Labeling tape and marker(Label each panel location)
- Torque wrench(Torque specs vary by mounting system)
- Cordless drill with bits(For loosening mounting hardware)
- Panel lifting aid (suction cups)(Optional for heavy panels)
- Soft blankets or foam padding(Protect glass during handling)
- Storage racks or pallets(Keep panels off ground)
- Camera or smartphone(Documentation of wiring and positions)
Steps
Estimated time: 2-4 hours
- 1
Plan and coordinate the removal
Assemble the team and confirm the removal plan. Identify roles, establish communication signals, and verify access and weather windows. Prepare a written sequence so everyone knows what comes first and what to do if conditions change.
Tip: Hold a quick briefing and assign a dedicated safety lead. - 2
Isolate power and utilities
Shut down the solar system at the main disconnect or combiner box as appropriate. Lockout procedures and utility coordination may be required to prevent backfeed while you work.
Tip: Capture a photo of the disconnect and label it clearly. - 3
Check weather and roof access
Ensure dry surface and stable footing. Clear the roof path and confirm fall-arrest anchors are in place before touching any panels.
Tip: Delay removal if wind speeds exceed safe limits. - 4
Label and document each panel
Mark each panel’s location and orientation; photograph the back and front of each unit to aid reinstallation and warranty compliance.
Tip: Keep a written map to cross-check during reinstallation. - 5
Loosen mounting hardware
With one person supporting the panel edge, loosen bolts or clamps using the proper tool. Do not drop or twist the panel during removal.
Tip: Do not over-tighten during reassembly; note torque specs. - 6
Disconnect electrical connections at the racking
Carefully unplug DC cables or connectors at the racking, using insulated tools. Place connectors in labeled bags and keep cables organized away from edges.
Tip: Never pull on cables; separate connectors slowly. - 7
Lift panels away safely
With a partner, lift panels straight up and away from the roof; maintain level orientation to prevent glass damage. Move panels onto padding or a rack as you proceed.
Tip: Communicate before every lift and maintain eye contact. - 8
Store panels and seal openings
Place panels in storage with protective padding; seal mounting holes or openings to prevent water intrusion. Label each panel’s storage location for easy retrieval later.
Tip: Record storage locations on a master inventory. - 9
Inspect mounts and plan reinstallation
Inspect rails, flashing, and roof surface for damage. Document the removal process to simplify future reinstallation and warranty considerations.
Tip: Keep all hardware organized for reassembly.
Frequently Asked Questions
Is it safe to remove solar panels by myself?
Removal can be hazardous, especially on a pitched roof or with live electrical connections. If you’re not fully prepared and trained, hire a licensed professional. Always follow a documented plan and use appropriate PPE.
Removal can be hazardous; hire a professional if you're not equipped. Follow a documented plan and use PPE.
Do I need to disconnect the system from the utility?
Yes. Coordinate with your utility to isolate the grid connection and avoid backfeed. This is essential for both safety and future reinstallation.
Yes, coordinate with your utility to isolate the grid connection.
Will removal void warranties?
Removal may affect warranties from the manufacturer or installer. Check warranty terms and ensure that reinstallation follows manufacturer guidelines to preserve coverage.
Check warranty terms and ensure reinstallation follows guidelines.
What if weather changes during removal?
If weather worsens, pause removal and secure panels. Resume only when conditions return to safe levels to prevent damage or injury.
Pause if weather turns bad and resume safely.
How long does removal typically take?
Time depends on system size and site conditions; typical residential removal ranges from a couple of hours to half a day with preparation.
Removal usually takes a few hours, depending on system size.
Watch Video
Top Takeaways
- Plan, safety, and documentation drive safe removal.
- Isolate power and protect roof integrity at all times.
- Label, store, and document panels for easy reinstallation.
- Check warranties and permits before removing panels.