Can You Charge a Lithium Battery with a Solar Panel? A Practical Guide
A practical, safety-focused guide to charging lithium batteries with solar panels, covering required hardware, sizing, step-by-step setup, and common pitfalls for homeowners and off-grid enthusiasts.

Yes—can you charge a lithium battery with a solar panel? You can, but it requires a proper setup: a solar panel sized to match the battery voltage and capacity, a charge controller (preferably MPPT) to regulate voltage and prevent overcharging, and safe wiring with fuses. This approach suits off-grid projects and backup power, provided you follow manufacturer specs for your lithium chemistry and battery management system.
How solar charging works for lithium batteries
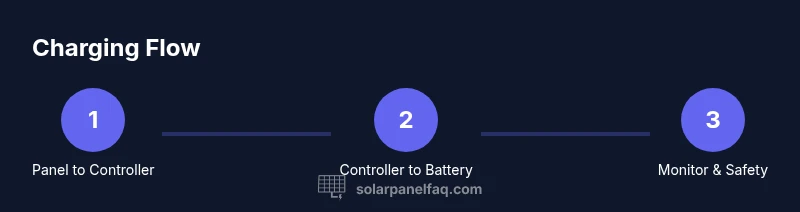
Can you charge a lithium battery with a solar panel? The short answer is yes, but only when you deploy a regulated, multi-part system. Solar cells produce DC power that varies with sunlight and temperature, so you need a controller to keep the battery safe from voltage spikes and excess current. According to Solar Panel FAQ, charging lithium with solar is feasible when you rely on purpose-built hardware and strict safety practices. The battery’s internal management system (BMS) handles cell balancing and protection, while the controller enforces voltage and current limits to match the battery’s specifications. In practice, you set up a simple flow: panel → charge controller → lithium battery (with BMS) → load or inverter. The controller modulates power delivery and prevents reverse current at night, which is essential for maintaining battery health. Remember that lithium chemistries differ from lead-acid in their charging tolerances; precise voltage control and temperature monitoring are part of the required setup, which is why a dedicated solar charge controller and an appropriate BMS are essential.
Essential components and how they interact
To make solar charging of a lithium battery safe and reliable, you need a handful of core components that work together. A solar panel or array provides DC power, typically with a nominal voltage that should align with your battery bank. A solar charge controller sits between the panel and the battery to regulate voltage and current; MPPT controllers are generally preferred for efficiency. The lithium battery (with an integrated or separate BMS) stores energy and protects cells from overcharge, undercharge, and temperature issues. Proper wiring, connectors, and protective devices (fuses or breakers) are also required to prevent hazards. Optional monitoring equipment can track real-time voltages, currents, and temperatures. Finally, ensure all components are rated for the system’s voltage and current, and that the entire setup is housed in weatherproof enclosures if installed outdoors.
Sizing and matching panels to battery capacity
Sizing your solar setup correctly is key to efficient and safe charging of a lithium battery. Start by identifying your battery’s nominal voltage and its useful capacity (Ah). Then determine how quickly you want to recharge from solar exposure, which informs panel wattage and potential charging current. Choose a charge controller whose maximum current rating meets or exceeds your anticipated charging current. The panel’s voltage should be compatible with the controller’s input range and the battery’s charging requirements. Also consider environmental factors such as shading, temperature, and seasonal sun angles, since these influence real-world performance. A well-matched combination minimizes heat and voltage drops while protecting battery longevity.
Wiring, safety, and installation best practices
Set up starts with safe, tidy wiring and correct polarity. Always install fuses or breakers on the positive conductor close to the panel and battery. Use weatherproof, UV-resistant connectors and prevent moisture intrusion into junctions. Keep wires short and neat to reduce voltage drop, and route cables away from high-heat surfaces or moving parts. Mount the panel where it receives ample sun, ideally with a tilt that optimizes exposure for your latitude. If the panel is ground-mounted, secure it to withstand wind and vibrations. Finally, confirm that all components share a common ground reference where required by local codes and the system design.
Lithium chemistries, BMS considerations, and charging profiles
Lithium battery chemistries vary (for example LiFePO4 vs other Li-ion chemistries), and each has its own charging voltage limits and temperature requirements. A Battery Management System (BMS) is essential for protecting cells from overvoltage, overcurrent, and overtemperature, and it often provides cell balancing and state-of-health data. The solar controller should be configured to the battery type and voltage, and you may need temperature sensors to inform the charging profile. Most lithium systems use a CC-CV charging approach, but the exact voltage limits depend on the chemistry; always follow the battery manufacturer's specifications and update the controller settings accordingly.
Real-world scenarios and common pitfalls
In real life, homeowners often pair a modest solar panel with a small lithium battery for shed lighting or a backup power supply. Problems arise when a panel is undersized for the desired charging rate, when wiring or fusing is inadequate, or when the battery’s BMS is incompatible with the controller. Shade, ice, dust, or wiring damage can also reduce performance. Avoid dragging charging from a panel across long distances without proper gauge wiring, and never bypass the controller in an attempt to increase charging speed. Regular checks help catch degraded cables, loose terminations, or failing protection devices before damage occurs.
Troubleshooting and common problems
If your system isn’t charging, check the obvious: is the panel producing power (measure panel voltage with a multimeter)? Are all connections secure and polarity correct? Is the controller illuminated and configured for the correct battery type? Look for overheating signs on the controller or battery, or a tripped fuse. If charging is slow, verify sun exposure, panel cleanliness, and ensure the controller’s maximum input current is not being exceeded. If the battery never reaches a healthy voltage, inspect the BMS behavior and ensure temperature sensors are functioning.
Maintenance and monitoring for long-term reliability
A solar charging setup for lithium batteries benefits from periodic inspections and proactive maintenance. Clean panels to remove dust and debris that block sunlight. Inspect cables and connectors for signs of wear, corrosion, or moisture intrusion. Review the controller’s data logs to identify patterns in charging efficiency, temperature excursions, or voltage spikes. Calibrate or replace the BMS if cell balancing becomes uneven. Regular testing under different sun conditions helps ensure the system remains safe and effective over years of use.
Authority sources
- https://www.energy.gov/eere/solar
- https://www.nrel.gov
- https://www.osha.gov
Tools & Materials
- Solar panel(Ensure nominal voltage matches the battery bank (12V, 24V, etc.) and sufficient wattage for desired charging rate.)
- Solar charge controller (prefer MPPT)(Regulates voltage/current; protects against overcharging; MPPT improves efficiency in variable sunlight.)
- Lithium battery with integrated BMS(Battery chemistry and BMS must align with panel/controller specs.)
- Wiring (proper gauge)(Use appropriate AWG for run length; minimize voltage drop.)
- Fuses/breakers and disconnects(Provide overcurrent protection and safe isolation.)
- Weatherproof connectors/covers(Protect joints from moisture and corrosion.)
- Multimeter or voltage tester(Useful for verifying voltages and diagnosing issues.)
- Tools for mounting and mounting hardware(Securely fasten panel and controller in a sturdy enclosure or rack.)
Steps
Estimated time: 60-120 minutes
- 1
Assess compatibility
Identify your battery’s nominal voltage, capacity, and BMS requirements. Confirm the solar panel’s voltage and wattage are appropriate for the battery and controller. This step prevents mismatch that could damage cells or reduce charging efficiency.
Tip: Check datasheets for the battery and panel; note the maximum charge current and voltage limits. - 2
Choose controller and wiring
Select an MPPT controller rated for the expected charging current and compatible with your battery chemistry. Pick wiring gauges that minimize resistance over the planned distances.
Tip: Prefer thicker gauge wires for longer runs and higher currents to reduce voltage drop. - 3
Mount and orient the solar panel
Place the panel where it gets ample sun, avoiding shadows. Tilt the panel to optimize exposure for your latitude and season. Ensure secure mounting to withstand environmental conditions.
Tip: Clean the panel surface and check mounting hardware periodically. - 4
Connect panel to controller
Wire the panel to the controller’s PV input using weatherproof connectors. Install any required diodes or bypass devices per the controller’s instructions. Verify polarity before powering on.
Tip: Double-check connections before energizing to avoid arcing. - 5
Connect controller to lithium battery (with BMS)
Connect the controller’s load/charge output to the battery terminal that the BMS monitors, respecting polarity. Confirm controller configuration matches battery type and voltage.
Tip: Start with a low charging current and monitor temperatures after initial power-up. - 6
Test and verify
Power the system and measure actual voltages at panel, controller, and battery. Look for stable charging current and no abnormal heating. Adjust settings if needed and log results for future reference.
Tip: Use a data logger or app if available to track performance.
Frequently Asked Questions
Can I charge a lithium battery directly from a solar panel without a controller?
No. A solar charge controller is required to regulate voltage and current, protecting the battery from overcharging and potential damage.
No—you should not connect a solar panel directly to a lithium battery. Use a controller to regulate power and protect the cells.
What size solar panel do I need to charge a 12V lithium battery quickly?
Panel size depends on sun conditions and the desired charging rate. Choose a panel that can deliver enough current through a controller within the battery’s safety limits.
The right panel depends on how fast you want to charge and how much sun you get.
Why is an MPPT controller recommended for lithium charging?
MPPT controllers optimize the conversion of solar energy to battery charging by tracking the maximum power point, improving efficiency especially in variable light.
MPPT helps you get more charge from the sun, especially when conditions change.
Is a BMS required when charging lithium from solar?
Yes. A Battery Management System protects individual cells, monitors temperature, and ensures safe charging and discharging.
Yes, you need a BMS to protect the cells and keep charging safe.
What safety precautions should I take when setting up solar charging for lithium batteries?
Use fuses, weatherproof enclosures, proper insulation, and correct wiring. Avoid shading, moisture, and loose connections that can overheat.
Protect your setup with fuses and weatherproofing, and check connections regularly.
Watch Video
Top Takeaways
- Verify compatibility before wiring
- Use an MPPT controller for better efficiency
- Protect all connections with fuses/breakers
- Monitor temperatures and voltages regularly
- Follow manufacturer specs to avoid safety risks