Solar Panel to Charge Car Battery: A Step-by-Step Guide
Learn how to safely charge a car battery using a solar panel, with essential tools, step-by-step instructions, safety tips, and troubleshooting for reliable performance.

Yes—it's feasible to charge a car battery with a solar panel by using a properly rated panel, a charge controller, and safe wiring. The setup must regulate voltage to 12V and control charging current to avoid overcharging. This guide outlines safe components, essential steps, and practical considerations for reliable, everyday use.
Why a Solar Panel to Charge Car Battery Makes Sense
Using a solar panel to charge a car battery aligns with practical, on-demand power in sunny conditions, helps with emergency readiness, and can support maintenance charging for parked vehicles. For homeowners, a well-designed setup reduces fuel or idling needs while keeping the battery at an optimal state of charge. Solar power is intermittent, so the system must include regulation to keep the battery healthy and ready when you need it. According to Solar Panel FAQ, a controller-regulated approach is the safest and most reliable way to translate sunshine into usable 12V charging for a car battery.
Essential Components You’ll Need
A successful solar charging setup starts with the right components. You’ll typically need a 12V nominal solar panel, a charge controller (MPPT preferred for efficiency), proper cabling and connectors, a reliable car battery, and basic tools. A fuse or breaker protects the circuit, while a multimeter helps you monitor voltages. Optional temperature sensors can optimize charging in varying climates. Selecting components that match your battery type (lead-acid, AGM, or lithium) is critical for safety and performance.
Safety first: Key precautions to prevent injuries and damage
Working with batteries and high-DC systems requires care. Always wear safety gear (gloves and eye protection), work in dry conditions, and never short circuit battery terminals. Disconnect loads before connection, verify polarity, and keep liquids away from electrical connections. Ensure the panel is mounted securely and that cables are protected from sharp edges and heat sources. A controller with overcharge, short-circuit, and reverse-polarity protection reduces the risk of damage and personal injury.
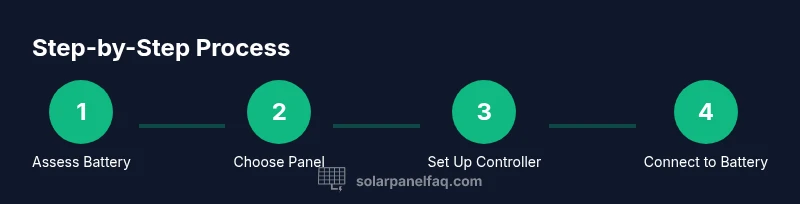
Step-by-Step Setup: A Basic 12V Lead-Acid/AHG Battery Charging Configuration
- Check battery health and charge state: Ensure the car battery is in usable condition and has no leaks or cracks before attempting charging with solar. 2) Confirm panel and controller compatibility: Verify the panel’s open-circuit voltage (Voc) and current rating align with the controller and battery. 3) Place the panel in direct sunlight with a clear path, facing the sun’s peak position for best output. 4) Connect panel to the charge controller following polarity: positive to positive, negative to negative, using weatherproof connectors. 5) Connect the controller to the car battery: positive terminal first, then negative, and don’t forget a proper fuse between the panel and controller. 6) Power on and monitor voltages:The controller should display charging current and battery voltage; check every 15–30 minutes initially. 7) Stop charging and disconnect when near full: For maintenance charging, set a reasonable state-of-charge target and unplug after maintenance, especially if the system lacks automatic shutoff. 8) After charging, store components securely and inspect cables for wear after exposure to sun and weather.
MPPT vs PWM: Which controller is right for solar-to-car-battery charging?
PWM controllers are simpler and cheaper but ship less efficient regulation, particularly with longer runs or higher panel voltages. MPPT controllers extract more power from the panel by matching its voltage to the battery’s charging needs, improving performance in variable sunlight and at higher temperatures. For car batteries, MPPT is usually the better choice because it provides smoother regulation and faster charging for a given panel size.
Wiring diagrams and practical tips for a tidy, safe install
Use a dedicated charging circuit separate from the vehicle’s main 12V system to avoid surprises when the car is in use. Run shielded DC wires with the right gauge, and keep panel cables away from heat sources and moving parts. Use a fuse close to the battery or controller to protect against faults. Label connections clearly and keep a copy of the wiring diagram for future maintenance. If you’re in a freezing climate, consider battery temperature compensation features to optimize charging.
Troubleshooting: Common issues and quick fixes
If the panel is not charging, check that all connections are tight and polarity is correct. Verify the controller is powered and configured for 12V systems. Inspect fuses, look for damaged cables, and confirm the battery’s voltage is within normal range. Weather, shade, or panel dirt can reduce output; clean panels and adjust angle for better sun exposure. If charging seems irregular, test components individually with a multimeter to isolate the problem.
Maintenance and long-term considerations
Regular inspection of cables, connectors, and the controller enhances reliability. Clean panels to remove dust and debris, check for corrosion on terminals, and replace worn components promptly. If you regularly rely on solar charging for your car, consider a dedicated storage solution or larger panel array to maintain consistent charge, especially during winter months. Consistent documentation helps you track performance and plan upgrades as needed.
Tools & Materials
- 12V solar panel (nominal 12V, suitable Voc for charging)(Select a panel sized for maintenance charging or higher, depending on battery needs)
- Charge controller (MPPT recommended)(Match input voltage to panel and output to battery voltage (12V system))
- Battery clamps or weatherproof DC connectors(Heavy-duty, weather-resistant with secure grip)
- DC cable (appropriate gauge, e.g., AWG 10-12)(Length should minimize voltage drop; use shielded or protected runs if possible)
- Multimeter or voltage tester(For monitoring panel voltage and battery state of charge)
- Inline fuse or fuse holder( protects the wiring and controller from faults)
- Safety gear (gloves, eye protection)(Wear when handling batteries and wiring)
- Weatherproof enclosure or mounting hardware(Optional for securing controller and wiring outdoors)
- Battery temperature sensor(Optional for temperature-compensated charging in extreme climates)
Steps
Estimated time: 1-3 hours
- 1
Check battery health
Inspect the car battery for signs of damage, corrosion, or leaks. Verify the battery holds a reasonable charge using a voltmeter and ensure terminals are clean. This prevents charging a compromised battery that could fail dangerously.
Tip: If the battery is swollen or leaking, do not attempt to charge; replace it first. - 2
Confirm system compatibility
Ensure the solar panel voltage and current are compatible with the controller and battery type. Consult the controller’s manual to verify voltage ranges and connection order. Incorrect matching can reduce performance or damage components.
Tip: Prefer an MPPT controller when using higher Voc panels or longer cable runs. - 3
Mount and orient the panel
Position the panel in direct sun with an unobstructed view of the sky. Angle it toward the sun’s path for maximum efficiency. Secure mounting to resist wind and weather.
Tip: A slight tilt toward the sun’s midday position yields better results in most locations. - 4
Connect panel to controller
Attach the panel leads to the controller’s input terminals following the manufacturer’s polarity instructions. Use weatherproof connectors and a fuse between the panel and controller. Confirm all connections are tight before powering.
Tip: Double-check polarity; a reversed connection can blow fuses or damage the controller. - 5
Connect controller to car battery
Connect the controller’s output to the car battery’s positive and negative terminals in the correct order. Install the fuse as close to the battery as possible. Do not bypass safety components.
Tip: Maintain a clear separation between the vehicle’s 12V system and the solar charging circuit to avoid interference. - 6
Power on and monitor
Turn on the system and observe the controller’s display for charging current and battery voltage. Check for steady voltage rise and no overheating. If the system isn’t charging, recheck connections and sun exposure.
Tip: Initial monitoring for 30–60 minutes helps confirm everything is working correctly. - 7
Complete charging and disconnect
When the battery approaches full charge or you’ve achieved the desired state of charge, disconnect the controller and panel. Store cables neatly and inspect components for wear after use.
Tip: For maintenance charging, set a target SOC and avoid leaving the system connected when not needed.
Frequently Asked Questions
Can I charge a car battery directly with a solar panel without a controller?
Direct charging from a solar panel to a car battery is not recommended. A charge controller regulates voltage and current to prevent overcharging, which can damage the battery and create safety risks.
Direct solar charging without a controller is risky and not advised; use a controller to regulate the charge.
What size solar panel do I need to charge a typical car battery?
The required panel size depends on the battery capacity and desired charge time. For maintenance charging, smaller panels can suffice; for full recharge from a discharged state, you’ll want a larger panel paired with a capable controller.
Panel size depends on your battery and how quickly you want to charge; larger panels charge faster but require appropriate controls.
Do I need a charge controller for solar charging a car battery?
Yes. A charge controller protects the battery by regulating voltage and current, preventing overcharging, excessive heat, and potential damage.
Yes, use a charger controller to safely regulate charging.
Is it safe to leave the solar charging setup unattended?
Unattended charging can be safe if you use proper protection, fusing, and weatherproof wiring. Always monitor initially and inspect components regularly.
It can be safe, but check it periodically and ensure safeguards are in place.
Can I charge Li-ion car batteries with this setup?
Li-ion car batteries have specific charging profiles. Ensure the controller supports lithium chemistries and follow manufacturer guidelines for safe charging.
Li-ion setups require compatible controllers and profiles; check your battery specs.
What maintenance is required for a solar charging setup?
Regularly inspect cables, connections, fuses, and the controller. Clean panels, check for corrosion, and replace worn parts as needed to maintain performance.
Keep cables clean and connections tight; inspect components periodically.
Watch Video
Top Takeaways
- Choose a controller-rated setup matched to your battery.
- Protect safety with proper fusing and PPE at all times.
- MPPT offers better efficiency for car-battery charging.
- Monitor voltages and temperatures during charging for longevity.