What Solar Panel for Campervan: A Practical Guide to Power
Learn how to choose the right solar panel for your campervan, size for daily energy needs, and pair with batteries and a controller. A practical, step-by-step guide for off-grid travel.

To power a campervan on the road, start with a roof-mounted solar panel in the 100–200W range, paired with a 12V or 24V battery bank and a reliable MPPT controller. For typical fridge, lights, and devices, plan roughly 60–120Ah of battery capacity and a modest inverter if you need AC power. Solar Panel FAQ recommends sizing around your daily energy needs.
Why the right solar panel matters for campervan life
A campervan is a compact, self-contained home on wheels, and the energy system you install dictates how long you can stay off-grid, how comfortable your trip will be, and how often you’ll rely on a noisy generator. The right solar panel choice balances energy production with roof space, weight, and budget. According to Solar Panel FAQ, the most common pitfall is under-sizing for the loads you actually run, which leads to battery strain and more generator use. When you plan properly, you can power a fridge, lights, phone charging, and a water pump with a compact system. In this guide we’ll cover sizing, mounting, wiring, and practical tips so you can pick the right panel for your campervan lifestyle. We’ll translate daily energy needs into realistic panel sizes and battery banks, helping homeowners and travelers make confident choices and avoid overpaying for unused capability.
Key questions to ask before buying
Before you buy, pin down how you’ll live with power on the road. Key questions include: What is my daily energy budget for fridge, lighting, charging devices, and water pump? How much roof space and weight can I dedicate to solar? Do I want a rigid roof-mounted panel or a portable kit for flexibility? What battery chemistry and capacity do I prefer—lithium, AGM, or flooded lead-acid—and what’s the budget? Will I need AC power, and therefore an inverter, or can I operate entirely on DC? Is there a warranty, and what maintenance is required? Answering these questions helps you compare panels, controllers, and batteries on a like-for-like basis and avoid mismatches that hamper performance.
Sizing: how many watts do you need?
Sizing starts with estimating daily energy use in watt-hours (Wh). List each appliance, estimate its running hours, and sum the total daily Wh. Then divide by the expected peak sun hours per day to approximate the required panel wattage. For example, if you consume about 400 Wh/day and expect 4 peak sun hours, you’d target roughly a 100W panel, plus some headroom for inefficiencies and seasonal changes. Add battery capacity to store energy for cloudy days: a common rule of thumb is to aim for 1–2 days of storage for off-grid trips. This method helps you tailor your system to your actual lifestyle, not just generic guidelines.
Panel types and mounting options
Solar panels come in several varieties. Monocrystalline panels offer higher efficiency and better performance in limited space, while polycrystalline options tend to be more affordable. Rigid, rooftop-mounted panels are sturdy and weatherproof but require mounting hardware and proper sealant, while flexible panels can conform to curved van roofs but may be heavier to install and sometimes less durable long-term. For most van builds, a roof-mount with sturdy brackets or clamps provides the best balance between space, durability, and ease of maintenance. When choosing mounting hardware, ensure compatibility with your roof material and use weatherproof seals to prevent leaks.
Battery and charge controller pairing
The battery bank stores energy for use when the sun isn’t shining. Lithium batteries offer higher energy density, lighter weight, and longer cycle life than AGM or flooded lead-acid, but come at a higher upfront cost. Lead-acid remains workable for budget setups but requires careful depth-of-discharge management. The charge controller protects batteries by regulating how much energy is sent from panels to the battery. An MPPT (Maximum Power Point Tracking) controller is typically more efficient and better for variable sun, while PWM (Pulse Width Modulation) controllers are cheaper but less efficient, especially with higher panel wattages. Match the controller rating to the panel array and battery bank voltage (12V or 24V) for optimal performance.
Wiring, cabling, and safety basics
Keep wiring lengths short and use appropriately gauged cable to minimize voltage drop. Use fuses or circuit breakers close to the battery to protect wiring from short circuits. Use weatherproof connectors and glands for exterior runs, and route cables away from heat sources and moving parts. Label positive and negative runs clearly, and maintain proper strain relief at all connection points. Always disconnect the system during servicing and wear protective gear when handling live wiring. A clean, well-organized loom reduces troubleshooting time and improves reliability on the road.
Charging regimes, energy management, and appliances
Effective energy management is as important as hardware quality. Run the fridge in the coolest part of the day or use energy-efficient models, and cycle devices like water pumps and heaters to minimize simultaneous draw. A battery monitor helps track state of charge (SOC) and informs when you should top up or conserve energy. Consider using DC-optimized devices and limit the inverter usage to essential AC loads. Off-grid habits scale with your system: smaller daily needs mean smaller panels and longer battery life, while larger loads justify bigger arrays and smarter energy management.
Real-world configurations and case studies
Case A: Light-use setup for weekend trips. 120W panel, 100Ah lithium battery, and a 20A MPPT controller. This configuration powers a compact fridge, LED lighting, and USB charging with ample headroom. Case B: Fridge-intensive family trips. 240W panel, 200Ah lithium, and a 40A controller. This supports a more powerful fridge, water pump, lights, and some AC charging at low draw. Case C: Budget-friendly off-grid adventures. 100W panel, AGM battery, PWM controller, and essential DC devices. All cases illustrate how to tailor components to actual usage, roof space, and budget.
Costs, budgeting, and payback considerations
Prices vary by wattage, battery type, and brand, but you can plan with general ranges. A mid-range 100–200W panel might cost a few hundred dollars, while 200–400W arrays can be substantially more. MPPT controllers add cost but improve efficiency, especially in variable sun. Battery bank prices vary widely by chemistry and capacity. A practical campervan system can be assembled in tiers: basic (smaller panel, AGM battery), mid-range (larger panel, lithium battery), and high-end (expansion-ready with lithium and a larger controller). Consider total system cost against the value of reliable off-grid power and reduced generator use over several seasons.
Maintenance, warranties, and long-term care
Regular cleaning of panels ensures optimal light absorption, especially in dusty or coastal environments. Inspect seals around vented components and roof penetrations annually for signs of wear. Test the battery SOC and controller settings every few months, and replace aging cables showing signs of wear. Warranties vary by manufacturer and component type; a longer warranty on a solar panel and a robust battery warranty are desirable. Keep a simple maintenance log to track performance trends and anticipate replacements before a failure occurs.
Tools & Materials
- Roof-mounted solar panel (100–400W)(Choose wattage based on energy needs and available roof space)
- MPPT charge controller(Select a rating matching the panel array and system voltage (12V/24V))
- Deep-cycle battery bank (lithium or AGM)(Capacity in Ah; consider 1–2 days of autonomy for off-grid trips)
- Inverter (optional)(Needed only if you require AC power for appliances)
- Mounting hardware and sealing material(Brackets, screws, and silicone/foil sealant for leaks)
- MC4 connectors and weatherproof cable glands(Weatherproofing for exterior cable runs)
- DC wiring with appropriate gauge(Calculate gauge by load and run length; include fuses)
- Safety gear (gloves, eye protection)(Use during installation and testing)
- Multimeter or solar test meter(For tracing voltages, currents, and ensuring proper connections)
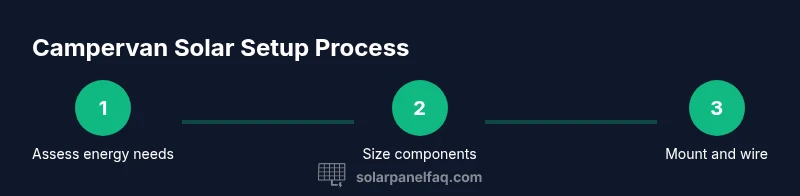
Steps
Estimated time: Total time: 2-4 hours
- 1
Assess energy needs
List every device you plan to run and estimate daily hours of use. Add fridge, lights, charging devices, water pump, and any heater or fan. This baseline defines the panel wattage and battery capacity you’ll need.
Tip: Create a simple table with devices, watts, and expected daily hours to avoid underestimating loads. - 2
Size the system
Compute daily energy (Wh) for each device, sum them, then divide by expected sun hours to estimate required panel wattage. Choose a slightly larger panel to cover inefficiencies and seasonal changes.
Tip: Aim for a buffer (10–25%) to accommodate cloudy days and aging hardware. - 3
Pick mounting hardware
Select mounting hardware compatible with your roof material and the panel’s weight. Plan for weatherproof seals and easy access for maintenance.
Tip: If the roof is curved, consider flexible panels or custom brackets to ensure a tight seal. - 4
Choose battery and controller
Match the controller to the panel and battery voltage. Lithium batteries offer longer life and higher depth of discharge, but come at a higher upfront cost.
Tip: Keep the battery close to the panel and controller to minimize voltage drop. - 5
Wire and fuse correctly
Run DC wiring with correct gauge, add fuses near the battery, and organize cables to prevent chafing. Label positive and negative conductors clearly.
Tip: Use a dedicated fuse for the main battery line and separate fuses for subcircuits. - 6
Test and calibrate
Connect the system and verify panel voltage, battery voltage, and controller settings. Check for leaks or loose connections and confirm all devices operate as intended.
Tip: Record initial readings to monitor performance over time.
Frequently Asked Questions
How do I calculate watts needed for a campervan?
Start by listing all devices, estimate daily usage in hours, and multiply by their wattage to get the total daily watt-hours. Then divide by peak sun hours to estimate panel wattage and ensure battery capacity matches daily needs.
Calculate your daily watt-hours by listing devices, then divide by sun hours to size panels and batteries.
Can I run a fridge off solar panels in a van?
Yes, many campervan setups power small absorption or compressor fridges with solar. Ensure the fridge’s startup current is within your controller and battery capacity, and consider a battery with sufficient depth of discharge for cool-down cycles.
A small fridge can run on solar if your system can handle startup surges and daily energy use.
Is MPPT better than PWM for campervan setups?
MPPT controllers are more efficient, especially with higher panel wattages or longer cable runs. PWM controllers are cheaper but less efficient and may waste energy in less-than-ideal conditions.
MPPT is generally better for efficiency, especially in varied sun; PWM is cheaper but less efficient.
Can I install solar panels myself on a campervan?
Many vanlifers install their own systems, but you should have basic electrical and roof-work skills. Follow safety guidelines, use proper seals, and consider a professional review for critical components.
DIY is possible if you’re comfortable with electrical work and roof mounting, but verify safety with a pro if unsure.
Do I need to reinforce the roof for solar panels?
Most van roofs can support solar panels with proper mounting hardware, but you should assess weight, wind, and mounting locations. Use rated brackets and seals to avoid leaks and roof damage.
Roof reinforcement isn’t always needed, but use proper mounting and sealing to protect the roof.
Watch Video
Top Takeaways
- Size systems to daily energy needs and space available.
- Choose MPPT controllers for better efficiency.
- Prefer lithium batteries for longer life and deeper discharges.
- Use proper wiring, fuses, and weatherproofing to prevent faults.
- Plan for expansion and monitor performance over time.