What angle should a solar panel be at? A practical homeowner's guide
Learn how to tilt solar panels for maximum energy, with latitude-based guidelines, roof type considerations, and seasonal adjustments explained for homeowners.

Homeowners commonly ask, what angle should a solar panel be at? The answer depends on location and roof constraints, but a practical starting point is to tilt panels close to your latitude. For fixed mounts, aim within ±15 degrees of that latitude and adjust for winter or summer as needed, considering shading, seasonal sun path, and roof orientation.
Understanding Tilt: Why angle matters
According to Solar Panel FAQ, the tilt angle directly influences how much sunlight a panel catches throughout the year. The Solar Panel FAQ team found that even small changes in tilt can cause noticeable differences in annual energy output, especially in regions with sharp seasonal sun paths. If you're wondering what angle should a solar panel be at, the answer is that tilt interacts with roof orientation, shading, and the mounting system, and there isn't a universal one-size-fits-all angle. Instead, you should view tilt as a tunable parameter that balances year-round production with the realities of your roof, budget, and aesthetic preferences. For most homes, the right tilt maximizes exposure to the sun when it is highest in the sky while allowing for adequate drainage and wind resistance. In practice, a sensible starting point is to set the tilt close to your latitude, then adjust within a comfortable range to optimize winter vs summer performance, all while keeping panels clean and free from shade. Solar panel systems also often include notch or tilt adjustment if seasonal optimization matters.
How to calculate your ideal tilt
Your ideal tilt starts with your latitude (L). A common starting point is tilt ≈ L, which aligns the panels with the sun’s average path over the year. If your goal is more winter production, you can increase tilt by a modest amount; for summer focus, decrease tilt. The exact degrees vary by climate, roof geometry, and whether you have a fixed or adjustable mounting system. Use a simple solar calculator or smartphone app that asks for your location, roof orientation, and shading. Record the recommended tilt range and then consider practical constraints like roof angle, prevailing wind, and accessibility for cleaning. If you live at higher latitudes, a steeper tilt may help capture the sun when it sits lower in the sky. Conversely, near the equator, a flatter tilt tends to keep the system productive throughout the year. Keep a note of your chosen tilt so you can reproduce it or adjust later as needed.
Tilt strategies by roof type
Roof type largely determines how you implement tilt. On pitched roofs, many homeowners simply match the panel tilt to the roof angle, which minimizes mounting hardware and wind loads. On flat roofs, installers use mounting rails to create a tilt in the typical range of a few degrees to a dozen degrees, balancing sun exposure with drainage. For metal roofs, ensure compatible mounting hardware to avoid damage; for asphalt shingle roofs, consider vibration and wind considerations. If you plan a fixed tilt, choose a compromise angle that works for most of the year. For adjustable systems, you can rotate to favor winter sun during that season. Regardless of roof type, ensure panels are kept free from shade from nearby trees, chimneys, or vents, and verify that the tilt doesn’t compromise roof integrity or flashing.
Seasonal optimization: summer vs winter tilt
Seasonal optimization means adjusting tilt to capture the sun when it is highest in the sky during summer or lowest in winter. A higher tilt catches more low-angle winter sun, while a lower tilt favors summer sun. If you have an adjustable system, you can switch between two angles seasonally, or use monthly adjustments if you have the time. For fixed systems, select a mid-range tilt and rely on other measures like panel orientation (azimuth) or microinverters to boost performance if you’re near the edge of your climate. Seasonal optimization is especially valuable in locations with pronounced seasonal contrasts and significant shading from surrounding terrain or trees.
How to account for shading, orientation, and azimuth
Shading from trees, chimneys, or other panels is one of the biggest reasons for reduced output. Start by surveying the sun path during peak production months and adjust tilt to minimize shading during high-sun hours. Orientation (azimuth) matters too: panels facing true south (in the northern hemisphere) or true north (in the southern hemisphere) maximize annual output, but local roof geometry may mean a slight deviation. Use a shade analysis tool or a sun-path diagram to test different tilt angles and azimuths. Finally, consider cleaning frequency; dust and bird droppings reduce efficiency, especially on higher tilt angles.
Practical setup for fixed-tilt systems
Plan your fixed-tilt installation with the tilt angle determined, then verify structural compatibility of mounting hardware. Measure roof pitch and map mounting locations to avoid obstructed access. Install brackets or rails with proper fasteners for your roof type and climate. Ensure adequate clearance for drainage and hail risk; verify code compliance or homeowner association rules if applicable. Finally, schedule a basic wind load check and consider professional inspection if you’re new to roof work.
Adjustable tilt vs fixed tilt: pros and cons
Fixed tilt is simple, reliable, and low maintenance, but it doesn’t optimize production throughout the year. Adjustable tilt costs more and requires periodic adjustments but can maximize energy yield across seasons. Trackers offer the best performance but are typically more expensive and require more maintenance and robust wind management. For most homeowners, fixed tilt with a latitude-based baseline offers a good balance among cost, complexity, and annual energy production. If you live in high-latitude climates or have significant seasonal energy goals, an adjustable tilt or a lightweight tracking option may be worth the investment.
Common mistakes and how to avoid them
Rushing the tilt decision without considering location and shading often leads to subpar performance. Another common error is ignoring roof constraints or local wind loads, which can lead to mounting failures. Not verifying the azimuth direction or failing to account for cleaning needs can reduce year-round gains. Finally, neglecting to document the tilt settings makes future maintenance harder. Avoid these by doing a proper sun-path analysis, choosing appropriate mounting hardware, and keeping a precise record of the angle.
Next steps and implementation checklist
Create a plan that includes tilt baseline, seasonal adjustments (if any), and maintenance tasks. Validate the tilt with a simple, low-cost sun-path app and a quick energy model. Consult with a licensed installer if you’re unsure about roof integrity or safety. After installation, monitor production and adjust as needed; keep a log of the season in which you tuned the tilt and why. This will help you optimize long-term energy output without costly mistakes.
Tools & Materials
- Measuring tape(At least 5 meters long for accurate roof measurements)
- Inclinometer or angle finder(To measure roof pitch and tilt angle)
- Pencil and notepad(For jotting measurements and notes)
- Ladder or roof access equipment(Secure and stable setup; follow safety protocols)
- Safety gear(Gloves, non-slip shoes, fall protection as required)
- Mounting hardware kit(Rails/brackets compatible with roof type)
- Sun-path app or calculator(Helpful for planning tilt and azimuth)
Steps
Estimated time: 60-90 minutes
- 1
Gather measurements and constraints
Collect roof dimensions, identify shading sources, and note any restricted access or maintenance concerns. Document surrounding structures that could cast shade at different times of day and year. Use a camera to capture solar exposure from multiple angles and record findings in your notes.
Tip: Take measurements from at least two points on each roof plane to account for uneven surfaces. - 2
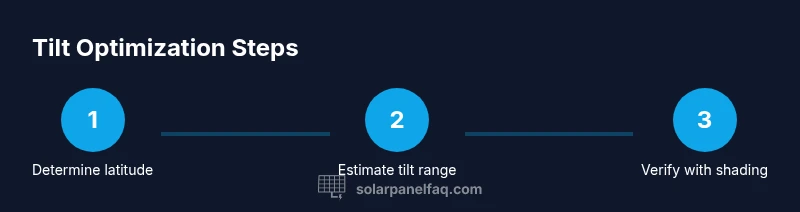
Determine latitude baseline tilt
Find your geographic latitude and set a preliminary tilt close to that value. This baseline is a practical starting point for most fixed-tilt installations and balances year-round sun exposure with practicality.
Tip: If you’re unsure, use an online calculator for your city to estimate a latitude-based tilt range. - 3
Estimate tilt range and season adjustments
Decide whether you want a winter-focused or summer-focused tilt or a mid-range default. For fixed mounts, keep the tilt within a narrow band around the baseline; for adjustable mounts, plan two angles that you can switch between seasonally.
Tip: Document both angles and the rationale for future reference. - 4
Check roof orientation and potential shading
Confirm the azimuth (direction the roof faces) aligns with sun-path expectations in your hemisphere. Re-check shading at peak production times and adjust tilt to minimize losses.
Tip: Trim branches or relocate obstacles if safe and permitted. - 5
Choose mounting type
Decide between fixed-tilt rails and adjustable mounts. Fixed is cheaper and simpler; adjustable offers seasonal optimization but adds hardware and complexity.
Tip: If unsure, start with fixed tilt and upgrade later if you see a gap in production. - 6
Validate wind load and safety
Ensure your mounting method can withstand local wind loads. Verify flashing integrity and ensure safe, code-compliant installation practices.
Tip: If you’re not experienced with roof work, hire a professional to handle the mounting work. - 7
Finalize tilt plan and document settings
Record the exact tilt angle and azimuth chosen, plus any seasonal adjustment plan. Archive these notes with installation photos for future maintenance.
Tip: Keep a maintenance log and set calendar reminders for tilt checks.
Frequently Asked Questions
What is the ideal tilt angle for solar panels near latitude?
While the exact angle depends on location, a good starting point is tilting panels close to your latitude. This baseline provides solid annual production, with better results in many climates than a flat mount. If you can adjust seasonally, minor changes can improve winter or summer output.
The ideal tilt starts with your latitude; adjust seasonally if you can.
Can I adjust tilt after installation?
Yes, with adjustable mounts you can rotate tilt seasonally or annually. Fixed tilts do not move. If you’ve chosen fixed tilt, plan for a mid-range angle that works most of the year.
Yes, you can adjust tilt if you have an adjustable mount.
Does roof pitch affect tilt angle?
Yes, a pitched roof often dictates tilt automatically; you may match tilt to roof angle, but you can adjust with mounting hardware if needed. Alignment with the sun path remains the key goal.
Roof pitch often sets the baseline tilt; you can adjust with mounting.
Is it worth a solar tracker?
Trackers can boost output but add cost and maintenance; assess payback and installation requirements for your climate and home.
Trackers can improve output but check cost vs benefit.
How do shading and orientation affect performance?
Shading reduces output dramatically. Tilt and azimuth should minimize shade during peak sun. Orientation toward the sun path helps maximize yearly production.
Shading matters; tilt and orientation can reduce losses.
Are there safety concerns when adjusting tilt?
Yes: working on a roof exposes you to fall risks. Use proper PPE, secure ladders, and consider professional help for high or complicated installs.
Yes, safety first; use PPE and avoid unsafe climbs.
Watch Video
Top Takeaways
- Start with latitude-based tilt as a baseline.
- Account for shading and azimuth to maximize production.
- Choose fixed vs adjustable tilt based on climate and budget.
- Document your settings and monitor energy output.