When to adjust solar panel tilt: A practical guide for homeowners
Learn when to adjust solar panel tilt to maximize energy capture, with seasonal guidelines, safety tips, and a practical step-by-step process for homeowners.

Goal: maximize energy capture by aligning panels with the sun’s seasonal arc. In most climates, tilt adjustment is beneficial when seasons shift: increase tilt in winter to catch lower sun, reduce tilt in summer for higher sun. Revisit guidance at least twice a year or after a major change in your roof, shading, or panel layout. Always follow manufacturer recommendations.
Why tilt matters for solar panel efficiency
Tilt angle directly affects the amount of sunlight your panels receive. A well-chosen tilt can improve annual energy production by aligning the panel face with the sun’s path through the sky. When the sun sits lower in winter, a steeper tilt captures those rays more effectively; in summer, a shallower tilt can reduce shading on the lower edge and help maintain better airflow under the modules. For homeowners aiming to maximize annual energy production, understanding how tilt interacts with latitude, roof orientation, and shading from nearby objects is essential. A thoughtful tilt strategy also helps stabilize output during shoulder seasons, reducing the gap between winter and summer performance. According to Solar Panel FAQ, seasonal tilt adjustments can provide noticeable gains for many homes, especially when wind and debris loads are considered. A fixed tilt system may still benefit from lifecycle checks, while adjustable mounts offer the possibility to fine-tune year to year.
Understanding sun angle and latitude
Sun angle, or solar altitude, changes with time of day, season, and geographic latitude. The higher the sun in the sky, the more directly sunlight strikes the panels, which can improve energy production on clear days. Latitude provides a baseline for tilt: closer to the equator typically requires a flatter tilt, while higher latitudes benefit from a steeper angle to catch low-angle winter sun. Practical upshots: your tilt should be designed to maximize exposure during the months when you rely on solar energy most, while still maintaining safe wind resistance and avoiding excessive debris buildup on the tilted surface. This section helps you translate latitude into a workable tilt target and explains how shading, roof orientation, and panel height influence the final setup. Solar Panel FAQ analysis shows that understanding sun angle and site specifics leads to more reliable performance over the year.
Seasonal adjustments: winter vs summer tilting
Seasonal tilting anchors performance to the sun’s annual arc. In general, winter tilts are steeper to capture lower-angle sun, while summer tilts are shallower to optimize for higher sun and longer daylight hours. The practical takeaway is not to chase a perfect fixed angle year-round; instead, aim for a tilt that balances one or two critical seasons and minimizes shading and wind exposure. If you have an adjustable-mount system, you can rotate to a winter setting for several months and switch to a summer setting when heat and sun intensity peak. If you rely on a fixed tilt, you’ll benefit from recalibrating your expectations and reviewing production data after seasonal changes. The Solar Panel FAQ team emphasizes weighing wind resilience and debris risk against incremental gains in sun exposure when deciding whether to adjust tilt seasonally.
How to estimate your target tilt without specialized tools
A practical starting point for many homeowners is a latitude-based rule of thumb paired with a buffer for seasonality. As a general guideline, consider a tilt near your latitude for year-round average performance and adjust by a small amount to favor winter or summer production as needed. For example, adding a modest amount for winter improves low-angle capture, while subtracting a small amount supports peak-sun days. If you have adjustable hardware, you can test a couple of tilt positions across a few sunny days and compare energy output. Record the results to identify a pattern of improvement. While precise solar models can offer exact angles, an iterative, data-driven approach using simple measurements and production data can yield meaningful gains. Solar Panel FAQ analysis shows homeowners who adopt a methodical, measurement-based approach tend to see more consistent results over time.
Mounts and configurations: adjustable vs fixed-tilt systems
Choosing between adjustable tilt mounts and fixed-tilt systems influences how you implement tilt changes. Adjustable mounts let you reorient panels with seasons or for maintenance, but they require careful handling, robust anchoring, and regular checks to ensure nothing shifts during wind events. Fixed-tilt installations are often simpler and more cost-effective but offer limited flexibility. If you anticipate significant seasonal variation in sun angle or if you install panels on a large roof area with diverse shading, an adjustable system can pay off in energy gains and system longevity. Always ensure that any mounting solution complies with local building codes and wind-load requirements, and consult the manufacturer for recommended tilt ranges and safe operating conditions.
Safety and preparation before making adjustments
Safety should be your first priority whenever you work on a roof or elevated platform. Review the project scope, weather forecast, and any roof access restrictions. Ensure you have a partner to assist, use fall protection, and keep the work area clear of obstructive debris. Inspect panels for damage or loosened hardware before adjusting tilt, and verify that all electrical disconnects are handled according to the system’s safety procedures. If you’re unsure about any step, it’s wise to seek professional help. The Solar Panel FAQ team notes that proactive planning and safety checks reduce the risk of injuries and equipment damage during tilt adjustments.
Step-by-step approach to adjusting tilt (overview)
Depending on your mounting system, you’ll adjust tilt by loosening the mounting hardware, repositioning the panel plane to the target angle, and re-tightening with appropriate torque. Always verify that the surface is level and that all fasteners are secure. After adjusting, observe the system for a full sun cycle and log performance metrics to confirm improvements. If at any point you notice instability, wind noises, or unusual panel movement, stop and re-check the setup. The goal is a stable, compliant tilt configuration that delivers improved energy capture without compromising safety or warranty terms.
Monitoring performance after adjustment
After you adjust tilt, allow the system to run for several sunny days to collect enough data for comparison. Track daily energy production, weather conditions, and any shading changes. Compare the new production figures to the prior period and assess whether the gains justify the effort and any additional maintenance needs. If performance remains flat or declines, revisit the tilt strategy and consider incremental tweaks rather than large-angle changes. Consistent documentation helps you refine your approach over multiple seasons and under varying weather patterns. The Solar Panel FAQ team recommends baselining performance with clean panels and accurate measurements to ensure reliable comparisons.
Maintenance and long-term considerations
Tilt components are part of the mounting system and should be inspected periodically for corrosion, wear, or loosening. Schedule an annual check that includes fastener torque verification, weatherproofing inspection, and a quick wind-load assessment after major storms. If your roof shifts or if you notice new shading from trees or nearby structures, you may need to revisit tilt settings. Respect warranty requirements and warranty terms from the manufacturer when performing any tilting adjustments, and avoid making changes outside recommended tilt ranges. Regular maintenance helps preserve system efficiency and safety over the long term.
Tools & Materials
- Ladder or roof access equipment(Sturdy, tall enough to reach panels; use stabilizer.)
- Fall protection harness(ANSI-rated, anchor point.)
- Wrench set (adjustable and fixed)(Sizes match mounting hardware.)
- Torque wrench (if specified)(Use only if torque specs are provided by the manufacturer.)
- Level (bubble or digital)(To verify tilt is true to target.)
- Measuring tape(For spacing and position checks.)
- Pen and notebook(Record tilt values and dates.)
- Tilt adjustment kit or adjustable rails(Needed if your system isn’t already adjustable.)
- Screwdrivers(Use appropriate bit types for mounting hardware.)
- Compass or inclinometer(Optional tool for orientation checks.)
Steps
Estimated time: 60-90 minutes
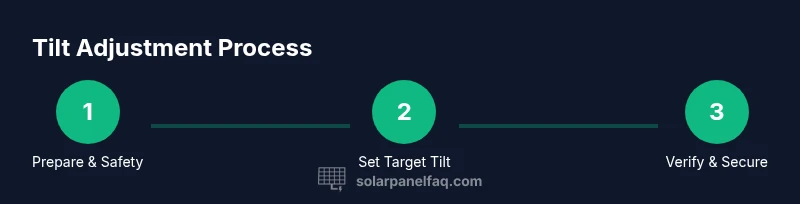
- 1
Prepare and verify safety
Review the project scope, check the forecast, and confirm you have a partner on site. Put on fall protection, secure ladders, and inspect the panels for damage before touching any hardware.
Tip: Have a second person ready to assist with holding panels and guiding tools. - 2
Identify target tilt using rule of thumb
Determine a practical tilt based on latitude and seasonal goals. Start with a baseline near latitude and plan adjustments of +/- 10–15 degrees depending on winter vs summer priorities.
Tip: Document the baseline tilt so you can compare results later. - 3
Loosen tilt adjustment mechanism
Loosen the mounting hardware just enough to allow movement without detaching panels. Keep a hand on the panel to prevent sudden shifts.
Tip: Do not fully remove fasteners; loose enough to move smoothly. - 4
Set tilt to target and verify level
Position the panel plane to the chosen tilt, then use a level to confirm the angle is accurate. Make fine adjustments as needed.
Tip: Avoid over-tightening; apply even torque to maintain alignment. - 5
Secure hardware and re-check wind resistance
Tighten all fasteners to manufacturer-specified torque, re-check alignment, and ensure there is no play. Confirm that mounting hardware remains within wind-load guidelines.
Tip: Re-check after a short wind gust to ensure stability. - 6
Record the adjustment and monitor performance
Log the new tilt value, date, and any observations. Monitor energy production over the next several days and compare with prior data.
Tip: Keep a photo record of the final tilt for future reference.
Frequently Asked Questions
How often should I adjust solar panel tilt?
Most homeowners adjust tilt twice a year or after a major change in shading, roof, or panel layout. For fixed systems, reassess during seasonal maintenance and monitor production.
Most homeowners adjust tilt twice a year or after a major shading change. For fixed systems, reassess during seasonal maintenance and monitor production.
Can I adjust tilt myself or should I hire a pro?
If you have adjustable mounting hardware and feel comfortable on a roof, you can perform the adjustments with proper safety. If not, hire a qualified installer to ensure wind loads and seals remain intact.
If you have adjustable mounts and proper safety, you can adjust yourself; otherwise hire a qualified installer.
Does adjusting tilt affect my warranty?
Adjusting tilt within the manufacturer’s recommended range typically doesn’t void warranties, but moving beyond specified angles or improper mounting can. Always consult your product manuals and installer guidelines.
Tilting within the recommended range usually won’t void warranties, but avoid angles outside the specs. Check manuals and guidelines.
What if my roof is steep or lacks safe access?
Steep roofs or limited access should be handled by a professional installer who can safely adjust tilt using appropriate equipment and safeguards.
If your roof is steep or access is limited, a pro should handle the tilt adjustment with proper safety gear.
What tools are required for tilt adjustment?
You’ll typically need a ladder, level, wrenches, and torque wrench if specified by the manufacturer. Having a partner on hand improves safety.
Common tools include a ladder, level, wrenches, and possibly a torque wrench. Have a helper for safety.
How can I tell if tilt improved performance?
Compare daily energy production before and after the tilt change, accounting for weather. Look for a consistent uplift across several sunny days.
Track energy production before and after tilting, while considering weather, to see if there’s a consistent improvement.
Watch Video
Top Takeaways
- Tilt seasonally to maximize sun exposure.
- Use latitude-based targets plus local conditions.
- Prioritize safety and refer to manufacturer guidelines.
- Document changes and monitor performance over time.