Sun Solar Panels: A Practical Homeowner Guide
Learn how sun solar panels convert sunlight into electricity, how to size a system, estimate costs, understand incentives, and maintain peak performance for your home with practical, step-by-step guidance.

This guide explains how sun solar panels convert sunlight into electricity, helps you size a system for your home, and outlines installation costs, incentives, and maintenance. You’ll learn about panel types, mounting options, and practical steps to evaluate roof suitability, budget, and performance—tailored for homeowners and prospective solar buyers. This quick overview also points you toward a complete step-by-step plan.
Understanding how sun solar panels work
Sun solar panels use photovoltaic (PV) cells to convert sunlight into direct current (DC) electricity. When photons hit the silicon cells, electrons are knocked loose and flow, creating DC power. An inverter then converts DC to alternating current (AC) that powers your home. In grid-tied systems, excess electricity flows to the utility and you receive credits or savings; off-grid setups rely on batteries. The efficiency and performance of panels depend on temperature, orientation, and shading; modern systems often include microinverters or power optimizers to maximize energy capture on uneven roofs. According to Solar Panel FAQ, grid-tied configurations remain the standard choice for homeowners seeking simplicity and maximize savings. The goal of this section is to give you a mental model of the system so you can ask informed questions during evaluation and planning.
Sizing your system: how much energy do you need?
To size a solar setup, start with your annual energy consumption (kWh) and local sun exposure. Look at the previous 12 months of utility bills to identify peak usage months and overall averages. Then consider roof orientation and shading patterns, which influence production. A typical homeowner will want enough capacity to cover a majority of daytime loads, with a buffer for future needs like EV charging. Remember, the goal isn’t to hit 100% of your usage every day; it’s to align production with your lifestyle and budget while leveraging incentives that reduce upfront costs.
Panel types and technologies: what to know
Solar panels come in several silicon technologies and formats. Monocrystalline panels offer high efficiency and better space utilization but at a premium; polycrystalline panels are usually cheaper with slightly lower efficiency. Thin-film panels are flexible and perform better in high temperatures but require more space. Inverters also vary: string inverters are common and cost-effective; microinverters or power optimizers can improve performance under partial shading. Choosing between fixed-tilt or tracking mounts depends on roof space, climate, and cost considerations. This section contrasts the main options to help you pick a setup that fits your roof and energy goals.
Roof and site assessment: can your roof support solar?
A successful installation begins with the site. Roof age, material, and structure influence mounting options and warranty coverage. Shading from nearby trees or HVAC equipment can dramatically reduce output, so a site assessment is essential. Determine the optimal tilt and orientation for maximum daily generation in your latitude. Permitting, HOA rules, and local incentives also factor into the design. By evaluating these factors early, you avoid surprises during installation and ensure reliable performance.
Inverters and electrical configuration: how the power flows
Inverters convert DC to AC for home use. String inverters are common for cost-effective, straightforward designs; microinverters or optimizers can mitigate shading issues and improve performance on complex roofs. The electrical configuration includes disconnect switches, combiner boxes, and a grid interconnection with your utility. A correctly sized inverter ensures you extract the most energy while keeping system safety margins. Make sure your plan accounts for future expansion, such as adding more panels or an energy storage system.
Costs, incentives, and payback: planning finances without speculation
Costs vary by system size, equipment choice, and local conditions. You’ll typically encounter a combination of hardware, permitting, and installation labor. Incentives such as tax credits, rebates, and net metering policies differ by location, so research your state or province and utility programs. A well-planned system improves not just monthly bills but long-term home value. For homeowners, a careful cost-benefit analysis helps set realistic expectations for payback and savings, considering maintenance and potential battery storage in the future.
Installation considerations and choosing a contractor
DIY solar can be risky and is often limited by building codes and warranties. Most homeowners hire licensed installers who handle design, permitting, insurance, and interconnection agreements. Get multiple quotes, verify credentials, and review warranties on panels, inverters, and mounting hardware. An experienced installer will assess your roof’s integrity, shading, and electrical panel compatibility, and will coordinate with the utility for grid interconnection. A professional approach reduces risk and ensures long-term performance.
Monitoring, maintenance, and performance optimization
Monitoring helps you verify expected production and quickly spot anomalies. Many systems include online dashboards that track daily, monthly, and yearly performance. Routine maintenance is minimal but wise: keep panels clean of dust or debris, trim overhanging branches to reduce shade, and inspect wiring for signs of wear after storms. Regular checks on inverters and switches can prevent unexpected outages. If performance drops, consult your installer to diagnose issues like microcracks, degraded cells, or shading changes.
Safety, permits, and common pitfalls
Working on roofs and high‑voltage DC systems requires caution. Always follow safety procedures, wear PPE, and ensure power is disconnected during service. Permitting and interconnection requirements differ by locale; failure to obtain approvals can delay incentives or violate codes. Common mistakes include underestimating shading, overestimating available roof space, and neglecting maintenance. Plan for contingencies and avoid rushed decisions that compromise safety or system longevity.
Long-term planning: storage, EVs, and future expansion
Battery storage can provide resilience and maximize self-consumption, especially in regions with time-varying incentives. If you plan to add an electric vehicle or shift to higher self-consumption, design the system with future expansion in mind. Consider the economics of storage versus grid reliance and how evolving incentives may affect your return on investment. The best approach is to align your solar design with 5–10 year energy goals and potential technology upgrades.
Tools & Materials
- Solar panels (modules)(Choose appropriate wattage and type for roof space and budget)
- Racking/mounting hardware(Roof or ground mount, weather-rated and corrosion-resistant)
- Inverter (string or microinverters)(Select based on system design and shading profile)
- DC disconnect switch(Code-compliant, accessible from the exterior)
- AC disconnect and main service equipment compatibility(Ensure service capacity matches anticipated load)
- Wiring and conduit (outdoor rated)(UL-listed, weatherproof, appropriately sized)
- Multimeter/voltage tester(For safe electrical verification)
- Safety harness and PPE(Fall protection and eye/hand protection)
- Monitoring software or hardware(Remotely track production and system health)
- Permitting documents and utility interconnection forms(Check local requirements early)
Steps
Estimated time: 2-5 days depending on permits, site access, and utility interconnection
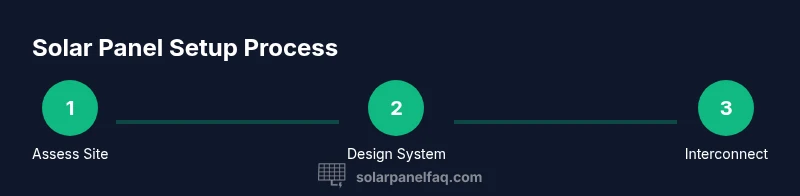
- 1
Assess site and energy needs
Review past utility bills to gauge annual usage and identify peak months. Inspect roof orientation and shading, and confirm structural soundness. This upfront analysis sets the baseline for system size and layout.
Tip: Document shading and roof access for the installer; a simple shade map helps optimize panel placement. - 2
Choose system type and inverter strategy
Decide between string inverters, microinverters, or optimizers based on shading patterns and budget. This choice influences wiring, monitoring, and potential expansion.
Tip: If shading is uneven, leaning toward microinverters or optimizers can improve real-world output. - 3
Confirm roof suitability and mounting plan
Ensure roofing material, age, and structure support the mounting hardware. Decide on fixed-tilt versus tracking mounts and verify uphill/roof access constraints for installation.
Tip: Plan for venting and airflow under panels to avoid heat buildup that can reduce efficiency. - 4
Obtain permits and utility interconnection
Submit design documents for local permits and complete interconnection forms with the utility. Permitting timelines can affect project start dates.
Tip: Start the permit process early to reduce delays; many programs require inspections after installation. - 5
Install mounts, panels, and wiring
Set up racking, mount panels, and route wiring through conduit. Install DC disconnect, then connect to inverter input. Adhere strictly to electrical codes and manufacturer instructions.
Tip: Work with a partner for safer handling of heavy modules; never stand on active mounts during electrical work. - 6
Interconnect and commission the system
Connect to the inverter, perform insulation and continuity checks, and have the utility inspector sign off. Configure monitoring and performance alerts.
Tip: Document serial numbers and wiring schematics for future maintenance and warranties. - 7
Test production and verify safety clearances
Run a full-system test, observe output on the monitoring portal, and confirm no overheating or abnormal readings. Ensure all safety clearances around panels remain intact.
Tip: Compare real-time production against expected estimates from your design plan. - 8
Plan maintenance and future expansion
Set up a maintenance calendar and review performance quarterly. Consider storage or EV charging upgrades as your needs evolve.
Tip: Keep a warranty and maintenance record; this helps when selling the home or making upgrades.
Frequently Asked Questions
Do I need permits to install sun solar panels?
Most regions require permits for solar installations and interconnection with the utility. Your installer can handle the process and ensure compliance with local codes. Checks and inspections help verify safety and performance.
Yes. Permits are typically required; your installer handles the process, and inspections ensure safety and code compliance.
How many panels do I need for my home?
Panel counts depend on roof space, local sun exposure, and desired energy offset. A professional design will estimate the number needed to meet a target fraction of your usage without overbuilding.
It depends on your energy needs, roof space, and sun exposure. A design will estimate the right number of panels.
Can I install solar on a flat roof?
Yes, flat roofs are common with ballasted or mounting systems that adjust tilt to optimize sun exposure. The layout should balance wind load, drainage, and maintenance access.
Absolutely, flat roofs work with specialized mounting; your installer will optimize tilt and ballast for safety.
What maintenance do sun solar panels require?
Maintenance is typically minimal: keep panels clean, check for debris or shading sources, and monitor electrical components. Professional inspections are recommended every few years to verify connections and performance.
Not much upkeep: keep panels clean and monitor performance; schedule periodic professional checks.
How long do sun solar panels last?
Most panels are designed for 25-30 years of useful life with gradual efficiency degradation. Inverters may need replacement sooner, typically after 10-15 years.
They last about 25-30 years, with some degradation over time; inverters may be replaced earlier.
Are sun solar panels worth the investment?
Worth depends on local costs, incentives, energy prices, and your home’s energy profile. A well-designed system can reduce electricity bills over decades and increase home value.
In most cases, if incentives and energy prices favor it, solar pays back over time and boosts home value.
Watch Video
Top Takeaways
- Understand how PV systems convert sunlight to usable electricity
- Size your system based on current and future energy needs
- Choose panel-inverter configurations that fit shading and budget
- Secure permits and utility interconnection early
- Prioritize safety and long-term maintenance planning