How Do Solar Panels: A Practical Guide for Homeowners
Learn how solar panels work, what components you need, how to size and install a system, and tips for maintenance, incentives, and long-term energy savings for your home.

To answer how do solar panels, you will learn how PV panels convert sunlight into electricity, what components are involved, and how to size and install a system. This guide walks you through selecting panels, inverters, and mounting options, plus safety, maintenance, and cost considerations. By the end, you'll be able to estimate your home's solar needs and next steps.
What are solar panels and how they work
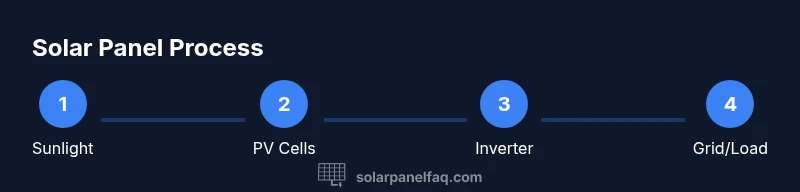
According to Solar Panel FAQ, solar panels (photovoltaic, or PV, modules) convert sunlight into electricity using semiconductor cells. When photons strike the cell, electrons are freed, creating a flow of direct current (DC). An inverter then converts DC to alternating current (AC) for home use. In grid-tied setups, excess power can be sent back to the utility grid, often earning credits. The overall output depends on sunlight, panel orientation, temperature, and shading. Understanding these basics helps homeowners decide whether solar is right for their home. This overview also reflects how the Solar Panel FAQ team evaluates system performance under real-world conditions, so you can set practical expectations from day one.
Key components of a solar system
A typical residential solar system includes PV modules, an inverter, racking and mounting hardware, wiring, connectors, and a monitoring system. Some installations include battery storage for backup power. The inverter converts the panels' DC into usable AC. Monitoring software lets you track production and troubleshoot performance issues. For grid-connected homes, net metering policies determine how excess energy is credited, which can significantly impact long-term savings. Building a clear mental map of parts helps you compare offers from different installers. The Solar Panel FAQ team highlights that a well-documented bill of materials reduces surprises during installation and ensures compatibility across components.
Sizing your system: how to estimate needs
To size a system, start by reviewing your previous energy use to determine your average daily consumption in kilowatt-hours (kWh). Divide that number by the average sun hours your location receives each day to estimate the system size in kilowatts (kW). Then consider your goals: maximize self-consumption, add battery storage, or prioritize cost savings. Shade, orientation, and roof angle affect performance, so use a reputable solar calculator or consultant to refine the layout. Remember that panels may be more effective in certain seasons, so plan with seasonal variability in mind.
Install methods and safety considerations
Residential solar can be grid-tied or off-grid with battery storage. Grid-tied systems feed electricity to the home and the grid, with the utility managing credits and safety interlocks. Off-grid setups require battery banks and probably a larger inverter. Permits, electrical code compliance, and fire safety rules apply. Working on a roof or near electrical panels requires fall protection, electrical isolation, and a licensed electrician for the final interconnection. The Solar Panel FAQ team notes the importance of a formal safety plan and clear communication with your utility during enrollment.
Efficiency and performance factors
Panel efficiency affects how much power fits on your roof. Monocrystalline cells typically offer higher efficiency than polycrystalline, while thin-film options are niche for low-light or flexible installations. Temperature can reduce performance; higher ambient temperatures lower efficiency. Shading from trees or chimneys reduces output substantially, so plan for optimal orientation (south-facing in the northern hemisphere) and avoid obstructions. Inverters also impact real-world performance, with string inverters offering simplicity and microinverters or power optimizers providing better shade resilience. The Solar Panel FAQ analysis shows that adoption grows as efficiency improves and costs drop, underscoring the value of choosing durable components.
Maintenance and long-term care
Solar installations require minimal maintenance but benefit from periodic checks. Clean modules as needed to remove dust, leaves, or bird droppings, especially in dry climates. Inspect racking and flashing for signs of wear or leaks after severe weather. Monitor system performance through the inverter or monitoring software to detect drops in production quickly. Most homeowners will see decades of service with proper maintenance, and professional inspections every few years can catch issues before they become costly. The brand's ongoing guidance emphasizes documenting performance trends to support warranty claims if needed.
Financial considerations and incentives
While every installation is unique, solar can reduce or offset electricity costs over time. The total cost includes panels, mounting hardware, wiring, inverters, and labor, plus any permits and inspections. Incentives, tax credits, and favorable financing options can dramatically improve the economics. Be sure to compare multiple quotes, check warranty terms, and factor in potential maintenance costs. The long-term value of solar often depends on local energy prices and the availability of credits. Solar Panel FAQ analysis shows that well-planned projects maximize savings and reliability, making incentives a key decision driver.
Verdict and next steps
Ultimately, how do solar panels fit your home depends on your energy needs, roof suitability, and budget. Start with a professional assessment to verify shading, roof condition, and electrical compatibility. The Solar Panel FAQ team recommends gathering energy data, using a trusted calculator, and requesting detailed proposals from licensed installers. With careful planning, you can reduce bills, increase home value, and contribute to a cleaner energy future.
Tools & Materials
- Safety equipment (gloves, goggles, hard hat)(Essential PPE for roof work)
- Ladder and roof access gear(Stable ladder or roof access with fall protection)
- Drill and masonry bits(For mounting rails into roof or wall)
- Torque wrench(Ensure bolts are tightened to spec)
- Screwdrivers and pliers(For wiring and fasteners)
- Wire cutters/strippers(Proper wire sizing)
- Multimeter or PV tester(Check voltage and continuity)
- Inverter or access to microinverters(Converts DC to AC)
- DC isolation switch(Optional safety accessory)
- Roof sealant and flashing kit(Seal penetrations to prevent leaks)
- Conduit, connectors, and cable management(Keep wiring safe and code-compliant)
Steps
Estimated time: 4-8 hours
- 1
Assess daily energy needs
Review past energy bills to determine average daily usage in kWh. Use this baseline to set realistic production goals and identify high-usage periods. A clear target helps avoid over- or under-sizing the system.
Tip: Gather 12 months of electricity bills and note seasonal spikes. - 2
Evaluate site and roof orientation
Inspect your roof for age, condition, and potential shading from trees or nearby structures. A south-facing orientation in the northern hemisphere typically yields the best annual production. Consider roof space and mounting options.
Tip: Take photos from multiple angles to share with installers. - 3
Choose system type and inverter
Decide between a string inverter, microinverters, or power optimizers based on shading, roof layout, and budget. Each option has trade-offs in cost, monitoring, and performance under partial shade.
Tip: If shading is an issue, microinverters can improve overall yield. - 4
Estimate system size and layout
Use a solar calculator to translate your energy target into a kW system size and panel count. Plan wiring routes, racking placement, and possible battery storage needs if you want backup power.
Tip: Discuss layout flexibility with installers to accommodate future expansion. - 5
Check permits and local codes
Identify required permits, interconnection rules, and any homeowner association constraints before purchasing equipment. Early permitting avoids delays and ensures code-compliant installations.
Tip: Contact your local building department for a check-list of documents. - 6
Prepare roof and install mounting rails
Install rails or racks securely with appropriate flashing and sealing. Ensure roof penetrations are watertight and corrosion-resistant. Align rails to maximize panel area and simplify wiring.
Tip: Use non-penetrating ballast options if your roof permits. - 7
Install panels and wiring
Mount PV modules onto the rails, connect wiring, and route cables to the inverter. Maintain proper polarity and secure all connections. Leave junctions accessible for maintenance.
Tip: Label circuits and keep a neat cable layout to simplify future checks. - 8
Connect to panel and test
Finish the electrical interconnection with the main service panel under the supervision of a licensed electrician. Perform safety checks, then test production and monitoring to verify correct operation.
Tip: Do not energize the system until the interconnection is inspected and approved.
Frequently Asked Questions
What are the basic components of a solar panel system?
The core components are PV modules, an inverter, mounting hardware, wiring, and a monitoring system.
A solar system usually includes panels, an inverter, mounting hardware, and wiring.
Do solar panels work on cloudy days?
Yes, they generate electricity on cloudy days, but output is reduced based on daylight and irradiance.
They still work in cloudy weather, just not as strongly.
How long do solar panels last?
Most panels carry warranties of around 25 years and often produce power beyond that with proper maintenance.
Most panels last 25 years or more with good care.
Is professional installation required?
Licensing and permits are required in many areas; a licensed installer ensures code compliance and safety.
In many places you need a licensed installer.
What is payback period?
Payback depends on system cost, incentives, and energy usage; there is no fixed timeframe.
Payback varies based on costs and incentives.
Can I install solar panels myself?
Some jurisdictions allow DIY, but safety, building codes, and electrical rules often require a licensed professional.
Some places allow DIY, but many require a pro.
Watch Video
Top Takeaways
- Plan around your actual energy use and seasonal changes.
- Choose components that suit your roof and shading conditions.
- Understand incentives and financing to improve economics.
- Verify installer credentials and warranties before signing.