Solar Panel to USB-C: A Practical DIY Guide
Learn how to safely power USB-C devices with a solar panel using a regulated charging circuit. This guide covers components, wiring, and safety for DIY solar charging.

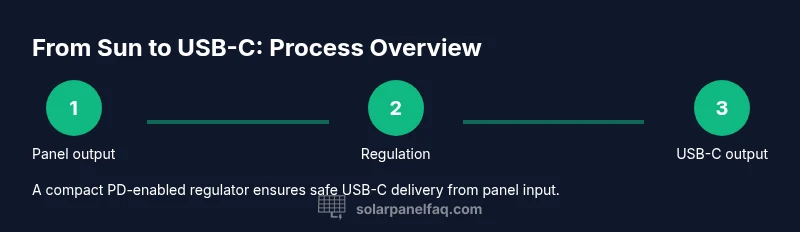
You can power USB-C devices from a small solar panel by using a regulated charging circuit that converts panel output to a stable USB-C voltage. This involves selecting a panel with adequate wattage, adding a voltage regulator or USB-C PD controller, and protecting the circuit from overvoltage and reverse polarity. The steps below outline component choices, wiring, and safety practices for a reliable DIY setup.
Why solar panel to USB-C matters
According to Solar Panel FAQ, converting solar energy to USB-C power can unlock off-grid charging for phones, laptops, and small accessories. This approach is especially useful for campers, RVs, or emergency kits where grid power is unavailable. While a simple diode and a fixed-voltage regulator can work for basic devices, USB-C charging often benefits from a smart regulator or PD (Power Delivery) controller to negotiate safe voltage and current with your device. In practice, a properly sized panel paired with a regulated USB-C interface reduces the risk of damage from voltage spikes and provides a more stable charging experience. Solar energy is abundant but variable; the goal is to capture sunlight efficiently while delivering consistent USB-C power. When done correctly, you can extend the times between full grid recharges and gain more independence in how you power everyday devices.
Quick context and scope
- This guide focuses on portable, small to mid-size panels (roughly 5–15W) and a USB-C charging interface capable of delivering at least 5V with current negotiation when needed.
- It covers essential safety features: reverse-polarity protection, overcurrent protection, and thermal management.
- It does not replace professional solar installations for high-watt applications, but it provides a solid DIY path for personal devices and small gadgets.
Core takeaway
The core idea is to convert variable panel voltage to a stable USB-C-compatible output using a regulator/PD module, while safeguarding devices with protection components and a safe enclosure. The result is a portable charging solution that works under sunny conditions and has fail-safes for safety and longevity.
Tools & Materials
- Small solar panel (5–15W, 5V nominal or higher)(Higher wattage panels provide more reliable USB-C charging; check Voc under your climate conditions)
- USB-C PD regulator / buck-boost converter(Choose a module that can negotiate USB-C PD or at least provide a stable 5V output with current limit)
- Reverse-polarity protection diode(Prevents damage if panels are wired incorrectly)
- USB-C PD controller or PD-enabled charging IC(Enables safe voltage negotiation for PD-compatible devices)
- Multimeter(Measure Voc, Vout, and current during testing)
- Hook-up wires and alligator clips(Short, robust connections for quick testing)
- Enclosure or project box(Helps protect components and keep wiring tidy)
- Soldering iron and spacer tools(Optional for permanent connections and secure joints)
- Heat shrink tubing / electrical tape(Insulation and strain-relief for exposed connections)
Steps
Estimated time: 60-120 minutes
- 1
Gather and inspect components
Collect the panel, regulator/PD module, protection diode, wiring, and a multimeter. Inspect each part for visible damage, and verify ratings match your intended USB-C output. This baseline check helps prevent surprises during assembly.
Tip: Lay out components on a non-conductive surface to avoid accidental shorts. - 2
Measure panel output under sun
Connect the multimeter to the panel terminals to record open-circuit voltage (Voc) and short-circuit current (Isc) in bright sunlight. This data informs regulator selection and safe operating ranges.
Tip: Take readings in direct sun and note how temperatures affect Voc. - 3
Select appropriate regulator and PD interface
Choose a regulator that can deliver the USB-C voltage profile you need (at least 5V) and a PD-enabled controller if you plan to negotiate higher voltages. Ensure current rating exceeds your device needs.
Tip: Prefer modules with built-in overcurrent and overtemperature protection. - 4
Wire protection diode and regulator input
Connect the reverse-polarity diode in series with the panel output to guard against reverse connection. Then route the panel output to the regulator input according to the module’s datasheet.
Tip: Solder joints cleanly or use secure crimp connectors; avoid loose wires near hot components. - 5
Connect regulator output to USB-C port
Wire the regulator’s output to the USB-C PD port or USB-C output interface, ensuring correct polarity and shielding. If using a PD controller, follow its configuration steps for voltage negotiation.
Tip: Test with a dummy load before plugging in a real device. - 6
Test performance and safety
Power the assembly under sun, measure Vout at the USB-C port, and verify current limit behavior with a load. Check for heating and enclosure temperature; adjust placement if needed.
Tip: Leave a small air gap around heat-generating parts to improve cooling. - 7
Package for portability
Place components in a compact enclosure, label ports, and organize cables with strain reliefs. This reduces risk of shorts during transport and makes field testing easier.
Tip: Use cable ties or velcro straps to keep wires tidy and prevent tugging.
Frequently Asked Questions
Can a USB-C device be charged directly from a solar panel without regulation?
Direct charging from a solar panel without regulation is not recommended. USB-C devices expect stable voltage and current; panel output can vary with sunlight and temperature, risking damage. Use a regulator or PD controller to maintain safe USB-C output.
No. You should use a regulator or PD controller to keep USB-C output stable and safe for your devices.
What determines the panel size I need for USB-C charging?
Panel size depends on the device's charging rate and the expected sun exposure. A larger panel offers better consistency in fluctuating light conditions but will be bulkier. Use a panel that can supply sufficient wattage for your typical draw plus a safety margin.
Panel size should match your device's charging needs and account for sunny vs cloudy conditions. Bigger panels are more forgiving.
Do I need USB-C Power Delivery, or is 5V output enough?
PD is beneficial if you plan to charge PD-compatible devices at higher voltages. If your devices only require 5V, a regulated 5V output may suffice. PD controllers negotiate voltage to match the device, reducing heat and time.
PD helps negotiate higher voltages when needed, but if your devices only need 5V, a fixed regulator can work.
Is it safe to leave the setup outdoors?
Outdoor use is possible if you protect exposed electronics from moisture, dust, and temperature swings. Use a weatherproof enclosure and secure mounting to prevent wind damage. Check for condensate after rain.
Yes, with proper weatherproofing and secure mounting.
What maintenance is needed for a solar-to-USB-C setup?
Regularly inspect wiring, connectors, and the regulator. Clean panel surface to maximize light capture and verify voltage/current periodically. Replace any worn components promptly.
Inspect cables, keep the panel clean, and test regularly.
Can I scale this for larger devices like laptops?
Laptop charging generally requires higher wattage and a robust PD solution. A larger panel and an advanced regulator with PD negotiation is necessary. For most laptops, expect a more complex setup.
Laptops can be charged, but you’ll likely need more wattage and a PD-capable system.
Watch Video
Top Takeaways
- Choose a panel with adequate wattage for USB-C charging needs
- Use a PD-capable regulator for safe, negotiable USB-C output
- Protect against reverse polarity and current surges
- Test under sun and monitor temperature for safety
- Enclose and organize components for portability