How to know if solar panel is charging Ring camera
Learn how to verify your Ring camera is charging with a solar panel, including signs of charging, battery health indicators, and troubleshooting tips for reliable power.

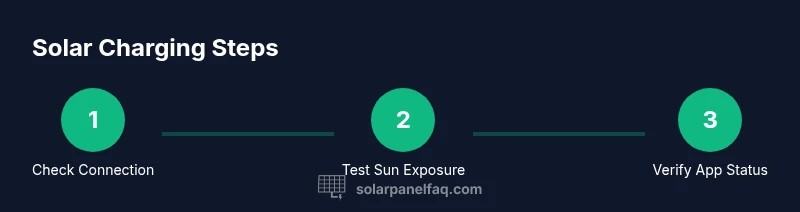
Your goal is to verify that a solar panel is charging a Ring camera. Start by confirming the panel is correctly connected to the camera and receiving adequate sunlight. Check the Ring app for battery/charging indicators, and, if supported, read live voltage or current from the panel. Monitor performance over several days to confirm consistent charging and normal operation.
Understanding Solar-Powered Ring Cameras
Solar-powered Ring cameras rely on a dedicated solar panel to replenish the internal battery, reducing the frequency of battery changes. When you set up a Solar Panel kit, the goal is steady, reliable power in outdoor settings, even in remote locations. This article addresses the practical question of how to know if solar panel is charging ring camera, and it does so with actionable steps, from physical checks to app-based signals. The charging efficiency depends on sunlight exposure, panel orientation, shading from trees or buildings, and the camera’s firmware. In most setups, you’ll see a combination of indicators: the camera maintaining operation, the battery level either growing over days or remaining stable, and in some cases, a clear “solar” or “charging” status shown in the Ring app. By understanding these factors, homeowners can optimize placement and maintenance to maximize uptime.
Signs You’re Seeing Real Charging Signals
- Continuous operation during daylight hours
- Battery indicator trending upward over several days
- App status showing solar as the power source on devices that support it
- Consistent footage and reliability even in mixed weather
If you notice the camera frequently dropping offline or battery percentage slowly declining despite sun exposure, it’s a sign you may need to adjust panel position, clean the panel surface, or inspect the cable.
How to Verify Panel Connection to the Ring Camera
Start with the physical connection. Ensure the solar panel cable is securely attached to the camera’s charging port or to the included solar adapter, and verify the panel is mounted in a location with direct sunlight for most of the day. Check for signs of wear on connectors, loose screws, or damaged seals. Inspect the panel surface for dirt, debris, or snow that could block sunlight, and clear it carefully with a soft cloth. If your setup uses a mount, confirm the panel angle is optimized to capture sun across peak hours. Finally, confirm the cable path is not pinched by mounting hardware or obstructed by nearby branches.
Reading Charging Status in the Ring App
Open the Ring app and navigate to your device (the camera). Look for the battery status and any charging indicators. Some models show a symbol or text indicating that charging is active, while others display a battery percentage that should gradually improve with consistent sunlight. If the app shows “Power Source: Solar” or a solar charging indicator, that is a positive sign. Keep in mind that some firmware versions may not expose precise charging data; in those cases, rely on the battery trend over several days to assess charging reliability.
Measuring Panel Output (If Available)
If your camera and panel support output readings, you can use a multimeter to measure the panel’s voltage at the connector or the camera’s charging input. Set the meter to DC voltage, connect appropriately, and compare readings to the panel’s rated output under full sun. Do not touch exposed live contacts beyond your comfort and safety threshold, and avoid invasive testing that could void warranties. If readings stay near zero in good sun, there may be a wiring issue or panel fault that needs attention.
Common Troubleshooting Scenarios
- Shading from trees or buildings reduces panel output; trim branches or relocate the panel.
- Dust, pollen, or bird droppings on the panel surface blocks sunlight; clean with a soft cloth and mild cleaning solution.
- Damaged cables or connectors; replace or repair as needed.
- Degraded battery in the Ring camera may require service or replacement if charging remains inconsistent.
- Firmware updates occasionally adjust charging behavior; ensure the device is up to date.
Best Practices for Reliable Solar Charging
- Place the panel to maximize sun exposure during the camera’s most active hours.
- Keep the panel clean and unobstructed; wipe with a soft, damp cloth as needed.
- Inspect cables and connectors annually for wear and corrosion.
- Consider a higher-output panel if your installation faces frequent shading or long mounting distances.
- Monitor battery levels regularly after any adjustment to ensure charging has improved.
Tools & Materials
- Multimeter or voltage tester(Use to check panel output at accessible test points; handle with care.)
- Ring camera user manual or model guide(Refer to charging specifications and compatible panel kit.)
- Replacement mounting hardware (optional)(If relocation is needed for better sun exposure.)
- Cleaning supplies (soft cloth, mild cleaner)(For removing dust and debris from the panel surface.)
- Safety gloves (optional)(Helpful when handling metal mounts or sharp edges.)
Steps
Estimated time: 45-75 minutes
- 1
Inspect physical connections
Check that the solar panel cable is firmly connected to the camera’s charging input or the provided adapter. Look for any signs of wear on the connectors, and ensure the plug is seated fully. If a quick loose connection is detected, reseat and test again.
Tip: A loose connection is a common culprit; reseating once can restore charging without more work. - 2
Verify panel orientation and sun exposure
Confirm the panel is oriented to capture direct sunlight for the majority of the day. Adjust angle up to the recommended range for your panel model and season. Check for shading from nearby branches, vents, or walls that could cast shadows during peak hours.
Tip: Aim for at least 4–6 hours of direct sun on the panel during typical daily hours. - 3
Check for surface cleanliness
Dust, pollen, or snow can significantly reduce output. Wipe the panel surface with a soft cloth dampened with mild cleaner, then dry with a lint-free towel. Recheck after cleaning to see if charging improves.
Tip: Never use abrasive cleaners or sharp tools that could scratch the panel. - 4
Review Ring app charging indicators
Open the Ring app and review the device health or battery status. Look for any note indicating solar charging is active and watch the battery percentage trend over the next day or two. If the app shows the camera remains online with solar as the power source, you’re likely charging.
Tip: Document battery level at different times to establish a trend and confirm charging stability. - 5
Optional: measure panel output
If your setup allows, use a multimeter to measure the panel’s voltage in direct sun. Compare to the panel’s rated output to verify it’s delivering expected power. Do not test if you’re unsure about safe handling of electrical components.
Tip: Keep test points stable and avoid touching live contacts to reduce shock risk. - 6
Triage and adjustments
If charging is inconsistent, relocate the panel, consider a higher-output model, or check for longer cable runs that introduce resistance. Ensure firmware on the Ring camera is up to date and reset the device if the charging signal seems stuck.
Tip: Small changes in location or orientation can yield noticeable gains in charging reliability.
Frequently Asked Questions
How can I tell if my Ring camera is charging with a solar panel?
Check the camera's status in the Ring app for battery health and look for any charging indicators. Ensure the panel is properly connected, unobstructed, and receiving adequate sunlight. If the app shows a solar source or a rising battery level over several days, charging is occurring.
In the Ring app, check the battery status and look for a solar charging indicator. Ensure the panel is connected and getting sun, then watch the battery level rise over a few days.
What should I do if the app shows no charging indicators?
First confirm the physical connection and sunlight exposure. Clean the panel surface, inspect the cable for damage, and restart the camera if needed. If problems persist, consider relocating the panel to a sunnier spot or replacing damaged components.
If there are no charging indicators, check connections and sun exposure, clean the panel, and reboot the camera. If it still fails, move the panel or replace faulty parts.
Can I measure solar panel output safely?
Yes, with proper precautions. Use a multimeter to test voltage at the panel’s output under direct sun. Do not touch live contacts and follow device safety guidelines. If unsure, consult the manufacturer or a professional.
You can measure output with a multimeter, but be careful. Test in direct sun and avoid touching live parts.
Is shadier weather enough to keep charging the Ring camera?
Reduced sun reduces charging efficiency. In cloudy or shaded conditions, you may still get charging, but expect slower battery replenishment. Plan for temporary slower charging by ensuring a sunnier orientation when possible.
Cloudy days reduce charging efficiency. You might still charge, but slower, so keep the panel sunnier when you can.
How often should I check charging performance?
Check at least weekly during the first month after installation, then biweekly or monthly once you’ve confirmed reliable performance. Document any drops in battery level or inconsistent charging and adjust placement as needed.
Check weekly for the first month, then every month or so once you’re confident in charging reliability.
Do firmware updates affect charging?
Firmware updates can tweak charging behavior or power management. Keep the Ring camera updated to ensure compatibility with solar charging features and optimal performance.
Firmware updates can change charging behavior, so keep your device updated.
Watch Video
Top Takeaways
- Verify physical connections first and foremost.
- Maximize sun exposure to improve charging reliability.
- Use the Ring app indicators to confirm charging signals.
- Clean and inspect panels regularly to sustain performance.
- If in doubt, test cautiously with a meter and adjust placement.