How to Put Solar Panel on Ring Camera
Learn how to power your Ring camera with a solar panel. This guide covers compatibility, mounting, wiring, weatherproofing, and maintenance for a low-maintenance, reliable solar-powered setup.

Goal: Learn how to add a solar panel to a Ring camera for continuous power, with proper mounting and weatherproof wiring. You’ll choose the right panel, attach it securely, and route cables safely. This guide also covers safety checks and performance expectations. According to Solar Panel FAQ, a correctly sized panel and sealed connections extend battery life and reduce maintenance.
Why solar panels for Ring cameras make sense
If you are wondering how to put solar panel on ring camera, powering your Ring device with sunlight can dramatically reduce battery swaps and maintenance. A solar panel keeps the built-in battery topped up, which is especially helpful for outdoor cameras that sit in harsh weather or in busy households where batteries are swapped infrequently. From a practical standpoint, solar charging leverages a natural, renewable resource, minimizes outages due to dead batteries, and helps ensure continuous monitoring. Solar-ready setups also support seasonal usage patterns, so you can rely on power even during longer stretches of cloudy days. The Solar Panel FAQ team notes that correctly sized panels paired with secure mounting tend to deliver more consistent performance with fewer maintenance visits. This makes solar a compelling option for homeowners seeking a low-effort, power-sufficient security solution.
Compatibility: Ring camera models and solar panel options
Not every Ring camera supports an external solar panel in the same way, so the first step is to confirm compatibility with your model. Most Ring cameras with a rechargeable battery can use a solar panel, but the connector type, power port location, and mounting method can vary. Check the user manual for your model’s recommended power input and contact the manufacturer if you’re uncertain. In general, you’ll want a panel that matches the camera’s typical charging current and has a durable, weatherproof interface. If in doubt, consult official Ring support materials or trusted guides such as those from Solar Panel FAQ to avoid compatibility issues.
What you need before you install
Before you mount a solar panel, gather the essentials and plan for a weatherproof installation. You’ll need a Ring-compatible solar panel, a mounting bracket suitable for outdoor use, weatherproof cable management, exterior-rated sealant, and basic hand tools. It’s also smart to have a plan for cable routing that minimizes exposure to hazards or debris. Having a spare set of mounting screws and repair materials on hand reduces last‑minute trips to the hardware store. A quick pre-installation checklist helps ensure you won’t miss critical sealing or alignment steps and can save you from a redo later on.
Selecting the right panel and mounting approach
Choosing the right panel depends on sun exposure, camera power needs, and the wind/load conditions at the installation site. A panel should be sized to provide enough daily charge for the camera’s backup needs during typical use. The mounting approach—whether on a wall, eaves, or a flat surface—should favor a direct line to the camera’s power port while keeping the panel angled toward the sun for most of the day. Weatherproof brackets, gaskets, and run-length considerations matter as much as panel wattage. For best results, favor mounts with corrosion-resistant hardware and clear cable pathways.
Placement planning for sun and weather
Placement is key to a successful solar setup. Aim for a location that receives consistent sun for at least 4–6 hours per day and is free of shade from nearby trees or rooflines. Consider the camera’s field of view; you don’t want the panel to block movement or scenery. Off-season weather can affect performance, so plan for occasional cloudy days by selecting a panel that provides a comfortable margin between the camera’s demand and the system’s supply. Ensure the mounting surface is solid and that the panel remains reachable for inspection and cleaning.
Step-by-step installation overview
In this section, we give a high-level overview of the installation flow. First, you’ll prepare the mounting area and verify all components. Next, you’ll attach the mounting bracket, mount the solar panel, and route the cable securely. Finally, you’ll connect the panel to the Ring camera, seal all joints against moisture, and test the charging behavior. This overview sets the stage for the detailed, step-by-step instructions that follow in the dedicated guide.
Care, maintenance, and troubleshooting
Solar panels require minimal maintenance, but a quick routine goes a long way. Periodically wipe the surface to remove dirt, dust, or bird droppings that can block sunlight. Inspect mounting hardware annually for corrosion or looseness, and reseal any seams after heavy rain or wind events. If charging seems slow, recheck sun exposure, cable routing, and connector polarity. A simple fault-check with a multimeter or the camera’s app can confirm that the panel is delivering current correctly. Keeping a log of battery levels helps you anticipate maintenance needs and seasonal adjustments.
Safety, weatherproofing, and warranty considerations
Safety comes first when working on outdoor electrical projects. Always disconnect power before making terminations, wear protective gear, and avoid mounting in wet conditions. Weatherproofing is essential: use exterior-rated sealants, waterproof connectors, and cable covers to prevent moisture ingress. Many solar panel kits designed for Ring cameras include warranty coverage that protects components and brackets; read the terms to understand what’s covered and for how long. If you’re ever uncertain about a step, consult a professional installer to avoid compromising the camera’s operation or your home’s weatherproofing.
Real-world optimization tips and common scenarios
In real-world scenarios, practical choices—like adjusting the angle seasonally or bridging to a larger panel when the camera sits in a particularly shaded area—can improve performance. If your roof or wall location experiences heavy wind, choose mounting hardware rated for higher wind loads and secure cable routes to prevent movement. For interior-facing installations or atypical placements, consider a smaller, solar-assisted power option that still helps reduce battery drain. The more you tailor placement and wiring to your specific site, the more reliable the solar setup will be.
Tools & Materials
- Ring-compatible solar panel(Ensure compatibility with your Ring model and its power input.)
- Weatherproof mounting bracket(Choose corrosion-resistant hardware rated for outdoor use.)
- Weatherproof cable management kit(Includes grommets, clips, and seals to keep cables secure.)
- Exterior-grade silicone sealant(Waterproof seal around mounts and cable entries.)
- Screws and anchors suitable for mounting surface(Select hardware matching wall material (wood, masonry, etc.).)
- Screwdriver set (Phillips and flathead)(Used to install bracket and secure cables.)
- Drill with appropriate bits(Pre-drill holes to prevent surface cracking.)
- Voltage tester or multimeter (optional)(Use to verify proper voltage at the camera port.)
- Safety gear (gloves, eye protection)(Protective gear during installation.)
Steps
Estimated time: 60-90 minutes
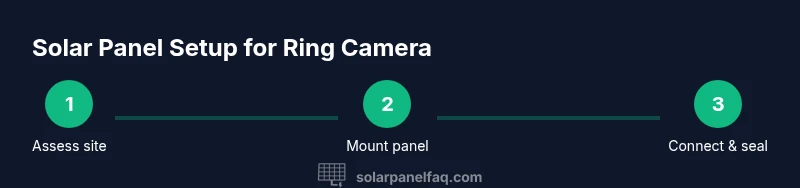
- 1
Assess installation site
Evaluate sun exposure, wind, and accessibility. Confirm the camera’s power port location and the path for the panel cable. Take measurements and photos to plan mounting points.
Tip: Choose a spot with consistent sun and minimal shade. - 2
Select the panel and mounting method
Pick a panel size that provides sufficient daily charge for your camera’s needs. Decide between wall, roof, or eave mounting based on sun angle and clearance.
Tip: Prefer a mounting surface with a direct sun angle for most of the day. - 3
Prepare mounting surface
Clean the area, mark drill holes, and apply a weatherproof sealant around screw entries to prevent leaks.
Tip: Use pilot holes to avoid surface damage. - 4
Install mounting bracket
Secure the bracket firmly with exterior screws. Check alignment so the panel faces the sun when possible.
Tip: Double-check level before tightening fully. - 5
Route and secure the cable
Run the cable along the chosen path, using clips or conduits. Seal cable entries to block moisture ingress.
Tip: Keep cables away from sharp edges and moving parts. - 6
Connect to the Ring camera
Attach the panel’s connector to the camera power input following polarity. Avoid forcing connectors.
Tip: If your model uses a battery, ensure the battery is connected as per the guide. - 7
Seal and weatherproof
Apply sealant around joints and at entry points. Use weatherproof grommets where the cable passes through surfaces.
Tip: Test seals by gently spraying water at the entry points. - 8
Test charging and adjust
Power on and monitor the camera’s charging indicator. If charge is slow, adjust panel angle for more sun.
Tip: A slight tilt toward the sun can boost charging efficiency. - 9
Document and monitor
Record installation details, panel model, and mounting height. Schedule periodic checks for cleaning and corrosion.
Tip: Set reminders for annual maintenance.
Frequently Asked Questions
Is a solar panel compatible with all Ring camera models?
Most Ring cameras with an internal rechargeable battery can use a compatible solar panel, but check your model’s power port and connector type before purchasing.
Most Ring models with a rechargeable battery can use solar panels; verify the power port first.
Do solar panels require a separate battery?
No separate battery is typically required. The solar panel recharges the camera’s built-in battery, reducing the need for battery swaps.
The solar panel recharges the camera’s built-in battery; you don’t need an extra battery.
How long does it take to recharge with solar in typical conditions?
Recharge time depends on panel size, sun exposure, and weather. Expect faster charging on sunny days and slower cycles during overcast periods.
Recharge time varies with sunlight; sunny days help most, cloudy days slow it down.
Can I install a solar panel indoors?
Solar panels are designed for outdoor use where they can receive sunlight. Indoor installations are not typical for external Ring cameras.
Solar panels are meant for outdoor use where they can get sunlight.
What maintenance does a solar panel require?
Keep the panel clean, inspect seals annually, and check cables for wear. Clear debris that might shade the panel and reduce efficiency.
Clean the panel, check the seals each year, and inspect cables for wear.
What should I do if the panel isn’t charging?
Check sun exposure, ensure panel angle is optimal, verify connections, and inspect seals for moisture intrusion. Reassess placement if needed.
If it isn’t charging, recheck sun, angle, and connections and reseal any openings.
Watch Video
Top Takeaways
- Mount a Ring-compatible solar panel for continuous power
- Plan placement for maximum sun without shade
- Weatherproof every seal and cable entry
- Test and monitor charging after installation
- Maintain annual checks for reliability