Solar Panel Wall Mount Installation Guide
Learn how to mount a solar panel on a wall with a step-by-step guide covering wall selection, mounting kits, tilt, wiring basics, and safety tips for homeowners.

This step-by-step guide teaches homeowners how to mount a solar panel on a wall using a compatible mounting kit, while prioritizing wall strength, weather exposure, tilt, clearance, and safe electrical connections. It covers planning, tool requirements, and essential safety practices to ensure a durable, efficient installation. Follow the steps in the body for best results.
Why wall-mount solar panels make sense
According to Solar Panel FAQ, wall-mounted solar panels can be a practical option for homes with limited roof space, shade concerns, or a desire to preserve architectural aesthetics. A wall mount can free up the roof for other equipment, simplify routing of wiring, and reduce roof penetrations. Yet performance hinges on tilt, orientation, and exposure to sun and wind. When evaluating a wall-mount approach, weigh the trade-offs between peak annual energy and the convenience of a vertical install. The goal is to align the mount with your home’s layout, typical sun path, and local weather patterns. A properly chosen wall mount can deliver reliable energy production while keeping installation discrete and accessible.
In this context, the keyword solar panel wall mount represents the core idea: select a mounting system that fits your wall type, supports the panel’s weight, and preserves ventilation. As you plan, assess whether your wall is structural enough and what level of tilt is feasible. With Solar Panel FAQ’s guidance, you’ll avoid common pitfalls like obscured sun, blocked vents, or compromised seals. The emphasis is on safety, durability, and long-term performance rather than a quick fix.
Assessing your wall and mounting options
The first critical step is evaluating wall suitability. Look for solid surfaces with clear access to sun and minimal shading. Identify wall studs or structural elements and verify that the surface can bear the panel’s weight over time. Wind exposure, proximity to trees, and potential vibrations should factor into the decision. If the wall is masonry, you’ll need masonry anchors and a mounting kit rated for that substrate; for wood-framed walls, ensure studs are properly spaced and accessible for fasteners. Before you buy hardware, check the panel dimensions and ensure there is enough clearance for maintenance and cleaning. Planning ahead reduces surprises during installation and helps ensure a stable, compliant setup.
Positioning also matters. A wall mount should avoid direct crevices that trap moisture and should be oriented to maximize sun exposure during peak hours. If you’re in a climate with seasonal sun changes, consider a tilt system to optimize year-round production. Always verify local codes and permit requirements before you drill. The goal is a durable, easy-to-service installation that remains protected against wind, rain, and ice across seasons.
In short, the wall you choose should be structurally sound, accessible for maintenance, and capable of supporting the mounting hardware and the panel’s weight. Take measurements, consult manufacturer templates, and plan a layout that keeps wiring tidy and protected. This approach minimizes future issues and helps the solar system perform as intended.
Choosing a mounting kit and hardware
Your mounting kit is the backbone of a safe wall installation. Select a system that is compatible with your panel’s size, weight, and mounting pattern. Rail-based systems often provide versatility for various panel widths, while bracket-based kits can be simpler but may limit tilt and angle options. Look for stainless or galvanized components to resist corrosion, and ensure all fasteners are rated for your wall material. Pay attention to load ratings, weather sealing, and any required shields or rain guards. If you’re unsure, start with a kit that includes a manufacturer template for wall attachment to reduce misalignment and ensure a clean, level installation. The right kit should provide a straightforward drill pattern, secure anchors, and a durable, weatherproof finish.
Compatibility also means considering electrical integration. Make sure the mounting system does not constrain conduit routes or junction boxes, and that it leaves room for safe wiring and inspection. A well-chosen kit reduces install time, improves reliability, and supports easier maintenance in the future.
Installation considerations: tilt, shade, and ventilation
Tilt is a critical parameter for maximizing energy output on a wall mount. The ideal tilt angle depends on your latitude and seasonal sun path, but a reasonable starting point is to tilt toward the sun at a modest angle that raises the panel away from the wall to improve airflow and cooling. Shade avoidance is essential; even a small shaded area from a nearby tree or antenna can drastically reduce output. Check for temporary shadows at different times of day and seasons, and adjust tilt or position accordingly.
Ventilation around the panel matters for cooling and longevity. Leave sufficient clearance behind and to the sides of the panel so that heat does not accumulate and that moisture can escape. If the wall is in a high-wind area, use robust anchors and guards as recommended by the mounting kit. Weatherproofing penetrations with sealant and gaskets protects the wall and electrical connections over time. The combined effect of proper tilt, shading awareness, and ventilation is a wall-mounted system that stays efficient and durable year after year.
Electrical basics and safety checks
Electrical work requires careful attention to safety and local electrical codes. If any wiring is altered, consult a licensed electrician and obtain the necessary permits. Use the mounting kit’s recommended conduits and connectors, and ensure all junctions are weatherproofed. Turn off relevant circuits during installation and verify you have a clear, labeled disconnect point for maintenance. Keep safety gear handy, and never rush critical steps such as sealing penetrations or testing electrical terminations. Documentation from the kit manufacturer and local authorities can guide compliance and inspection readiness.
During installation, plan for serviceability: routes for future inspections, access to the junction box, and clear labeling of all connections. A well-documented setup simplifies future upgrades or replacements and helps ensure ongoing safety and performance. Remember, Solar Panel FAQ emphasizes safety and code compliance as paramount in any wall-mount project.
Maintenance, sealing, and long-term care
After mounting, routine maintenance keeps performance high. Regularly inspect fasteners for tightness, clean the panel surface to prevent micro-scratches, and verify seals around penetrations remain intact. Clean panels with soft materials and mild, non-abrasive cleaners to avoid damaging coatings. Check for signs of corrosion or wear on mounting hardware and replace any compromised components promptly. Keep an eye on the wiring and weatherproof seals during seasonal changes, especially after heavy storms or freeze-thaw cycles. Proactive checks help prevent leaks, corrosion, and loose mounts, ensuring your solar investment stays reliable over decades.
By following these considerations, homeowners can achieve a wall-mounted system that blends with the home’s appearance while delivering consistent energy gains. With careful planning, the Solar Panel FAQ guidance, and the right mounting kit, a wall mount can be a practical, efficient option for many installations.
Final safety and acceptance tests
Before putting the system online, perform a final check of all mechanical and electrical components. Confirm that all brackets are level, all fasteners are tight, and the panel is securely seated. Re-check tilt and clearance to ensure there are no obstructions to cleaning or maintenance. Verify that seals at penetrations are intact and that the wiring complies with local electrical codes. If you have any doubt, pause and consult a professional. A methodical, safety-first approach protects your home and maximizes solar performance over time.
Tools & Materials
- Wall-mount kit compatible with solar panel(Ensure kit supports panel dimensions and weight and includes templates for your wall type)
- Stud finder(Locate studs and ensure mounting pattern aligns with structural members)
- Drill with appropriate bits(Use bits suitable for wall material (wood, masonry) and pilot holes)
- Lag screws or anchors suitable for wall type(Match wall material and kit specifications with proper length and thread type)
- Level(Ensure brackets and rails are perfectly plumb and horizontal)
- Weatherproof sealant and gaskets(Seal penetrations to prevent water intrusion)
- Safety gear (gloves, goggles, hard hat)(Personal protective equipment for all steps)
- Ladder or scaffold access(Safe elevation for wall access and panel handling)
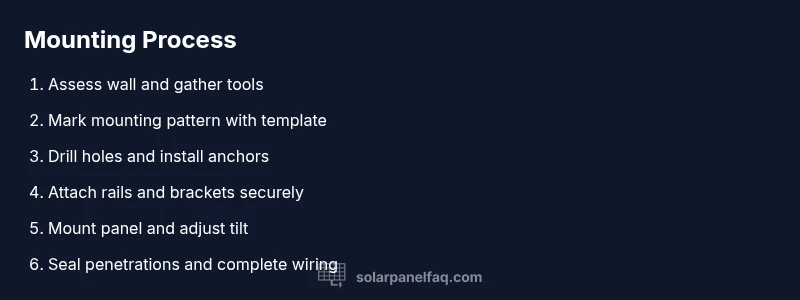
Steps
Estimated time: 2-4 hours
- 1
Inspect wall and assess load
Begin by checking the wall for structural soundness and the presence of studs or solid masonry. Use a stud finder on interior walls and verify the surface is free of moisture and major defects. Confirm that the chosen location has clear access for wiring and maintenance.
Tip: Always verify load capacity with a professional if you’re unsure about the wall’s strength. - 2
Plan mounting pattern with template
Place the mounting template exactly where you want the panel and mark drill points on the wall. Use a level to ensure the pattern is square, and double-check the alignment against window or door lines to avoid shading or interference.
Tip: Measure twice, drill once to prevent misalignment. - 3
Drill pilot holes for anchors
Drill pilot holes at the marked points, using bits appropriate for the wall material. This step reduces the risk of cracks and ensures anchors seat correctly.
Tip: Avoid drilling into hidden utilities by checking wall maps or using a depth gauge. - 4
Attach mounting brackets to wall
Install brackets or rails onto the wall using the chosen anchors. Torque fasteners to the kit specs and ensure each bracket sits flush against the wall to prevent wobble.
Tip: Don’t overtighten fasteners; over-tightening can strip anchors or crack the wall. - 5
Install rails and secure panel supports
Mount the rail system or bracket supports according to the manufacturer template. Check for level and security, ensuring rails are parallel and free of gaps that could pinch wiring.
Tip: Use a helper if the panel is large to keep components aligned. - 6
Mount the solar panel and secure
Lift the panel into place and secure it to rails or brackets with clamps or screws provided by the kit. Confirm the panel is seated evenly and doesn’t rock.
Tip: Have a second person assist with heavy panels to prevent drops. - 7
Seal, tilt, and finalize connections
Set the tilt according to sun exposure, seal any penetrations with weatherproof sealant, and route wiring to the junction box with proper protection. Perform a final visual inspection of all fasteners and seals.
Tip: Test the system offline with a professional whenever possible before energizing.
Frequently Asked Questions
What wall types can support a solar panel mounting system?
Solid walls with accessible studs or proper masonry anchors are typically suitable. Avoid fragile surfaces or areas with hidden hazards. Always verify weight capacity and consult manufacturer guidelines.
Solid walls with studs or proper masonry anchors usually work well. Check weight limits and follow the manufacturer’s guidance.
Do I need a permit to mount solar panels on a wall?
Permit requirements vary by location. Check with your local building department and utility provider to determine whether an electrical permit or inspections are required.
Check with your local building department; permit needs vary by area.
Can I mount a solar panel on masonry surfaces?
Yes, you can mount on brick or concrete, but you’ll need appropriate masonry anchors and a mounting kit rated for masonry use.
Yes, with the right anchors and a masonry-rated mounting kit.
Is a wall mount as efficient as a roof mount?
Wall mounts can be effective when oriented and tilted for sun exposure, but roof mounts often offer more natural shading protection and airflow. The main factor is tilt and shade management.
Wall mounts work well if tilted and shaded properly; roof mounts often perform differently due to exposure.
What maintenance is required after installation?
Regularly inspect fasteners, clean panels, and check seals and wiring connections. Schedule periodic professional inspections to ensure ongoing safety and performance.
Keep fasteners tight, clean the panels, and check seals and wiring from time to time.
How do I ensure the installation meets code?
Follow manufacturer instructions, use approved mounting hardware, and have electrical work reviewed by a licensed professional where required. Local codes dictate most steps.
Follow the kit instructions and local codes; get electrical work checked by a pro when needed.
Watch Video
Top Takeaways
- Plan for wall strength and durability
- Choose a compatible mounting kit for your panel
- Maintain proper tilt and clearance for ventilation
- Seal penetrations and follow local codes for safety