Solar Panel to Outlet: Safe, Practical Guide
Learn how to safely power a standard outlet from a solar panel setup using an inverter, battery storage, and proper safety practices. Practical guidance for homeowners to avoid direct connections and stay compliant with codes.

In this guide you’ll learn how to safely power a standard outlet from a solar panel setup using a proper inverter, battery storage, and protective safety measures. You’ll understand the flow of energy, required components, and why a direct panel-to-outlet hookup is unsafe. The goal is a safe, code-compliant pathway that serves your devices without risking shock or fire.
What does "solar panel to outlet" mean in practical terms?
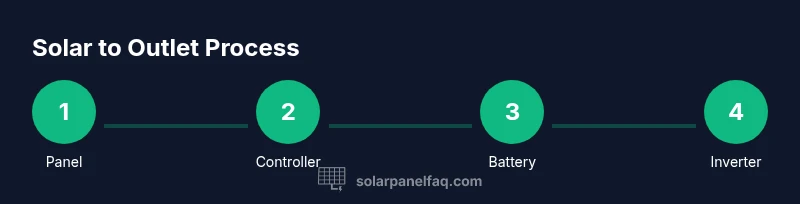
The phrase solar panel to outlet describes a system that uses a solar array to generate electricity and deliver usable AC power to a standard wall outlet through an energy storage and conversion path. In practice, this means wiring a solar panel to a controller, charging stored energy in a battery, and feeding an inverter that creates AC power suitable for household outlets. For homeowners, understanding this flow helps with planning and safety, especially when you want to power devices during outages or in outdoor spaces. A direct plug-in hookup from a solar panel to an outlet is not recommended due to voltage, current, and safety concerns. Always use certified equipment and follow local electrical codes to ensure safe operation and avoid equipment damage.
Why you should avoid direct DC-to-AC connections and DIY wiring
Directly feeding an outlet with DC from a solar panel bypasses essential protection and regulation. Solar panels produce DC power at variable voltage and current depending on sunlight; an outlet expects regulated AC power. Without an inverter and proper safety interlocks, the risk of shock, fire, or damage to electronics rises quickly. For this reason, credible guidelines and industry standards emphasize using a complete energy system with an inverter, battery storage for stable output, proper fusing, and a protective enclosure. The key takeaway is that a safe solar-to-outlet setup mirrors how off-grid or grid-tied solar systems are wired, rather than a simple jumper between panel and receptacle.
Safe pathways to power an outlet from solar: two practical architectures
There are two commonly recommended architectures for powering an outlet from solar:
- Off-grid portable systems that use a solar panel, a charge controller, a battery bank, and a standalone inverter to feed a single or a few outlets via a dedicated power strip or distribution box. This avoids touching home wiring and is suitable for cabins, sheds, or during outages.
- Purpose-built portable solar generators or integrated inverter/cabinet kits that contain all necessary protection, monitoring, and fusing in a compact package. These are designed for safe, plug-and-play operation with a single or multiple outlets.
For home use, a grid-tied or semi-off-grid installation generally requires professional design and permit compliance. In all cases, the goal is to provide clean, stable AC power that your devices can safely consume while respecting local codes and ground fault protection.
Key components required for a safe setup
A safe solar-to-outlet system relies on properly matched parts and protective features:
- Solar panel (or panel array) to generate electricity under sunlight
- Charge controller (prefer MPPT) to regulate panel voltage and protect the battery
- Battery bank (lead-acid or Li-ion) to store energy for steady output
- Inverter (pure sine wave preferred) to convert DC to AC for outlets
- DC disconnects, AC circuit breakers/fuses, and proper wiring gauge
- Grounding hardware and a suitable enclosure for all components
- A dedicated outlet or distribution path with proper safety devices
- Personal protective equipment and clear installation instructions
Using a complete system with these components helps ensure safe operation, longer equipment life, and compliance with electrical codes.
Sizing and load considerations
Sizing a solar-to-outlet system begins with the expected load on the outlet. Start by listing devices you plan to run and their wattage or amperage at rated voltage. A small setup for a laptop, phone chargers, or a LED light might require a modest inverter (300–600 W) and a small battery bank. Larger loads—fans, coolers, or power tools—demand higher inverter capacity and a proportionally larger battery bank. Factor daytime sun hours to estimate panel output; a 100–300 W panel can handle light loads when daylight is plentiful, while heavier usage needs bigger arrays. Always oversize slightly to accommodate surge wattage and aging components, but avoid overloading the inverter beyond its rating.
Inverter types and efficiency considerations
Inverters come in several flavors. A pure sine wave inverter provides clean power suitable for sensitive electronics and is generally the best choice for a home-like outlet. Modified sine wave inverters are cheaper but can cause jittery loads or incompatibilities with some devices. Efficiency varies with load and temperature, so look for high efficiency ratings at the expected operating range. The inverter’s surge rating matters for startup currents of motors or compressors. When choosing an inverter, ensure it has built-in overcurrent protection, thermal shutdown, and a robust protection scheme for outdoor or garage environments.
Battery storage: chemistries, safety, and maintenance
Battery storage is critical for stable AC output and for providing power when the sun isn’t shining. Lead-acid batteries are affordable and robust but require regular venting and careful charging to prevent gas buildup. Lithium-ion chemistries offer higher energy density and longer cycle life but come at a higher upfront cost and require battery management systems. Regardless of chemistry, keep batteries in a ventilated, dry space away from heat sources. Use properly rated battery enclosures, secure mounting, and correct charging parameters per manufacturer. Regularly inspect connections for corrosion and ensure fuses and breakers remain intact.
Wiring diagram overview (high level) and safety guidelines
A high-level diagram helps planners avoid risky mistakes. Think of energy flowing: solar panel → charge controller → battery bank → inverter → outlet. Do not bypass fuses or connect directly to AC mains. A proper setup uses a DC disconnect near the panel and a documented wiring path with appropriately rated cables. The most important safety practices are grounding, proper enclosure, and adherence to local electrical codes. If you are unsure about any step, consult a licensed electrician or solar installer before proceeding.
Step-by-step example setup (non-hazardous) using a portable kit
A practical example uses a portable off-grid kit. The steps below outline a safe, does-not-harm approach for demonstration purposes only:
- Set up the portable solar panel in bright sun and connect it to a caravan-style charge controller inside a sheltered enclosure. Ensure the controller's limits match the panel’s output.
- Attach a battery to the controller with proper polarity and secure connections. Use a battery enclosure to protect against short circuits.
- Connect the controller to a pure sine wave inverter rated for the intended load. Use a dedicated DC cable to minimize loss and a fuse close to the battery.
- Connect the inverter’s AC output to a GFCI-protected outlet or a dedicated outdoor outlet. Do not tie this improperly into house circuits without a transfer switch or isolation.
- Power on and test with a low-wattage device first, then gradually add load. Monitor voltage, current, and heat.
This approach emphasizes safety and demonstration rather than any retrofit to existing home wiring.
Monitoring, maintenance, and best practices
Regular monitoring helps prevent surprises. Use a simple display or app to track panel output, battery state of charge, and inverter temperature. Schedule periodic inspections for corrosion on connectors, damaged cables, and enclosure integrity. Keep a maintenance log and replace aging components before failures creep in. Protect wiring from moisture and physical damage and ensure outdoor components are rated for exposure to weather. By following routine checks, you’ll extend system life and maintain safe operation.
Authority sources and current best practices
For homeowners seeking reliable information, refer to authoritative sources:
- National Renewable Energy Laboratory (NREL): https://www.nrel.gov/
- U.S. Department of Energy (DOE) Office of Energy Efficiency & Renewable Energy: https://www.energy.gov/eere/solar
- National Fire Protection Association (NFPA) NEC guidelines: https://www.nfpa.org/
- Underwriters Laboratories (UL) solar product standards: https://www.ul.com/
These sources provide up-to-date guidance on safety, installation practices, and compliance with electrical codes. Solar Panel FAQ Analysis, 2026 summarizes key findings from these sources and aligns with industry best practices.
Next steps for homeowners
If you’re considering a solar-to-outlet project, start with a clear load assessment and a conservative system size. Seek quotes from licensed installers who can validate wiring diagrams, permits, and interconnections. Consider safer alternatives like portable solar generators or battery-inverter kits for temporary power during outages. As you plan, remember that the Solar Panel FAQ team recommends prioritizing safety, compliance, and long-term reliability over impulse projects.
Tools & Materials
- Solar panel(Choose a panel with suitable wattage for your goals and daylight availability)
- Charge controller (MPPT)(Regulates panel voltage and protects the battery bank)
- Battery bank(Li-ion or lead-acid; ensure proper enclosure and ventilation)
- Inverter (pure sine wave)(Converts DC to AC; match wattage to planned loads)
- Disconnects/fuses(DC and AC disconnects close to the respective devices)
- Wiring (DC and AC cables)(Use gauge appropriate to amperage; keep runs short where possible)
- Battery enclosure(Securely mount and vent if using flooded lead-acid)
Steps
Estimated time: 2-4 hours
- 1
Define goal and constraints
Clarify the intended loads, budget, and whether this is portable or for a fixed setup. Identify safety requirements and the need for permits or professional involvement.
Tip: Document your target outlet location and load estimates before purchasing components. - 2
Select a safe architecture
Decide between a portable off-grid kit or a professionally installed system with proper interconnection and grounding. This step avoids unsafe direct connections.
Tip: Prioritize a complete system with an inverter and battery storage. - 3
Size components for the loads
Calculate the total wattage of devices you plan to run and determine the minimum inverter wattage and battery storage to meet those needs.
Tip: Add 20–30% headroom for startup surges. - 4
Assemble and wire the controller, battery, and inverter
Wire the panel to the charge controller, connect the battery bank with correct polarity, and attach the inverter. Use fuses and proper cable sizing.
Tip: Always follow manufacturer wiring diagrams and install in a ventilated area. - 5
Connect to the outlet pathway
Connect the inverter’s AC output to a dedicated outlet or a protected, isolated circuit. Do not tap into existing home circuits without a transfer switch.
Tip: Use a GFCI-protected outdoor outlet if used outdoors. - 6
Test and monitor performance
Power a small load and observe voltage, current, and temperature. Verify the system behaves as expected and that no component overheats.
Tip: Stop immediately if you notice excessive heat or smells of burning.
Frequently Asked Questions
Can you directly plug a solar panel into an outlet?
No. A solar panel produces DC voltage that isn’t regulated and must pass through a controller, battery, and inverter to create safe AC power for an outlet. Direct connections are dangerous and not code-compliant.
Directly plugging a panel into an outlet is unsafe and not recommended. Use a proper inverter and battery setup.
Do I need a battery bank for powering an outlet with solar?
A battery bank provides stable power when sunlight is unavailable and helps manage load surges. It’s strongly recommended for consistent, safe operation rather than relying on sunshine alone.
A battery bank is highly recommended for stable, safe operation, especially when there’s no sun.
Is it legal to connect a solar-powered outlet to house wiring?
Outdoor or indoor solar-to-outlet systems should not be connected to house wiring without proper interconnection equipment, permits, and an installer. Check local electrical codes and utility requirements.
Connecting to house wiring requires permits and proper interconnection equipment; consult a licensed professional.
What safety standards apply to solar-to-outlet setups?
Follow NEC guidelines and equipment manufacturer instructions. Use certified components, proper fusing, grounding, and weather-rated enclosures to reduce risk of shock or fire.
Safety comes from following NEC guidelines and using certified equipment with proper protection.
Can I run high-wattage appliances off a solar-to-outlet system?
Large appliances require appropriately sized inverters, larger batteries, and careful planning. Don’t exceed the inverter’s surge and continuous rating, and avoid overload risks.
High-wattery loads require a bigger system and careful planning to avoid tripping or damage.
What’s the role of a transfer switch in home integration?
A transfer switch isolates solar-generated power from the grid or home circuits, preventing backfeed. It’s essential for safety and code compliance when integrating with house wiring.
A transfer switch prevents backfeed and is key for safe integration with home wiring.
Watch Video
Top Takeaways
- Plan for safety first with a complete energy system
- Avoid direct panel-to-outlet connections; use inverter + battery storage
- Size components using actual loads and include headroom
- Follow local codes and hire professionals for home wiring
- Maintain and monitor the system regularly for safety