Solar Panel Layout Tool: A Practical Guide for Homeowners
Discover how to choose and use a solar panel layout tool to plan panel placement, shading analysis, and permitting-ready documentation for a safer, more efficient solar installation.

Using a solar panel layout tool lets homeowners map roof space, optimize panel placement, and visualize wiring and shading before purchase. By inputting roof dimensions and sun exposure, you generate layouts, BOMs, and installation-ready reports. This quick guide shows how to choose a tool, run a model, and interpret results for a safe, code-compliant build.
What a solar panel layout tool does and why homeowners should care
A solar panel layout tool is software that helps you model where to place solar modules on a roof, taking into account orientation, tilt, spacing, and wiring routes. It blends architectural data with solar physics to predict energy yield and minimize shading. For homeowners, the key value is early visualization: you can compare layouts, estimate materials, and spot potential problems long before you order equipment or hire installers. According to Solar Panel FAQ, these tools have evolved from rough sketches to integrated planning platforms that combine satellite imagery, roof measurements, and shading analysis into a single plan. With a layout tool, you can test multiple scenarios—different panel counts, mounting names, and racking types—without climbing a roof or entering an installer’s truck. In practice, you’ll export a plan that includes a bill of materials, corner measurements, and a shading map you can share with contractors for bids or permitting. The ability to simulate sun angles across seasons helps you choose the best orientation for your latitude, reducing waste and improving return on investment. The most reliable tools also offer warnings about minimum setbacks, fire clearances, and junction box placements so you stay compliant with local codes. Solar Panel FAQ analysis notes that early modeling reduces surprises during installation.
Core features to evaluate in a layout tool
Layout tools vary in capabilities; essential features include shading analysis (3D), sun-path modeling, module layout grids, import/export, project templates, and BOM generation. Look for variable tilt simulation, panel orientation controls (south-facing optimization for northern latitudes), support for different mounting types (rail, ballast, or fixed), and data import from CAD or GIS. A good tool offers scenario comparison, not just a single plan, and should provide export-ready PDFs, BIM-friendly files, or integration with energy modeling software. Data reliability matters: is the roof model built from satellite data or user-entered measurements? The best options let you adjust for shading from trees, chimneys, or antennas and show you the effect on energy production. For homeowners, the software should be intuitive, with guided wizards and clear visual cues so you don’t need professional training to get useful results. The Solar Panel FAQ team emphasizes that a robust layout tool is a planning partner, not a black-box calculator.
Preparing roof data and inputs
Before you model, collect accurate roof information: roof orientation (compass direction), pitch, dimensions, and any limitations due to skylights or vents. Capture shading sources such as nearby trees, buildings, or settling chimneys. Gather property setbacks and electrical constraints from your local authority. If you have a recent contractor's roof survey or a drone map, import it to the tool. Most layout tools accept multiple data formats: CSV, DXF, or image overlays; you can also manually enter measurements. When inputting data, maintain unit consistency (feet vs meters) and keep a separate sheet for assumptions like tilt angle and allowable row spacing. A quick sanity check is to compare the roof area the tool calculates with your actual roof area; large discrepancies usually indicate a data error. Use a baseline scenario with a modest number of panels first to verify outputs align with your expectations. Solar Panel FAQ guidance suggests starting with a conservative estimate to avoid optimistic miscalculations.
Reading and applying layout outputs to planning and permitting
After running a model, review the layout preview, shading maps, module counts, and orientation. Export a Bill of Materials, a wiring diagram, and a layout drawing suitable for bids and permits. Translate the outputs into permit-ready documents by labeling setbacks, roof anchors, and mounting details. If your locality requires electrical diagrams, ensure the tool’s export includes conductor sizes, conduit routes, and DC-isolator placement. Use the software’s comparison feature to test alternate strings and keep track of changes with versioning. Validate results against common engineering norms: module spacing, array tilt, and safe clearance around edges. Finally, share the report with your installer and electrical inspector for feedback; the more precise your data, the smoother the permitting and installation will be. The Solar Panel FAQ team emphasizes validating tool outputs with a professional when in doubt.
Common mistakes and how to avoid them
Relying on a single layout without cross-checking shading at different times of day and year is a frequent error. Ensure units align with the tool’s defaults; mixing metric and imperial values can produce erroneous results. Don’t skip data verification; misread roof orientations or forget to account for roof obstructions like vents or skylights. Avoid over-optimistic panel density that ignores mounting hardware or ballast limitations. Always save incremental versions of your project to track changes and rollback if needed. Finally, don’t treat the tool’s output as the final installation plan—use it to inform contractor discussions, then verify with a site survey.
Real-world scenarios: roof types, shading, and orientation
Flat roofs, pitched roofs, tile roofs, and metal roofs each interact differently with layout tools. A flat roof might benefit from ballast mats, while pitched roofs require a stand-off height to avoid leaks and maximize shading avoidance. Tile roofs add constraints for penetrations and flashing; the tool should support tile-specific mounting patterns. Shading from trees or nearby structures varies by season; plan for worst-case shading scenarios to avoid overestimating yield. In the Northern Hemisphere, southern exposure generally yields the best performance, but local latitude and climate can shift optimum tilt. Consider landscape obstacles like chimneys and vents that create partial shade, and remember to model inter-row spacing that accommodates access and maintenance. Finally, ensure your plan respects fire codes and emergency access requirements; the layout tool should flag potential violations so you can adjust before submitting permits.
How this tool fits into the broader solar project lifecycle
Using a solar panel layout tool is part of a broader lifecycle that includes site assessment, financing, procurement, installation, and commissioning. Start with a validated layout to support bids, choose modules and inverters, and estimate payback using shading-adjusted yields. Export a BOM and installation steps that installers can follow, reducing surprises and speeding up the project. Use the results as a communication bridge with inspectors, financing partners, and your HOA if applicable. After installation, compare measured performance with modeled yields to refine future projects. The Solar Panel FAQ team notes that disciplined planning with a layout tool improves predictability and reduces risk.
Quick-start checklist to kick off your solar layout planning
This short checklist helps you move from hello to a practical plan quickly: (1) define your goals and constraints; (2) gather roof and shading data; (3) pick a layout tool and set up your project; (4) create multiple layout scenarios; (5) export BOMs and wiring diagrams; (6) review with your installer and inspector; (7) save versions and document decisions as you go. A well-documented process reduces back-and-forth during bidding and permits, and it builds confidence in your final installation.
Tools & Materials
- Laptop or tablet with internet access(To run the layout tool, input data, and export reports)
- Measuring tape(For on-roof dimensions and edge clearances)
- Roof data form or mapping app(Capture orientation, pitch, and shading sources)
- Pencil and notebook(Record assumptions, notes, and changes)
- Safety gear (helmet, harness, non-slip shoes)(Important for any roof data collection tasks)
- Drone map or recent roof survey (optional)(Can improve data accuracy for larger roofs)
- Calculator or solar modeling app(Assist in quick yield estimates and checks)
Steps
Estimated time: Total time: 1-2 hours
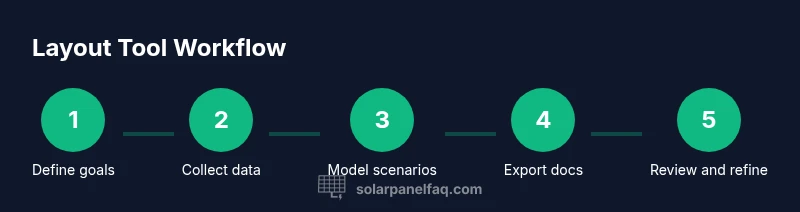
- 1
Define goals and constraints
List target system size, budget range, and any architectural or code constraints. Identify preferred mounting style and space for maintenance access. This establishes the baseline for all layout decisions.
Tip: Document your goals in a single sheet to prevent scope creep. - 2
Gather roof data and environmental inputs
Collect orientation, tilt, roof dimensions, shading sources, and any obstructions. If possible, obtain a recent survey or drone map to increase accuracy.
Tip: Use a single data source and verify units (feet/meters) before modeling. - 3
Choose a solar panel layout tool and set up your project
Select a tool that supports shading analysis and BOM export. Create a new project and import any available roof data or images.
Tip: Enable a baseline scenario with a modest panel count first. - 4
Create initial layout candidates
Generate multiple layouts with different panel counts and orientations. Keep a copy of each variant for side-by-side comparison.
Tip: Label each variant clearly to avoid confusion later. - 5
Evaluate shading, spacing, and wiring plan
Review shading maps across seasons, confirm inter-row spacing, and plan string wiring with safe clearances.
Tip: Check for potential near-term obstructions like tree growth or new buildings. - 6
Export plan and prepare installation checklist
Export BOM, layout drawings, and wiring diagrams. Create a succinct installation checklist for contractors and inspectors.
Tip: Version and save outputs; share for early feedback.
Frequently Asked Questions
What is a solar panel layout tool?
A solar panel layout tool is software that models panel placement, orientation, shading, and wiring on a roof. It helps you visualize designs, estimate materials, and prepare permit-ready plans.
A solar panel layout tool models placement, orientation, shading, and wiring to help plan and permit your system.
Do I need professional software or are consumer apps enough?
Consumer apps handle basic layouts, but professional tools offer more accurate shading modeling and export options for permits and BIM workflows.
Basic layouts work in consumer apps, but professional tools give you better accuracy and documentation.
What inputs are required for accurate results?
Accurate roof dimensions, orientation, tilt, shading sources, and panel specifications are essential inputs for reliable results.
You should provide roof size, direction, tilt, shading sources, and panel details.
How do outputs help with permits and wiring?
Outputs include layouts, BOMs, and wiring diagrams that support permit applications and contractor planning.
Outputs help you prepare permit documents and guide wiring plans.
Can these tools handle tile roofs and flat roofs?
Many tools support multiple roof types, but verify that they handle tile mounting and flat-roof ballast appropriately.
Yes, but check that tile and flat-roof mounting are supported for your project.
Are online layout tools secure and private?
Privacy depends on the tool; review terms and choose options with strong data protection or local data storage.
Privacy varies—check the policy and choose secure tools.
Watch Video
Top Takeaways
- Choose a layout tool with shading analysis and BOM export
- Input roof data accurately and consistently
- Generate multiple layouts and compare results
- Export permit-ready docs and installation checklists
- Validate outputs with a site survey and professional input