Maine Solar Panel Installation: A Practical Home Guide
Learn how to plan, permit, install, and maintain a Maine solar panel system. This practical guide covers climate considerations, permitting steps, equipment choices, and typical project timelines for homeowners.

Plan a safe, code-compliant Maine solar panel installation by assessing roof viability, obtaining permits, selecting compliant equipment, and coordinating interconnection with your utility. This guide outlines Maine-specific codes, weather considerations, and typical timelines, so homeowners can start with confidence.
Maine Climate and Solar Potential
Understanding Maine's climate is essential for a successful solar panel installation maine. According to Solar Panel FAQ, longer winter nights and frequent snow can affect production, while long summer days can boost output. In Maine, roof orientation, shading from trees, and seasonal weather patterns determine system size and tilt. Cloudy days reduce output, but modern panels perform reliably in diffuse light. When planning, consider seasonal snowfall, wind loads, and the possibility of ice dams. A well-designed system compensates for winter limitations with higher tilt and proper racking to shed snow. This section lays the groundwork for choosing the right size, layout, and equipment for your home, balancing winter production with summer peaks. By starting with site assessment and climate realities, homeowners can avoid overextending the system or underutilizing available roof space. Solar Panel FAQ's data-informed guidance helps you set realistic expectations for Maine's conditions.
Local Permits and Codes in Maine
Maine requires building permits for most residential solar installations, along with interconnection approval from your utility and adherence to local zoning rules. Net metering programs in the state encourage excess generation to offset future use, but each utility may have specific timelines and documentation requirements. As you plan, contact your town’s building department early to confirm permit scope, inspection steps, and setback rules. The Solar Panel FAQ team recommends documenting roof age, structural integrity, and any invasive tree shading before submitting applications. Expect potential delays during winter months when inspections slow and weather can limit access to rooftops. Understanding these requirements up front helps prevent rework or stalled projects later.
Sizing Your System for Maine Homes
Your system size should align with annual electricity usage, roof space, and available sun exposure. In Maine, winter demand often drives sizing decisions more than summer peaks, due to longer nights and heating needs. Begin by reviewing 12 months of utility bills and calculating average daily consumption. Then estimate peak sun hours for your location and translate that into a module count and inverter capacity. A properly sized system minimizes unused capacity in winter and avoids oversizing for days with strong sun in late spring. Remember to factor in shading from trees, seasonal snow cover, and the potential for future home energy needs as you consider adding storage or expanding the system later.
Choosing Equipment for Maine Conditions
Choose robust, weather-ready components suited to cold climates. Look for panels rated for wide operating temperatures, inverters with wide input ranges, and mounting systems engineered for snow shedding and wind loads common to Maine roofs. Consider micro-inverters or DC optimizers if shading varies across the array, which can help maximize production in real-world conditions. For warranties, prefer manufacturers with long-term coverage and a service network reachable from your region. The Solar Panel FAQ team notes that equipment compatibility and quality matter more than brand name alone, especially in environments with temperature swings and snow.
Roof Considerations: Shingle vs Metal in Maine
Roof type influences mounting approaches, sealant needs, and long-term durability. Shingle roofs are common in Maine; they require carefully chosen clip mounts or penetrating fasteners with appropriate weatherproofing. Metal roofs tolerate mounting rails differently and can simplify snow shedding, but require compatible flashing and sealant. In either case, plan for future roof work and ensure that mounting hardware is rated for local wind speeds and snow loads. A professional assessment helps determine the best attachment method, whether you’re retrofitting an older roof or installing on a new one. Remember, roof integrity is the foundation of a safe, durable solar system.
Installation Timeline and Phases
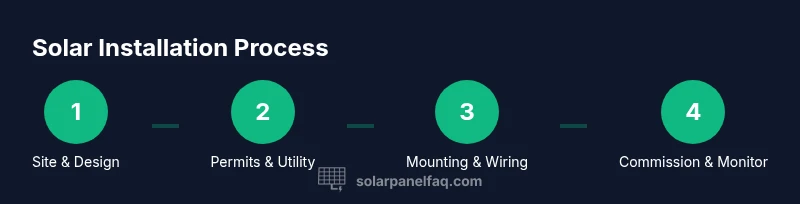
A typical Maine installation progresses through site assessment, permitting, system design, mounting, electrical wiring, commissioning, and inspection. Factor weather windows into your timeline, since heavy snow or rain can delay roof work. Permit approval may take extra time, especially in rural areas with limited staff. If you hire a licensed installer, expect coordinated scheduling between roof work, electrical work, and utility interconnection. The timeline can vary from a few days for a straightforward retrofit to several weeks for larger or more complex projects. Planning ahead reduces idle time and helps you coordinate inspections smoothly.
Hiring vs DIY: Pros and Cons for Maine
DIY solar installations are possible for very experienced homeowners, but Maine’s climate and local codes favor professional installers for safety and compliance. Pros of hiring include rated warranties, certified electrical work, and streamlined permit approvals. Cons may be higher upfront costs but reduced risk of miswiring or roof damage. If you pursue DIY, ensure you understand roof safety, electrical code requirements, and interconnection rules. The Solar Panel FAQ team emphasizes that for most homeowners, a licensed installer offers better protection, predictable results, and peace of mind when negotiating with utilities and inspectors.
Financing, Incentives, and Maine-Specific Considerations
Financing options range from cash purchases to solar leases or power purchase agreements, with various eligibility criteria. Maine residents should explore federal tax credits, utility rebates, and any state or local incentives that may be available, noting that these programs can change over time. In addition to upfront costs, consider long-term maintenance, monitoring subscriptions, and potential savings on electricity bills. Solar Panel FAQ highlights the importance of comparing total cost of ownership, warranty coverage, and projected energy generation when choosing a financing path. Always verify current programs with your installer or utility before committing.
Net Metering and Utility Interconnection in Maine
Net metering policies determine how much of your generation offsets your consumption and how credits are paid out by your utility. Maine's interconnection process typically requires a formal application, a safety inspection, and a technical review of the system. Your installer should handle most documentation and coordinate with the utility to schedule inspections and meter changes. Plan for a few weeks of processing time, depending on your utility’s backlog. Understanding these steps helps ensure a smooth transition from sign-off to energy production and reduced bills.
Maintenance, Cleaning, and Warranties for Maine Homes
Regular maintenance extends the life and performance of your solar system. In Maine, snow removal from panels should be done carefully to avoid damaging modules. Clean panels only when safe and dry to prevent slip hazards and fall risks. Keep an eye on seals around racking and conduit entries to prevent moisture intrusion during freeze-thaw cycles. Review inverter and monitoring warranties each year, and schedule annual checkups with your installer. A well-documented maintenance plan helps sustain energy production and protect your investment across Maine's changing seasons.
Common Pitfalls and Troubleshooting
Common pitfalls include underestimating roof condition, ignoring shading from nearby trees, and delaying permits. Skipping a proper derating analysis can reduce system output; failing to verify interconnection requirements can delay activation. If performance drops, start with a quick check of solar irradiance, shading, and overall inverter status. System logs and monitoring data will guide you to the likely cause. The Solar Panel FAQ team advises keeping a close eye on winter performance, as snow, ice buildup, and cold temperatures can mask underlying issues that only become apparent during cold months.
Getting Started: Next Steps for Homeowners
Ready to begin? Start by compiling your energy usage data and checking roof access in good weather. Contact a licensed installer to obtain a preliminary site assessment, a design proposal, and a permit checklist. Gather roof warranty documents and any prior electrical work history to speed up the process. By following these steps, Maine homeowners can initiate a smooth, compliant solar panel installation maine journey and move toward cleaner energy with confidence.
Tools & Materials
- Fall protection harness and safety equipment(Full-body harness, lanyards, anchor points; compliance with fall protection standards)
- Ladder and roof access gear(Stable ladder, roof anchors, and secure footing)
- Roof mounting rails and racking system(Snow-load rated, corrosion-resistant, compatible with roof type)
- Drill/driver, drill bits, and torque wrench(Appropriate bits for mounting hardware; torque specs per manufacturer)
- Wiring tools and electrical components(Conduit, connectors, DC disconnects, combiner boxes)
- Inverter and electrical panel equipment(AC disconnect, conduit, and safe ingress to service panel)
- Safety glasses and gloves(Eye and hand protection during installation)
- Multimeter and testing equipment(Voltage, current, and continuity checks)
- Weatherproof sealant and gaskets(Seal all penetrations; prevent leaks during freeze-thaw)
- Solar panels and mounting hardware(Certified modules and rails compatible with system design)
- Utility interconnection documents(Permit applications, interconnection forms, approvals)
- Documentation for warranties and manuals(Keep digital and paper copies for reference)
Steps
Estimated time: 1-4 weeks
- 1
Assess energy needs and site viability
Review past 12 months of utility bills to determine annual usage, peak demand, and seasonal variability. Identify available roof space, orientation, and shading. This step sets the baseline for system size and layout.
Tip: Gather energy data before site visits; bring a current utility bill for reference. - 2
Verify roof condition and orientation
Inspect roof age, material, and structural integrity. Note prevailing winter wind directions and shade from trees. Confirm roof can support mounting hardware and potential snow load.
Tip: Consider a professional roof inspection if the roof is older than 15 years. - 3
Design layout and module count
Create a layout that maximizes sun exposure, accounts for shading patterns, and fits roof geometry. Decide on string sizing, inverter capacity, and whether microinverters or optimizers are needed.
Tip: Plan for future expansion by leaving space and cable routing routes. - 4
Obtain permits and utility approval
Submit permit applications with your local building department and request interconnection approval from your utility. Prepare drawings, electrical schematics, and system specs as required.
Tip: Start permit requests early to avoid weather-related delays. - 5
Prepare mounting surface and install racking
Install roof mounts or ballast, secure rails, and verify all fasteners are torqued to spec. Ensure all components are level and aligned to the layout.
Tip: Double-check weatherproofing around penetrations before panel mounting. - 6
Mount solar modules on rails
Attach modules using manufacturer-recommended hardware. Maintain proper clearance for ventilation and thermal expansion. Verify mechanical stability after mounting.
Tip: Use non-corrosive fasteners and follow the wind-load instructions. - 7
Wire strings and install DC disconnects
Connect modules in series/parallel as designed, mount DC disconnects, and route conductors through conduits with strain relief. Label all circuits clearly.
Tip: Keep DC conductors away from AC wiring to prevent interference. - 8
Install inverter and connect to electrical panel
Mount the inverter in a ventilated location, run AC wiring to the service panel, and install an appropriate AC disconnect. Ensure grounding per code.
Tip: Consult a licensed electrician to verify wiring and safety clearances. - 9
Schedule inspection and commissioning
Coordinate with the local inspector and the utility for inspection, testing, and interconnection release. Address any punch-list items before energizing.
Tip: Prepare the required inspection packet ahead of the visit. - 10
Set up monitoring and performance checks
Install monitoring software or hardware to track production, panel temperatures, and shading changes. Calibrate alerts for performance drops.
Tip: Review gains monthly and compare to design estimates. - 11
Understand warranties and maintenance
Document panel, inverter, and mounting warranties. Schedule annual checks for debris, seal integrity, and electrical connections.
Tip: Keep a digital library of manuals and warranty dates. - 12
Review energy savings and plan for future options
Evaluate bill reductions after commissioning and explore expansion or storage with a future storage option. Consider energy efficiency improvements for greater gains.
Tip: Set long-term goals and revisit system sizing if energy needs change.
Frequently Asked Questions
Is Maine suitable for solar energy?
Yes. Maine has improving incentives and a growing installer network, and solar can offset heating-related energy usage when sized correctly. Expect seasonal variability, with strong summer sun and winter challenges addressed by system design.
Yes, Maine is suitable for solar energy. Proper sizing and design address seasonal variability and incentives.
Do I need a permit to install solar panels in Maine?
Most residential installations require a building permit and interconnection approval from your utility. Your installer will typically handle the submission process and coordinate inspections.
Most installations need a building permit and utility interconnection; your installer handles most of this.
Can I install solar panels myself in Maine?
DIY installation is possible for very experienced homeowners, but Maine’s codes and safety requirements often favor licensed professionals to ensure compliance and safety.
DIY is possible for skilled homeowners, but professional installation is safer and more reliable in Maine.
What costs should I expect for a Maine solar project?
Costs vary by system size, roof type, and labor, with upfront expenses including hardware, permits, and installation. Plan for ongoing maintenance and potential monitoring fees in your budget.
Costs vary; plan for hardware, permits, labor, and ongoing maintenance.
How can I maximize savings in Maine?
Choose a system sized for your usage, optimize placement for winter production, and pair with energy efficiency upgrades. Monitor performance to ensure you’re meeting projections over the year.
Size appropriately, optimize for winter, and monitor performance to maximize savings.
What maintenance do solar panels in Maine require?
Regularly inspect for snow buildup, debris, and seal integrity around mounts. Clean panels if dirt accumulates and ensure wiring remains secure and dry during freeze-thaw cycles.
Inspect and clean as needed; check seals and wiring for weather resistance.
How long do Maine solar systems typically last?
Most systems are designed for 25+ years, with warranties covering performance and equipment. Regular maintenance helps sustain output over the decades.
Most systems last 25+ years with proper maintenance and warranties.
Watch Video
Top Takeaways
- Plan around Maine’s winter conditions and roof exposure.
- Obtain permits early to avoid delays.
- Choose equipment matched to climate and shading.
- Hire a licensed installer for safety and compliance.
- Set up monitoring to track real-world performance.