Indiana Solar Panel Installation: A Step-by-Step Guide
Learn how to install solar panels in Indiana with a clear, step-by-step guide. From site assessment to commissioning, covers permits, design, safety, and incentives.

This guide walks homeowners in Indiana through a safe, code-compliant solar panel installation, from site assessment to active monitoring. You'll learn required permits, roof and system sizing considerations, and a step-by-step process. Key steps include designing the array, obtaining approvals, installing racking, wiring, and inverter setup, then commissioning and monitoring.
Overview of solar panel installation indiana
Embarking on a solar project in Indiana means balancing climate realities with local regulations. The basic goal is to design a reliable, safe system that reliably meets your energy needs while staying compliant with state and local codes. This guide, tailored to the Indiana environment, walks you through planning, permitting, installation, and commissioning steps. You’ll learn how to evaluate roof suitability, choose a system size, and collaborate with qualified professionals. The approach emphasizes safety, quality, and long-term performance, so you maximize energy production and minimize post-install maintenance. According to Solar Panel FAQ, clear planning reduces surprises and helps homeowners optimize incentives while staying within code requirements. As you proceed, focus on durable mounting, proper wiring, and reliable monitoring to ensure steady performance for years to come.
Legal & Permitting Landscape in Indiana
Indiana's solar installation landscape blends state policy with local jurisdiction requirements. Before any physical work, you’ll likely need permits from your city or county building department and approval for interconnection with the grid. Agencies may require electrical diagrams, equipment lists, and roof condition assessments. HOA rules can also affect rooftop placements, panel color, and mounting details. Net metering remains a key consideration for post-install economics, subject to utility rules and state approvals. Working with a licensed installer helps ensure filings are accurate and timely. The Solar Panel FAQ team notes that getting permits early reduces delays and helps align your project with utility timelines, minimizing the risk of rework during installation.
Site Assessment for Indiana Roofs
A thorough site assessment determines how much sun your panels will receive and whether your roof can support the system long-term. Assess azimuth and tilt for optimal exposure, identify shading from chimneys, trees, or nearby structures, and evaluate roof age and material integrity. If the roof is older, consider replacement or reinforcement before mounting. In Indiana, seasonal snow load and wind exposure are practical considerations influencing mounting choices and panel orientation. A good assessment also includes electrical readiness checks, such as available space for inverters and the position of the main service panel. This due diligence lowers surprises when you install, connect, and commission the system.
System Sizing & Design Considerations
System sizing starts with your annual electricity usage and growth plans. A typical approach is to model a yearly kWh target based on past bills and future needs, then translate that into a number of panels and an inverter rating. Panel efficiency, temperature coefficients, and available roof area determine the final array layout. In Indiana, where summers are hot and winters are cold, system design should account for performance variability across seasons. A well-designed system balances production against system cost, warranty coverage, and available incentives, ensuring a solid payback profile without oversizing critical components.
Equipment & Materials Overview
The core components include solar panels, mounting rails, racking hardware, wiring conduits, a combiner box, an inverter (string or microinverters), and a connection to the electrical panel. Durable, UV-resistant components and weatherproof seals protect against Indiana weather. Quality connectors and correct cable sizing prevent voltage drop and safety hazards. Keeping a spare set of fuses, breakers, and connectors on hand accelerates serviceability. Finally, a cloud-connected monitoring system helps you track production and detect anomalies early, safeguarding long-term performance.
Installer Qualification and Bids
Choosing a qualified installer is as important as selecting equipment. Look for NREL-certified installers, proper licensing, and proof of liability and workers' compensation insurance. Request multiple bids and compare system designs, warranties, and projected performance. Check references and review installation timelines, especially around winter months when weather can affect scheduling. A reputable installer will provide a transparent contract detailing scope, payment milestones, and post-install support. The Solar Panel FAQ team emphasizes evaluating warranties and service levels to prevent gaps in coverage over time.
Installation Process Flow (High-Level)
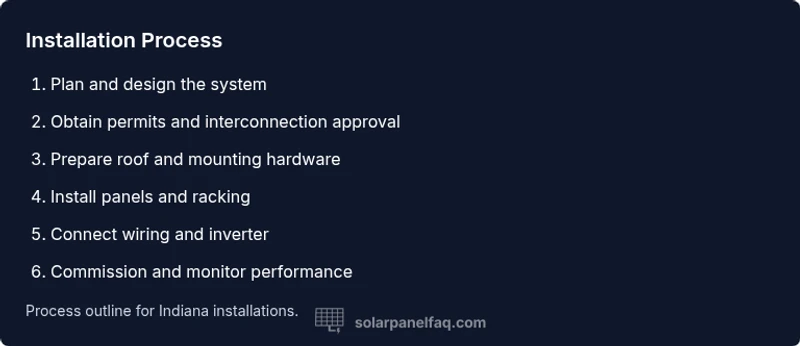
While specifics vary by site, the typical flow follows planning, permitting, roof preparation, mounting, electrical wiring, inverter connection, interconnection with the main panel, and commissioning. The process prioritizes safety with fall protection, lockout-tagout procedures, and proper PPE. On a well-planned site, inspection and testing occur after every major milestone to catch issues early. The goal is a seamless sequence that minimizes downtime and ensures code compliance at every step.
Electrical Wiring & Grid Interconnection
Connecting solar to the home grid involves careful electrical design, conduit layout, and protective devices. Ensure the inverter output is correctly synchronized with the service panel, and use appropriate backfeed protection and rapid shutdown features as required by code. Interconnection with the utility requires accurate meter configurations and may require an interconnection agreement. Maintaining clear labeling and documentation supports safe future work and simplifies audits or warranties. A competent installer helps navigate these complexities and reduces the risk of unsafe configurations.
Commissioning, Monitoring, and Net Metering in Indiana
Commissioning confirms that the system performs as designed, with voltage, current, and timing aligned to the production goals. Post-installation, monitoring dashboards help you verify daily output, detect shading issues, and confirm that the system responds to changes in weather. Net metering economics depend on utility programs and state policy; incentives can influence payback periods and cash flow. The Solar Panel FAQ team recommends validating all performance data against bill history to quantify savings and confirm system reliability over the first year.
Maintenance, Warranties, and Longevity
Regular maintenance keeps performance stable: clean panels, inspect wiring and seals, and verify mounting integrity after severe weather. Warranties typically cover panel degradation for 25 years and inverters for 10-25 years, though terms vary by manufacturer and installer. Schedule annual or biannual inspections to verify physical condition, electrical connections, and monitoring functionality. Keeping records of maintenance, warranties, and inspections supports resale value and future service requests.
Tools & Materials
- Tape measure or laser distance tool(Essential for layout and shading assessment)
- Cordless drill with driver bits(For mounting rails and hardware)
- Solar mounting rails and racking kit(Broad compatibility with common panel sizes)
- Conduit, fittings, and weatherproof cable(Protects wiring and simplifies routing)
- DC/AC combiner box and fuses(Safe electrical distribution)
- Solar inverter (string or microinverter)(Converts DC to AC for home use)
- Safety gear (hard hat, gloves, fall protection)(Mandatory for rooftop work)
- Multimeter and testing tools(Verify voltages, continuity, and isolation)
- Personal protective equipment (PPE) and ladder(Ensure fall protection and safe access)
Steps
Estimated time: 4-8 hours for on-roof installation; 2-3 weeks including permits and inspections
- 1
Plan and design
Define energy goals, select panel type, and map the array layout. Confirm roof orientation and shading patterns to optimize sun exposure. Prepare a preliminary bill of materials and a safety plan.
Tip: Include a simple one-page diagram showing panel positions and wiring routes. - 2
Obtain permits and approvals
Submit plans to the local building department and utility for interconnection. Secure all required permits before any mounting or wiring begins. Track deadlines to avoid delays.
Tip: Ask for a written permit approval and keep it with the project files. - 3
Prepare the roof and mounting hardware
Inspect the roof structure, replace failing shingles if needed, and install flashing and mounting rails according to the manufacturer’s instructions. Ensure all anchors are secure and watertight.
Tip: Verify roof integrity and fix any leaks before mounting. - 4
Install panels and racking
Mount panels onto the rails, ensuring proper spacing and alignment. Tighten hardware to spec, avoiding over-tightening that could crack frames. Route cables as per code and keep them away from hot surfaces.
Tip: Label panel strings early to simplify troubleshooting later. - 5
Connect wiring and inverter
Run conduits to the inverter location, attach DC wiring to the combiner box, and install the inverter. Follow manufacturer guidance for wiring diagrams and safety clearances.
Tip: Double-check polarity and insulation before energizing. - 6
Interconnect with main panel
Tie the system into the home’s electrical panel with backfed breakers, ensuring compatibility with existing circuits. Install rapid shutdown features if required by code.
Tip: Coordinate with the utility to confirm interconnection timing. - 7
Commission the system
Power up the system and verify voltage, current, and performance against design values. Validate monitoring data and ensure alarms are set correctly.
Tip: Document baseline performance and save warranty documents. - 8
Finalize interconnection and inspection
Obtain final inspections from the building department and utility. Confirm meter changes and ensure net metering setup is active.
Tip: Keep a copy of the inspection report and contact info for future service. - 9
Post-install monitoring and maintenance
Use the monitoring dashboard to track daily production and health of the system. Schedule regular cleanings and safety checks, especially after severe weather.
Tip: Set up alerts for performance deviations to catch issues early.
Frequently Asked Questions
Do I need a permit to install solar panels in Indiana?
Yes. Most Indiana municipalities require building permits for solar installations. The process typically includes plan review and inspections before interconnection.
Yes, you usually need a permit and inspection before turning the system on.
Can I net meter in Indiana?
Indiana allows net metering under specific programs; check with your utility and the state utility commission to confirm current rules and program sizes.
Net metering is available in Indiana under certain programs; verify with your utility.
How long does installation take?
Timing varies by system size and contractor. Planning and permits can take weeks; actual rooftop work is typically one to two days.
Timelines vary; planning may take weeks, installation a day or two.
Do HOAs need to approve solar installations?
Some HOAs require approval for roof-mounted panels. Review governing documents and obtain consent before ordering equipment.
HOA approval may be required; check documents.
What warranties should I expect?
Expect 25-year panel warranties and 10-25 year inverters; terms vary by manufacturer and installer.
Most panels have 25-year warranties; inverters vary.
Is there a solar tax credit in Indiana?
Federal solar incentives exist, state programs vary yearly. Check current programs with the Solar Panel FAQ or local authorities.
Federal incentives exist; state programs change yearly.
Watch Video
Top Takeaways
- Obtain permits early and confirm HOA rules.
- Size the system to meet energy goals.
- Choose a licensed installer and inspect warranties.
- Expect incentives to vary by year in Indiana.