Solar p: A Practical Home Guide to Solar Installations
A comprehensive, step-by-step guide for homeowners to understand, plan, and safely implement solar p installations, with maintenance and cost considerations.

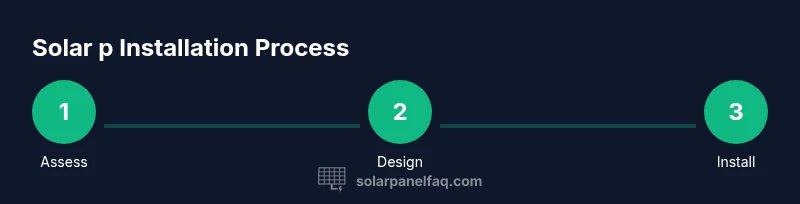
This guide helps homeowners understand solar p: from assessing site suitability and choosing components to safe installation and basic maintenance. You’ll learn practical steps, safety considerations, and how to estimate a typical home setup without overwhelming jargon. It covers permits, inspections, and long-term upkeep to decide if solar p fits your home.
Why solar p matters for homeowners
For many homeowners, solar p systems offer a reliable path to lower electricity bills and greater energy resilience. The term solar p refers to solar panels mounted on rooftops or other sunny locations that convert sunlight into usable power. When assessing solar p for a home, you begin with sun exposure, then evaluate equipment choices, safety measures, and long-term maintenance. According to Solar Panel FAQ, understanding the basics helps homeowners separate marketing claims from practical decisions. A well-planned solar p setup can align with your energy goals, whether you want to power a single appliance or your entire home. This section explores core reasons to pursue solar p, typical wiring configurations, and how to think about durability in real-world conditions. The goal is practical, action-oriented guidance you can apply this week to survey your roof, shade patterns, and electrical panel readiness.
Assessing site suitability for solar p
Site suitability is the foundation of a successful solar p project. Key factors include roof orientation, tilt, and shading from trees or nearby structures. Solar p performance drops with shade, so evaluate the sun path across seasons. A simple shade diary—marking sun hours at different times of day—helps forecast how much energy your solar p array could generate. If you’re using Solar Panel FAQ guidance, you’ll learn to map out how many panels you’ll need and where to place them for optimal exposure. Remember that even modest improvements in orientation can significantly affect output, making site assessment an essential first step for any solar p plan.
Key components for solar p systems
A modern solar p setup comprises several essential parts. At the core are the solar p panels that capture sunlight and the inverter that converts DC to household AC. Mounting hardware, racking, and wiring connect the panels to the inverter and service panel. A combiner box or disconnect switch provides safety and organization for multiple strings of panels, while monitoring software helps you track performance over time. When choosing components for solar p, consider compatibility with your roof type, climate, and electrical load. Clear labeling and proper conduit routing reduce maintenance needs later on. This section highlights how to pair panels with inverters and what role each component plays in a dependable solar p system.
Safety and permitting basics
Safety is non-negotiable in any solar p project. Working on roofs, handling electrical connections, and integrating with the home’s electrical system require attention to fall hazards, electrical codes, and local permits. Check whether your jurisdiction requires solar p permits or inspections, and whether inspections are needed before energizing the system. DIY enthusiasts should temper ambition with respect for safety and legality; many homeowners opt for a licensed installer for the electrical work part of solar p. The Solar Panel FAQ team emphasizes documenting permits, securing safety gear, and coordinating with utility or inspectors to ensure a compliant installation.
Overview of installation approach (high-level)
A high-level overview of solar p installation covers planning, site prep, mounting, wiring, and commissioning. Begin by confirming roof integrity and diagramming panel placement, then install mounting rails and racking. Attach panels and connect to the inverter, followed by wiring to the disconnect and service panel. Finally, perform tests, verify safety clearances, and set up monitoring. This section avoids overly technical steps, but it lays the groundwork for the more detailed STEP-BY-STEP guide that follows. The emphasis remains on safety, proper component matching, and documenting as you go, since well-documented Solar p projects reduce future maintenance concerns.
Maintenance and performance optimization
Maintenance for solar p is mostly about keeping surfaces clean, checking wiring, and monitoring output. Regular cleaning in dusty or coastal environments helps panels run closer to their potential, while inspecting mounting hardware prevents looseness that can arise from wind or thermal cycling. Performance optimization also means keeping the system synced with your energy usage, updating software on monitoring devices, and ensuring inverters operate within their rated temperatures. Solar p users should schedule periodic inspections to confirm no corrosion or loose connections have developed, which protects both safety and longevity.
Cost considerations and ROI basics
Understanding the cost landscape for solar p helps homeowners evaluate value over time. While exact prices vary by region, roof type, and system size, most homeowners plan based on a long-term payoff rather than upfront sticker price alone. Consider hardware costs, installation labor, permits, and potential incentives in your area. Solar p projects often include ancillary costs such as necessary electrical upgrades or panel replacements in the long run. When thinking about ROI, balance upfront investments with anticipated energy savings, system lifespan, and reliability of the components, rather than chasing the lowest initial price.
Common pitfalls and how to avoid them
Common pitfalls for solar p projects include underestimating shade impact, choosing mismatched components, and neglecting safety and permitting. Another frequent issue is DIY electrical work beyond one’s skill, which can cause safety hazards or code violations. To avoid these, perform thorough site analysis, verify component compatibility, and engage licensed professionals for electrical connections when required. Keeping thorough documentation and choosing reputable suppliers reduces the risk of poor performance or warranty disputes later on. The solar p journey rewards careful planning and prudent vendor selection.
Choosing a solar p installer or DIY path
Homeowners face a key decision: DIY solar p installation or professional installation. A DIY path might suit someone with electrical and roofing experience who can handle mechanical and certain electrical tasks safely. In many cases, however, a licensed installer is the better choice for the electrical work, permit handling, and city inspections. If you’re relying on Solar Panel FAQ guidance, make sure you understand local codes, warranty implications, and whether you’ll need post-installation verification from utility or inspectors. Regardless of path chosen, plan for proper training and equipment handling to ensure a successful solar p result.
Long-term resilience and warranty basics
Resilience and warranties are essential for solar p longevity. Read warranty terms carefully for panels, inverters, and mounting hardware, noting coverage duration and what constitutes eligible damage. Regular maintenance and prompt repairs help preserve performance over the system’s life. Solar p warranties often require professional installation for eligibility, so factor this into your plan. Keeping maintenance logs and monitoring data can support warranty claims and help you optimize performance over time.
Tools & Materials
- Solar p panels(Quantity depends on roof space and energy goals)
- Roof mounting brackets and rails(Compatible with roof type and pitch)
- Inverter (microinverter or string inverter)(Design depends on panel count and shading)
- Junction box and wiring(Use appropriately rated conduit and cables)
- Combiner box or disconnect switch(Safety device for multiple strings)
- Conduit and cable management(Rigid conduit for outdoor sections)
- Safety gear (harness, non-slip shoes, ladder)(Fall protection for roof work)
- Voltage tester and multimeter(Check continuity and voltage levels)
- Permitting documents and permits(Local permits and inspection readiness)
Steps
Estimated time: 2-4 hours (excluding roof work and permits)
- 1
Assess site and permits
Evaluate roof condition, sun exposure, and local permit requirements for solar p. This step sets the stage for sizing, safety planning, and scheduling with utility or inspectors.
Tip: Take photos of the roof and electrical panel area before starting; it helps when coordinating with a professional. - 2
Design the system and size
Determine desired energy goals and calculate approximate panel count for solar p. Consider shading, orientation, and inverter choice to match your consumption patterns.
Tip: Sketch a simple layout showing panel rows and wiring routes; this prevents layout changes during installation. - 3
Prepare mounting surface
Inspect the roof structure and ensure rafters and sheathing can support solar p. Strengthen as needed and plan for proper wind loads and sealant applications.
Tip: Verify roof integrity to avoid leaks after installation. - 4
Install mounting rails and racking
Attach rails securely to the roof and verify level alignment for solar p panels. Use corrosion-resistant fasteners and seal all penetrations.
Tip: Double-check spacing to optimize airflow and cleaning access. - 5
Mount panels and connect to inverter
Secure panels to rails and connect DC conductors to the inverter or microinverter. Follow torque specs and observe polarity to prevent damage.
Tip: Label strings clearly to simplify future maintenance. - 6
Run wiring to disconnect and service panel
Route conduit from the array to the disconnect and service panel with proper strain relief and weatherproofing. Ensure all connections meet electrical codes.
Tip: Turn off main power when making final connections and verify with a tester. - 7
Test, inspect, and activate
Power up the system, verify voltages, and confirm the monitoring system is recording data. Schedule an official inspection if required by local codes.
Tip: Document all readings and photos for warranty and permits.
Frequently Asked Questions
What is solar p and how does it work?
Solar p refers to solar panels that capture sunlight and convert it to electricity. A typical home setup includes panels, an inverter, and safety disconnects. Learn how these components work together to power your home.
Solar p means solar panels that convert sunlight to electricity, using an inverter to power your home. It’s a standard setup with panels, an inverter, and safety disconnects.
Do I need permits to install solar p?
Most jurisdictions require some form of permit and inspection for solar p installations, especially when tying into the home electrical system. Check local codes and coordinate with your utility.
Yes, permits are usually required. Check local rules and coordinate with the utility for inspections.
Can I install solar p myself?
DIY installation is possible for certain non-electrical tasks, but electrical connections typically require a licensed professional to ensure safety and code compliance. Always verify local regulations before starting.
DIY work is possible for some tasks, but electrical connections usually require a licensed professional. Check your local rules.
What maintenance does solar p require?
Maintenance is generally simple: keep panels clean, inspect mounting hardware, and monitor performance. Address any loose wiring or corrosion promptly to preserve efficiency.
Keep panels clean, check mounts, and monitor performance. Fix loose wires quickly.
How long does a typical solar p installation take?
Installation duration depends on system size and site complexity. A basic residential solar p project may take from a day to a few days, including permitting and inspection steps.
It varies, but a basic home project can take a day or two, including steps like permitting and inspection.
What costs are involved beyond the panels?
Beyond panels, consider mounting hardware, inverters, wiring, permits, and potential electrical upgrades. Local incentives can influence total cost and payback timelines.
Think about hardware, wiring, permits, and possible upgrades; incentives may affect payback.
Watch Video
Top Takeaways
- Assess site feasibility before purchasing solar p hardware.
- Match components for solar p compatibility and safety.
- Prioritize permits, inspections, and professional electrical work when required.
- Maintain ongoing monitoring and cleaning to protect performance of solar p.