A Practical Guide to a Simple Shed Solar System
Learn how to design and install a simple shed solar system that powers lights, chargers, and small tools with a modular, scalable setup for off-grid reliability and safety.

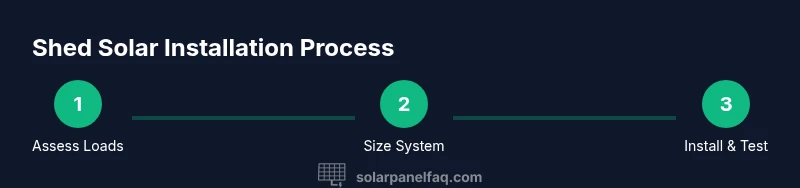
You can power a small shed with a simple solar system by selecting a compact array, a charge controller, a battery, and a basic inverter. Start by assessing your loads, then size the kit and wire it safely. This guide provides a practical, step-by-step path to a shed solar setup.
What a simple solar system for shed looks like
A simple solar system for shed is a compact, modular energy setup designed to power essential tools, lights, and charging in a small outbuilding. It typically uses a few photovoltaic panels, a charge controller, a rechargeable battery bank, and a modest inverter to convert DC to AC for outlets and powered devices. The goal is to provide reliable, low-maintenance power for the shed without requiring a full-scale grid connection. A well-designed shed system emphasizes safety, expandability, and straightforward maintenance.
According to Solar Panel FAQ, practical shed installations start with clearly defined loads and a scalable plan that can grow as needs change. This approach keeps design simple, safe, and affordable while teaching homeowners how solar energy supports a more independent workspace. Think of your shed solar system as a small, modular energy station you can expand by adding panels or a bigger battery bank when your workload increases.
Assessing shed electrical loads
Before you buy components, map out what the shed will power. List items such as LED lighting, a USB charger, a laptop, a radio, and one or two small tools. Note whether each device runs continuously or only briefly. Group loads into core (essential) and optional (nice to have). This helps you determine daily energy needs and peak draw, which guide panel count, battery size, and inverter rating. A clear load profile reduces wasted capacity and avoids over-design. Solar energy works best when your system is sized to support your real usage, not speculative worst cases. Keep a running log of daily use for several days to capture seasonal changes and cloudy days, which informs future upgrades.
Sizing the system without overengineering
Sizing a shed solar system is about balancing demand and supply without overbuilding. Start with a conservative plan: a small array that meets daytime needs and a battery bank capable of sustaining critical loads into the evening. Leave room to scale up by adding more panels or a larger inverter as your shed activities grow. A modular approach reduces risk: you can retire and replace components as technology advances, and you’ll learn what works best for your unique climate and sun exposure.
Key components you will need
Panels convert sun to DC electricity, feeding the rest of the system. A charge controller protects the battery from overcharging and prevents deep discharge. A deep-cycle battery stores energy for use when the sun isn’t shining, with lithium and lead-acid options each offering trade-offs in cost, weight, and longevity. An inverter turns DC into AC for traditional outlets. You’ll also need mounting hardware, weatherproof enclosures, cable runs, fuses, and conduit. A simple monitor can help you track energy flow and battery health. Include basic safety gear and a sturdy plan for securing components against moisture, dust, and pests.
Wiring and safety basics
Keep safety at the center of every connection. Run panels to the charge controller using appropriately rated DC cables, and connect the controller to the battery with heavy-gauge leads and proper fuses. Inverter connections should also be fused and sized for the expected load. Route wires through weatherproof channels and avoid running low-voltage cables alongside high-voltage paths. Ventilate battery compartments and keep the area dry. Never work on live circuits and always de-energize before making changes. If in doubt, hire a licensed electrician to inspect the installation.
Placement and mounting considerations
Place panels where they receive the most sun without shading for the majority of the day. A south-facing orientation is typical in many regions, with a tilt that matches your latitude to maximize annual energy. Roof mounting requires checking the structural capacity of the shed and using corrosion-resistant hardware. If roof mounting isn’t possible, consider a ground-mounted rack in a sunny area with stable soil. Protect wiring from weather and critters with robust conduit and sealed enclosures.
Installation overview and safety checks
This section outlines practical considerations rather than a step-by-step tutorial. Start by securing mounting rails and verifying roof integrity, then attach panels and route cables through weatherproof channels. Connect the controller, battery, and inverter in a logical sequence, with fuses placed correctly. Power up slowly by testing a small load and watching battery voltage and output. Document connections and keep spare parts on hand for quick repairs or future upgrades.
Maintenance, troubleshooting, and upgrades
Maintenance helps you squeeze years of service from a shed solar system. Regularly inspect mounting hardware for corrosion and loose fasteners, clean panels to remove dust and debris, and check for degraded insulation or loose terminals. Monitor battery health, and be prepared to replace aging cells as needed. If you see reduced run-time, check for shading changes, dirty panels, or a failing charge controller. Upgrades are straightforward with modular components—add panels, upgrade the inverter, or expand the battery bank as your needs grow.
Costs, long-term value, and decision points
Prices for shed solar systems vary with region, components, and installation complexity, but the goal is to deliver value rather than chase the lowest price. Focus on quality components, proper sizing, and future-proofing through modular design. A well-planned shed system can provide reliable lighting, charging, and small-tool operation during outages and off-grid hours, while avoiding unnecessary overbuilding. The best decision is to start with a clear load plan, a modest, expandable kit, and a path to gradual expansion as your workshop evolves.
Tools & Materials
- Photovoltaic panels(Choose durable outdoor-rated panels with good efficiency; modular options help scale.)
- Charge controller(Select MPPT if budget allows; ensure it matches your system voltage.)
- Battery bank(Choose lithium or lead-acid; ensure adequate capacity for critical loads.)
- Inverter(Size for essential outlets; consider pure sine wave for sensitive electronics.)
- Mounting hardware(Roof or ground mounts; use corrosion-resistant hardware.)
- Wiring & fuses(Use solar-rated cables, conduit, and appropriate fuses.)
- Junction box & enclosure(Weatherproof, with ventilation if battery is inside.)
- Basic safety gear(Gloves, safety glasses; PPE always recommended.)
- Battery monitor (optional)(Helps track state of charge and health.)
- Tools (drill, screwdriver, wire stripper)(Essential hand tools for assembly.)
Steps
Estimated time: 6-12 hours
- 1
Assess your needs and loads
Identify essential devices, list their usage patterns, and separate must-haves from nice-to-haves. Create a daily load profile to understand baseline energy needs and peak demand. This step prevents overdesign and helps you plan future expansions.
Tip: Make a wall chart of devices and note hours used each day. - 2
Inventory components and plan layout
Catalog the components you will use and sketch a simple layout showing where panels, battery, and inverter will live. Consider weather exposure, access for maintenance, and ease of future upgrades. A clean layout reduces cable lengths and heat buildup.
Tip: Sketch on paper or a simple app to visualize cable routes. - 3
Estimate solar generation and storage capacity
Estimate how much energy your planned array can generate during typical sun hours and ensure the battery can store sufficient energy for essential loads through the night. Leave headroom for cloudy days and seasonal variations. Remember, modular design allows you to add capacity later.
Tip: Aim for a conservative buffer so you don’t deeply discharge the battery. - 4
Select controller, inverter, and battery type
Choose a charge controller that matches your panel voltage and a compatible battery technology. An inverter should handle your peak loads with a safety margin. Compare lithium for longevity and weight against lead-acid for upfront cost.
Tip: Prefer a single-brand kit to simplify warranty and troubleshooting. - 5
Plan wiring routes and safety features
Map out the route for DC cables, from panels to controller to battery, and then to the inverter. Include fuses close to the battery, proper conduit, and weatherproof enclosures. Ensure separation of high- and low-voltage paths to minimize interference.
Tip: Label all cables and keep a spare fuse kit handy. - 6
Mount hardware and route cables
Install mounting rails, attach panels securely, and route cables through weatherproof channels. Seal penetrations to prevent water ingress and check for secure cable slack to avoid abrasion. Verify that all connections are tight and corrosion-free before energizing.
Tip: Do not rush; verify mechanical fasteners and wire connections twice. - 7
Test, document, and plan for expansion
Power up with a low-load gadget and monitor voltage, current, and battery state of charge. Document connections for service visits and future upgrades. Schedule periodic checks and note environmental changes that may affect performance.
Tip: Keep a maintenance log with dates and readings.
Frequently Asked Questions
Do I really need a charge controller for a shed solar system?
Yes. A charge controller protects the battery from overcharging and prevents deep discharge, extending battery life and protecting your investment.
Yes—use a charge controller to protect your battery and system power.
What loads can a basic shed solar system handle?
A basic shed solar system typically supports LED lighting, USB charging, a small laptop, a radio, and a few low-watt tools. High-draw devices should be avoided or capped.
It can run lights and small devices; use larger loads sparingly.
Lithium vs lead-acid batteries for shed use?
Lithium batteries offer longer life and deeper cycles but come at a higher upfront cost. Lead-acid batteries are cheaper initially but require more maintenance and have shorter lifespans.
Lithium lasts longer but costs more; lead-acid is cheaper up front.
Do I need permits for a shed solar system?
Permit requirements vary by location. Check local building codes and HOA rules; small, off-grid setups may not need a permit, but an inspection is often recommended.
Permits depend on your area; check with local authorities.
Can I expand the shed solar system later?
Yes. The modular design lets you add panels, upgrade the battery, or add more inverters as your needs grow.
Yes, you can expand with more panels and bigger batteries.
What maintenance tasks are essential?
Regularly inspect mounts and wiring, clean panels, check battery health, and verify fuse status. Keep an eye on performance to catch degradation early.
Check connections, clean panels, and monitor battery health.
Is a shed solar system enough for all tools and devices?
It depends on your loads. A well-planned system powers lighting, charging, and some tools, but high-draw equipment may require a larger setup.
Good for basics; heavy machinery needs more capacity.
What is the typical lifespan of shed solar components?
Panels are long-lasting; batteries and inverters have limited lifespans and require periodic replacement. Regular maintenance helps maximize life.
Panels last decades; batteries and inverters wear out over time.
Watch Video
Top Takeaways
- Plan loads before gear
- Start small, then scale up
- Prioritize safety and local codes
- Choose modular components
- Maintain a simple maintenance log