RV Solar Panel Installation: The Step-by-Step Guide
Learn how to plan, mount, and wire RV solar panels on your motorhome roof with a safe, scalable approach. This guide covers components, mounting, wiring, safety, and maintenance for off-grid power.

By following this guide, you'll learn how to plan, mount, and wire RV solar panels on your motorhome roof, choose compatible panels and a charge controller, and safely integrate a battery bank. The steps cover mounting, cable routing, safety precautions, and a basic troubleshooting checklist to keep your system reliable on the road.
Why RV solar panel installation matters
According to Solar Panel FAQ, rv solar panel installation can extend off-grid camping by powering essential appliances with a lightweight, properly sized system. For many travelers, reliable power means fewer generator runs, less fuel use, and more time enjoying the outdoors. A well designed system respects the RV roof, weight limits, and local electrical codes while delivering steady charging for batteries. Before you buy panels, think about your typical daily energy use, your typical camp setup, and how long you want to stay off hookups. In practice, most rigs benefit from a modest array that balances performance with roof load. The core goal is to maintain safe battery charging, prevent parasitic draws when parked, and ensure convenience during travel. Keep in mind that even small solar kits can replace a portion of shore power, but the biggest gains come from proper planning and scalable components that can grow with your needs.
Assessing power needs and rooftop space
The first step in rv solar panel installation is understanding how you will use energy during trips. List the devices you rely on, such as a fridge, lighting, water pump, and laptops. Translate those loads into daily amp-hours, then compare with the predictable sun exposure in your travel regions. On the roof, measure available space and consider the panel dimensions you can fit without overloading rails or vents. A common approach is to start with a conservative panel count and then expand later as your demands or solar efficiencies improve. Remember that the sun's angle changes with seasons, so plan for some headroom to maintain useful charging even when days are shorter. If you already have a battery bank, calculate its capacity against your daily use to estimate how many panels you need to keep the system balanced.
Choosing panels, controllers, and batteries
When selecting components, choose panels that balance weight, efficiency, and durability for mobile use. Monocrystalline panels tend to deliver higher efficiency with less space, which is valuable on an RV rooftop, while polycrystalline options can be more affordable. Pair panels with a charge controller that matches your system, with MPPT controllers often offering better efficiency in challenging lighting and wide temperature ranges. For energy storage, consider battery types that fit your travel style and budget. Lead-acid options are affordable and robust, while lithium options offer longer life and lighter weight but higher upfront costs. Safety and reliability come from matching the controller, battery, and wiring to the array size and your expected daily draw. Also check the warranty terms and compatibility with any on-board inverters.
Mounting strategies and roof considerations
PV panels must be mounted securely while preserving roof integrity. Use purpose built RV mounting rails or brackets designed for your roof material, whether fiberglass, aluminum, or composite. Ensure the mounting system supports the panel size and weight with a proper sealant to prevent leaks around fasteners. When drilling is involved, seal every penetration and use backer tape for waterproofing. In many cases it is best to work with the vehicle at a low height and use fall protection. Plan cable routing to minimize exposure to heat sources and movement areas; keep cables away from doors and vents to prevent wear. Remember to respect weight limits and recheck all fasteners after a few road trips.
Wiring plan: routing, controllers, and fusing
A clean, safe wiring plan reduces voltage drop and avoids safety hazards. Run conduits from the roof to the controller through interior channels, using grommets to protect cables at pass-throughs. Install a DC disconnect or fuse block close to the battery bank and keep all connections tight and clean. Use the appropriate gauge wiring for the current you expect, and avoid sharp bends that can wear insulation. Plan for proper grounding and weatherproof connections at all exterior junctions. If you are unsure about wire sizing or fuse ratings, consult the controller's manual or a professional. Finally, map the route so you can monitor temperatures and identify potential heat buildup during use.
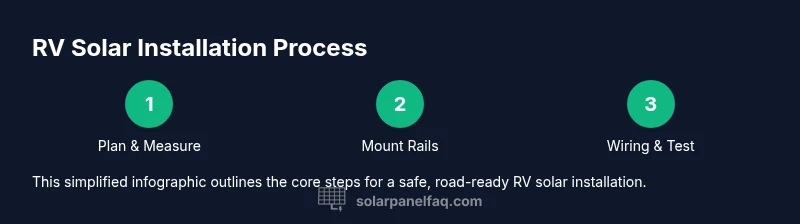
Step-by-step installation overview
This section provides a concise progression you can follow during the actual installation. Step 1: Assess energy needs and rooftop space, and finalize a component list. Step 2: Prepare the roof and safety gear, ensuring you have a safe work area and reliable fall protection. Step 3: Mount rails or brackets to secure the mounting plane and verify alignment. Step 4: Attach panels to the rails and tighten fasteners evenly. Step 5: Route cables from the panels down to the interior, avoiding tight bends and heat sources. Step 6: Install the charge controller and fuse block, then connect to batteries with proper polarity. Step 7: Connect an optional inverter if you plan to run AC devices. Step 8: Test the system, monitor voltages, and verify charging performance under sun. Pro tip: double-check seals at every roof penetration and use weatherproof sealant where needed.
Safety, permits, and troubleshooting
Electrical work on an RV roof carries safety risks, including shock, falls, and leaks. Always disconnect the battery before wiring and wear non-slip footwear and a harness when working at height. Check local regulations regarding any required inspections or permits for solar installations on recreational vehicles, and contact your dealer or a licensed electrician if you are unsure about code compliance. If you encounter slow charging or unexpected voltage drops, verify connections first, then inspect fuses, wiring, and the panel orientation relative to the sun. Keep a spare fuse and basic tools on hand for quick field fixes.
Maintenance and long-term care
A durable RV solar system benefits from periodic inspection and cleaning. Wipe panels with a soft cloth to remove dust and debris, and inspect seals around roof penetrations after long trips or extreme weather. Monitor battery health and inverter performance using the built-in indicators or a dedicated monitor. Regularly check mounting hardware for looseness and verify shielding of wiring from heat and abrasion. Document maintenance for warranty purposes and plan periodic checks at least once per season or after a few hundred miles of road use.
Tools & Materials
- RV-rated solar panels(Lightweight, weather-resistant panels sized for roof space)
- Roof mounting rails/brackets(RV-specific hardware compatible with your roof type)
- MC4 connectors and weatherproof conduit(Waterproof, strain-relief connectors)
- Charge controller (MPPT recommended)(Match input/output to panel array and battery bank)
- Battery bank (lead-acid or lithium)(Sized for anticipated daily use and autonomy)
- Inverter (optional, for AC loads)(Choose pure sine wave for sensitive electronics)
- Fuse blocks and fuses(Safety disconnects near the battery)
- DC wiring gauge and marine-grade tape(Size wiring to expected current; protect with tape)
- Silicone sealant and roof repair materials(Waterproof penetrations and junctions)
- Voltage tester/multimeter(Verify polarity and system voltage)
- Fall protection gear(Harness or safety lines if working on a tall roof)
Steps
Estimated time: 6-12 hours
- 1
Assess energy needs
Evaluate daily energy use and available roof space to determine required panel count and layout.
Tip: Create a simple energy budget and rough roof map before buying parts. - 2
Select components
Choose panels, controller, and battery that match your energy budget and roof constraints.
Tip: Prioritize MPPT controllers for better efficiency in varied light. - 3
Prepare the roof and safety gear
Inspect the roof, clean surfaces, and assemble your fall protection and ladder setup.
Tip: Test all safety gear and plan escape routes in case of weather changes. - 4
Mount rails and brackets
Attach rails/brackets firmly to the roof following manufacturer guidelines and seal penetrations.
Tip: Pre-mark holes, dry-fit components, and verify alignment before drilling. - 5
Attach solar panels
Secure panels to rails with even torque on all fasteners and check for movement.
Tip: Avoid over-tightening to prevent frame damage; use vibration dampers if provided. - 6
Route cables inside
Run cables through a weatherproof path into the RV, avoiding heat sources and bending stress.
Tip: Use grommets and conduits to protect cables at pass-throughs. - 7
Install controller and battery connections
Mount the charge controller, connect to the battery with correct polarity and install protective fuses.
Tip: Double-check polarity and secure all terminal connections. - 8
Test and verify
Power up, verify charging voltages, and monitor performance under daylight.
Tip: Do a daylight test before a long trip and record readings for future reference.
Frequently Asked Questions
Do I need a permit to install RV solar panels?
Permit requirements vary by jurisdiction. In many areas a small off-grid RV solar setup does not need a permit, but interstate or campground regulations may apply. Always verify local rules and consult a professional if you are unsure.
Permit needs vary; check local rules and consult a pro if unsure.
Can I install RV solar panels on any roof type?
Most RV roofs can accommodate solar panels, but you may need different mounting hardware for fiberglass, aluminum, or composite roofs. Ensure load limits are not exceeded and that you seal penetrations properly.
Most RV roofs work, but pick the right hardware and seal properly.
Is an MPPT charge controller necessary?
An MPPT controller is usually recommended because it maximizes charging efficiency, especially in variable lighting and higher temperatures common on the road.
MPPT controllers boost efficiency in varied conditions.
What size battery bank should I plan for?
Plan based on your daily energy use and desired autonomy. Start with a conservative bank and scale up as your needs grow.
Size your battery bank to match daily energy needs and plans.
Can I DIY RV solar installation?
Yes for confident homeowners, but electrical work and roof penetrations carry risks. Consider professional help for critical steps or if you are uncertain.
DIY is possible with caution; seek pro help if unsure.
How should I handle roof sealing after mounting?
Use manufacturer recommended sealants and test for leaks after first trips. Regularly inspect seals as part of maintenance.
Seal properly and check for leaks after trips.
Watch Video
Top Takeaways
- Assess energy use before choosing components
- Choose MPPT and lightweight panels for RVs
- Seal all roof penetrations to prevent leaks
- Test the system in daylight and keep maintenance schedules