DIY Guide: Pop Up Trailer Solar Panel Installation
A practical, step-by-step guide to sizing, installing, and maintaining a pop up trailer solar panel setup for campers, with safety tips and budget-friendly options for 2026.

You can power a pop up trailer with a compact solar panel system, giving you quiet, maintenance-free energy off-grid. This guide explains how to size, mount, and wire a safe setup, plus maintenance tips and common pitfalls for 2026. We'll cover key components, safety steps, and how to choose between fixed roof mounts and portable panels for travel and camping.
Why a pop up trailer solar panel matters
A pop up trailer solar panel is a practical upgrade for campers who want energy independence without maintaining a loud generator. In the compact space of a pop-up trailer, a roof-mounted or portable solar array harvests daylight and converts it into usable power for lighting, ventilation fans, USB charging, and small appliances. The setup remains appealing for weekend trips where hookups are sparse or uncertain. According to Solar Panel FAQ, lightweight, modular systems can be added without sacrificing interior space or travel practicality. The main benefit is reliability: with a properly sized array and a quality charge controller, you can keep essential devices powered through a mix of sunny and slightly overcast days. Since sun exposure varies by season, design the system with a little headroom so you don’t deplete batteries during cloudy spells. The goal is simple: reduce fuel use, enjoy quieter camping, and extend off-grid stays. This, in turn, yields more freedom on the road and a more comfortable trip overall.
How to size a solar setup for a pop up trailer
Sizing a system hinges on how you’ll use power, the roof area you can dedicate, sun exposure, and whether you plan to store energy in a buffer battery. Start by listing core loads: LED lighting, fans, phone charging, and a small cooling or heating option. A common starting point is a 100-200W panel paired with a 12V battery and an MPPT charge controller. If your trips include longer drives between campsites or frequent overcast days, you might scale up to 200-400W or add a second panel and a larger battery bank. Always account for sun hours: summer sun is more forgiving, while winter sunlight is weaker, so plan for headroom. Solar Panel FAQ analysis shows that modular systems that allow expansion work well for varying trips. When choosing components, emphasize weatherproof wiring, lightweight mounting hardware, and a plan for cable management. An MPPT controller can significantly increase energy harvest, especially during partial shading or during the afternoon peak.
Essential components for a pop up trailer solar setup
A typical system includes: solar panels (rigid 100-200W each or a single higher-wattage unit), a charge controller (MPPT preferred), a 12V battery bank, fuses and wiring rated for outdoor use, mounting brackets or temporary mounts, and simple monitoring hardware. For pop-up trailers where weight matters, flexible panels offer lighter options but may require careful mounting and sealing. An MPPT controller maximizes energy capture and adapts to changing sun angles, which is especially helpful when panels sit at an angle on a trailer roof. Cable runs should minimize voltage drops and be protected from the elements. Mounting choices range from roof brackets to temporary magnetic mounts for mobility, with sealant to prevent leaks. Don’t forget a basic test kit, spare fuses, and a simple load analyzer to verify system performance under real conditions.
Installation options: DIY vs professional
DIY installations are common for modest setups, particularly on trailers with straightforward roof designs. If you’re comfortable with basic electrical work, you can mount brackets, route wiring along clean channels, and connect a controller with proper polarity and fusing. For more complex roofs, or if you’re unsure about structural loads or weather sealing, a professional install can save time and reduce risk. Always verify roof weight limits and ensure panels aren’t interfering with vents or antennas. Use silicone sealant to seal mounting penetrations and protect against leaks. During wiring, disconnect the battery to avoid shocks and test the circuit gradually under shade before exposing it to full sun.
Maintenance, safety, and common issues
Keep your system performing well with regular cleaning of the solar panels—soft cloth and water remove dust and bird droppings that reduce efficiency. Inspect mounting hardware for corrosion or looseness, and re-seal penetrations if needed. Check all cables for wear and replace damaged connectors promptly. If charging seems slow or a panel shows reduced output, examine shading from trees or roof vents, verify controller settings, and confirm battery health. For safety, never work on live circuits in wet conditions, and keep tools and spare parts organized to avoid trips during travel. Maintain a simple log of maintenance and seasonal checks so you can address issues before they become trips-ending problems.
Real-world scenarios and troubleshooting tips
Two common scenarios involve overcast days and high energy draw. In prolonged cloud cover, ensure battery storage is sufficient and consider adding a small portable panel for supplemental charging. In high-heat environments, shading the panels during peak sun and ensuring proper ventilation around the battery can preserve efficiency and battery life. Troubleshooting steps include verifying MPPT controller operation, checking all connections for corrosion or looseness, testing battery state-of-charge with a multimeter, and measuring panel current to confirm energy production aligns with expectations. Keeping a spare fuse and basic tools on hand can save trips from minor faults.
Tools & Materials
- Portable/roof-mounted solar panels (100-200W each)(Choose rigid for durability or flexible for weight; ensure weather rating)
- MPPT charge controller(Higher efficiency; avoid PWM for marginal sun)
- 12V deep-cycle or AGM battery bank(Adequate capacity for weekend trips; consider 100-200Ah depending on loads)
- Fuses/buss bar and automotive-grade wiring(Use appropriately rated gauge; protect against shorts)
- Roof mounting brackets or portable mounting hardware(Weatherproof; ensure weight limits and sealant compatibility)
- Sealant (marine-grade or automotive silicone)(Waterproof seals around mount points)
- MC4 connectors, adapters, and weatherproof conduit(Secure and waterproof connections)
- Cable management tools (clips, zip ties, conduit)(Keep wiring tidy and protected)
- Electrical test instruments (multimeter, solar tester)(Verify voltage, current, and continuity)
- Safety gear (gloves, eye protection)(Protect during drilling and wiring)
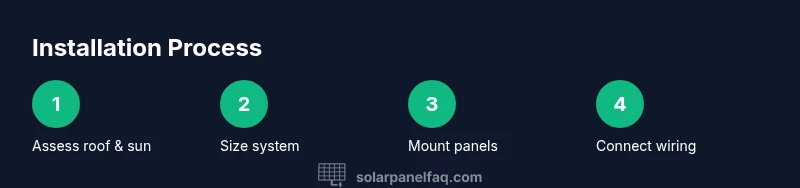
Steps
Estimated time: 2-4 hours
- 1
Assess roof space and sun exposure
Visually inspect the trailer roof for available surface, vents, and potential shade. Map the sun’s path through different times of day and seasons to identify the best mounting location with minimal shading. This upfront assessment helps prevent later rework and ensures optimum energy collection.
Tip: Measure available width and length in inches; plan for panel sizes that fit without overhang or interference. - 2
Calculate load and size your array
List all expected loads (lighting, fans, charging). Choose a starting panel wattage and battery capacity that leaves headroom for cloudy days. Use a rule-of-thumb to ensure the battery can supply essential loads overnight without excessive cycling.
Tip: Aim for a 20-30% buffer between expected daily energy use and battery capacity. - 3
Choose mounting method and hardware
Select roof brackets for a permanent install or portable mounts for flexibility. Ensure hardware is rated for outdoor use and compatible with your trailer roof material. Plan cable routes away from edges and heat sources.
Tip: Always seal mounting holes with silicone or sealant to prevent leaks. - 4
Install the charge controller and wiring path
Mount the controller in a dry, accessible location. Run positive and negative conductors from the panels to the controller, then onward to the battery, with fuses close to the battery. Keep wiring organized and protected from sharp edges.
Tip: Double-check polarity before connecting to the battery to avoid damage. - 5
Connect battery and perform a test
Wire system components, then power up and confirm all indicators on the controller. Check panel voltage in sun and verify battery charging behavior. If you observe abnormal readings, recheck connections and fuse integrity.
Tip: Test in shade first, then in full sun to verify proper operation. - 6
Document and maintain your setup
Create a simple diagram of the wiring and note panel wattage, controller model, and battery capacity. Schedule routine checks for corrosion, sealant wear, and battery health. Keeping records helps you diagnose issues quickly on future trips.
Tip: Store a spare fuse and basic tools in an accessible location.
Frequently Asked Questions
Can I install a pop up trailer solar panel myself?
Yes, a motivated camper can install a basic panel system with a few essential tools. Focus on safe wiring practices, proper sealing, and following manufacturer instructions for the charge controller and fuse sizing. If you’re unsure about roof structure or electrical safety, consider a professional install.
Yes, many campers install a basic panel system themselves, but ensure safe wiring and proper sealing; hire a pro if you’re unsure about the roof or electrical safety.
What wattage is typically enough for weekend camping?
A common starting point is a 100-200W array with a 12V battery and MPPT controller. With light loads and good sun, this covers essential lighting and charging; for heavier use or poor sun, consider larger arrays or additional panels.
Most weekend setups start around 100-200W with a 12V battery; add more if you use more devices or face less sun.
Do I need a battery bank for a pop up trailer solar panel system?
A battery bank is highly recommended if you want off-grid power beyond daylight hours. It stores energy for night use and cloudy days, improving reliability. If always near shore power, you could run a smaller, shuttle-alternating system.
Yes, a battery bank is recommended to store energy for off-grid use and cloudy days.
What maintenance is required for solar panels on a trailer?
Keep panels clean and free of debris, check mounting hardware for corrosion, and inspect wires for wear. Seal penetrations and replace damaged connectors promptly to maintain performance and safety.
Clean the panels, inspect mounts and wiring, and replace worn parts to keep performance up.
How can I protect panels during travel?
Use protective covers or remove portable panels when traveling, and secure all wiring. For fixed panels, ensure mounts are tight and anti-wind hardware is used to resist road vibrations.
Cover or remove portable panels while traveling and secure wiring; keep mounts tight.
Are flexible solar panels better for pop-up trailers?
Flexible panels are lighter, but they may be less durable over long-term exposure and can be harder to seal and mount securely on curved surfaces. Rigid panels offer durability and easier maintenance for most campers.
Flexible panels are lighter but can be less durable; rigid panels are usually easier to mount and maintain.
Watch Video
Top Takeaways
- Plan your system with room to expand for changing trips
- Choose MPPT controller for better performance in shade
- Seal all mounting points to protect the trailer from leaks
- Keep a simple maintenance log for reliability