Off-Grid Solar Setup: A Complete DIY Guide for Homes
Learn how to plan, size, and install an off-grid solar setup for your home. This step-by-step guide covers components, safety, maintenance, and budget-friendly strategies for reliable power independence.

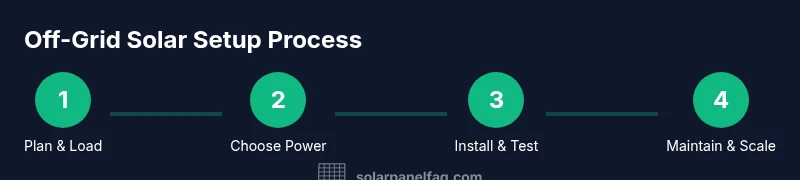
This guide helps homeowners build an off-grid solar setup that meets basic needs—lights, refrigeration, and charging—without a grid connection. You’ll learn how to size components, choose batteries, and plan safety during installation. Core requirements include a reliable solar array, a battery bank, a charge controller, an inverter, and proper fusing. Expect a multi-day project with careful adherence to local codes.
What an off-grid solar setup makes possible for a home
An off-grid solar setup lets you power essential loads where the utility grid isn’t available or desired. It can support lighting, refrigeration, communications, and charging for devices in cabins, workshops, or remote homes. With thoughtful design, you can maintain comfort, security, and independence even during outages or price spikes. In practice, a well-planned system balances daily energy needs with the sun’s availability, and relies on a scalable mix of solar panels, energy storage, and power electronics.
Early planning matters. Start by listing your must-run appliances and seasonal variations; then define a target energy budget that excludes peak surges you don’t need every day. For most homeowners, a small buffer for cloudy days matters as much as the sunny days. According to Solar Panel FAQ, successful off-grid installations begin with clear goals, a practical space for equipment, and a plan to expand gradually as energy demand grows. The aim is reliability, not perfection, so design for easy maintenance and future upgrades.
Core components and their roles
A robust off-grid solar setup centers on four major subsystems: generation, storage, power management, and distribution. The solar array collects energy from the sun and charges the battery bank through a controller. The battery bank stores energy for use when the sun isn’t shining. The inverter converts the DC energy from panels/batteries into usable AC for lights and appliances, while protective devices guard against short circuits and overloads. For most homes, a well-chosen MPPT charge controller improves charging efficiency in variable sunlight. Placement matters: mount panels where they receive the most sun and are protected from shading, and position the battery bank in a ventilated, temperature-controlled area. The quality of wiring, connectors, and safety switches affects longevity and safety just as much as the choice of hardware.
Sizing the system: matching daily energy use to capacity
Sizing a system is a balance between need, sun, and budget. Start with a complete list of essential loads, then estimate daily run times and energy requirements. Convert those estimates into a total daily energy need, and pick a solar array and battery capacity that can comfortably cover it under a range of possible conditions. Solar Panel FAQ analysis shows that accurate sizing reduces waste and improves long‑term reliability. In practice, design with a margin for weather days and seasonal changes, and plan for expansion as your comfort with off-grid living grows.
Battery technology and management
Battery choice shapes performance, cost, and lifespan. Deep-cycle lead-acid options are affordable but require more maintenance, while lithium-ion chemistries offer higher energy density and longer life with careful management. Temperature and depth of discharge influence cycle life and efficiency, so select a battery type that matches your climate and usage pattern. A reliable battery management system (BMS) helps balance cells, monitor temperature, and protect against overcharging or deep discharge. Pro tip: store batteries in a well-ventilated area away from moisture and extreme heat, and follow manufacturer guidance for charging voltages and maintenance intervals.
Inverters, controllers, and protection
Choose a pure sine wave inverter if you plan to run electronics or sensitive equipment. Pair it with a modern MPPT controller for efficient charging, especially when conditions vary. Protect the system with proper fusing, DC disconnects, and weatherproof enclosures. Grounding and bonding reduce shock risk and help with safety during lightning events. Layout the wiring so that high-current paths have appropriate gauge and short runs, and keep the inverter and battery compartments separate to minimize heat buildup.
System architecture options: home, cabin, or remote outbuilding
Off-grid systems come in different scales and configurations. A compact rooftop or ground-mounted array may suit a tiny cabin or shed, while larger homes require more panels and a bigger battery bank for redundancy. For seasonal homes, consider a hybrid approach that uses a small generator for peak demand or a larger solar array with modular expansion. If your space is limited, a DC microgrid with low-voltage distribution can reduce losses and simplify wiring. Each option has trade-offs in cost, weight, and maintenance, so map your goals against available space and climate.
Installation workflow: plan, mount, wire, test
Begin with a detailed wiring diagram and a safety-first mindset. Then mount the racking, install the panels, and route cables with appropriate protection. Connect the charge controller to the battery and to the panel array, then wire the inverter to the battery and to the home distribution panel. Install protective devices, test voltage and grounding, and perform a controlled startup to verify operation. Document every connection and keep a spare parts kit on hand for quick fixes. Expect the process to take several hours to a full day depending on system size and site conditions.
Safety, codes, and permitting for off-grid setups
Before you begin, check local and state rules regarding off-grid installations, as some jurisdictions have specific requirements for electrical work, battery storage, and emissions. Hire an electrician for any work involving mains connections or complex wiring beyond basic DC circuits. Use rated components, proper clearance, and weatherproof enclosures. Keep safety gear within reach and never work alone on live circuits. Documentation, permits, and inspections help secure warranties and ensure compliance during future sale or transfer of the property.
Maintenance, troubleshooting, and long-term care
An off-grid solar system requires regular checks of connections, electrolyte levels, and charging behavior. Schedule periodic cleaning of panels to remove dust and debris, inspect seals and enclosures, and monitor battery temperatures. Keep a log of performance metrics to identify gradual declines or inconsistent charging. Troubleshooting common issues—no charging, dimming lights, or tripped breakers—begins with verifying the basics: panel cleanliness, secure connections, and correctly configured controllers. If problems persist, consult the manufacturer’s guidelines and re-check safety devices. The Solar Panel FAQ team emphasizes steady, measured maintenance to protect investment and energy independence.
Tools & Materials
- Solar panels (PV array)(Select total wattage based on sizing; consider future expansion.)
- Battery bank (lithium or deep-cycle lead-acid)(Choose capacity for daily use plus a safety margin; ensure proper ventilation for lead-acid.)
- MPPT charge controller(Prefer MPPT for higher efficiency in variable conditions.)
- Inverter (pure sine wave)(Match inverter size to peak load; ensure continuous rating above daily usage.)
- DC disconnects and fuses(Install at all major junctions; keep a spare for quick fixes.)
- Wiring, conduit, and connectors(Use appropriate gauge for current; protect from weather and abrasion.)
- Mounting hardware and racking(Select rust-resistant hardware; secure panels for wind and snow loads.)
- Battery enclosure and ventilation(Ventilate to prevent gas buildup in enclosed spaces.)
- Tools (multimeter, crimping tool, screwdrivers)(Have electrical-rated tools and safety gear on hand.)
- Safety gear(Gloves, eye protection, and a sturdy ladder or lift for roof work.)
- Documentation and permits(Keep diagrams, manuals, and any local permit records.)
Steps
Estimated time: approximately half a day to a full day
- 1
Define essential loads
Create a list of must-run devices (lighting, fridge, communications) and estimate daily usage. Prioritize loads by necessity and identify any optional comfort items you can live without during outages.
Tip: Start with the most-used devices to establish a realistic baseline. - 2
Plan location and permits
Choose a safe, accessible site for the battery bank and inverter. Check local regulations and obtain any required permits before wiring begins.
Tip: Prefer ventilated, shaded areas for batteries to extend life. - 3
Select components and initial sizing
Choose panels, battery type, and inverter based on loads and climate. Outline a basic wiring diagram showing panel-to-controller and controller-to-battery connections.
Tip: Allow room for future expansion in both panel and battery counts. - 4
Mount solar array and run wiring
Install racking on a stable surface with clear sun exposure. Route cables with protective conduit and seal entry points to prevent moisture ingress.
Tip: Keep DC conductors as short as practical to reduce losses. - 5
Connect controller, inverter, and protection devices
Wire the charge controller to the panels and to the battery bank; then connect the inverter to the battery and load center. Install fuses and disconnects at designated points.
Tip: Double-check polarity before powering any component. - 6
Grounding, testing, and safety checks
Ground all metal equipment and verify continuity. Test each connection under no-load and then light-load conditions to confirm safe operation.
Tip: Use a non-contact tester to confirm lack of stray voltage before touching wiring. - 7
Initial startup and load validation
Power up the system gradually, observe battery voltage, inverter heat, and controller readings. Validate that essential loads run as expected during peak sun and cloud conditions.
Tip: Keep a log of readings for future troubleshooting. - 8
Documentation and future-proofing
Document wiring diagrams, component models, and serial numbers. Plan for modular expansion as energy needs grow.
Tip: Store manuals digitally and physically with your system parts.
Frequently Asked Questions
What is an off-grid solar setup?
An off-grid solar setup powers a home independently of the utility grid using a solar array, battery storage, a charge controller, and an inverter. It supports essential loads and can be scaled for comfort and resilience.
An off-grid solar setup powers your home independently with a solar array, batteries, a controller, and an inverter.
How do I start sizing an off-grid system?
Start by listing essential loads and estimating daily energy use, then choose a solar array and battery capacity that cover that use with a margin for variability. Consider climate and sun exposure.
Begin by listing your essential loads and estimating daily energy use, then size the system with a safety margin.
Can I mix battery types in one setup?
Different battery chemistries have different charging needs; mixing types can create safety and performance issues. It’s best to use a single battery type per bank.
Mixing battery types in one bank isn’t recommended; stick to a single chemistry per bank.
What permits or codes apply to off-grid systems?
Local electrical codes and permitting requirements vary. Check with local authorities and consider professional inspection to ensure safety and warranty validity.
Local rules vary; check permits and consult a professional to stay compliant.
What maintenance is required for off-grid systems?
Regularly inspect connections, clean panels, monitor battery temperature and voltage, and update firmware or controller settings as recommended by manufacturers.
Regular inspections of connections and batteries keep your system reliable.
Is off-grid solar cost-effective in the long term?
Off-grid setups can be cost-effective over time with careful sizing and maintenance, particularly in remote locations, but upfront costs vary with component choice and installation complexity.
Long-term value depends on your location, usage, and maintenance; plan accordingly.
Watch Video
Top Takeaways
- Plan essential loads before choosing components
- Size conservatively and leave room for expansion
- Use MPPT controllers for better efficiency
- Prioritize safety and local code compliance
- Schedule routine maintenance to extend life