Moultrie Edge 2 Solar Panel Guide: Setup, Performance, and Practical Tips
Learn how to set up and optimize the Moultrie Edge 2 solar panel for trail cameras, with practical installation tips, compatibility notes, and best practices to maximize uptime in 2026.

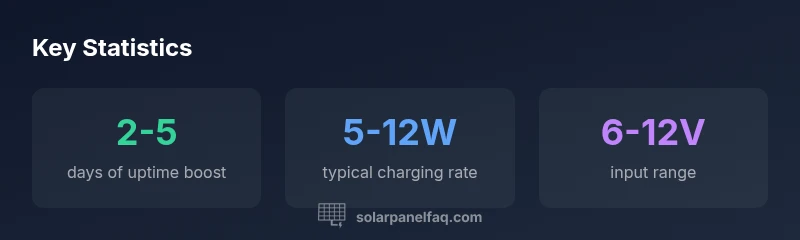
The Moultrie Edge 2 solar panel enables on-site solar charging for compatible trail cameras, reducing battery changes in remote locations. It supplies a modest but steady trickle charge that can extend battery life in sunny conditions, especially during peak wildlife activity. For best results, pair with high-efficiency batteries and shaded exposure considerations.
What the Moultrie Edge 2 solar panel is and how it fits into field power
Like many wildlife cameras, the Edge 2 model can benefit from an auxiliary solar source that reduces field maintenance. The moultrie edge 2 solar panel is designed to provide a steady, low-current charge to compatible cameras, helping to keep batteries topped up during long monitoring sessions. When sunlight is available, the panel converts daylight into a gentle trickle that replenishes the camera's power reserve without overcharging. For homeowners and field researchers, this can translate into fewer trips to replace batteries and more reliable coverage during critical activity windows. While the energy gained from a small panel is modest compared with a full power system, properly positioned solar input can meaningfully extend intervals between battery changes in typical sun exposure. In practice, success depends on sun hours, the camera's power draw, and how well the system is integrated with the Edge 2's battery compartment. For the search query moultrie edge 2 solar panel, expect guidance to cover mounting, cable management, and weatherproofing as well as compatibility with common 6V to 12V camera inputs.
Key setup considerations for reliable power
To maximize uptime, start with sun exposure. Place the panel where it receives direct sun for most of the day, avoiding bright shade from trees or building corners. Tilt the panel to match your latitude; in the northern hemisphere, a southern exposure generally yields the best results, while in the southern hemisphere you’ll want northern exposure. Keep the cable path short and protected from the elements, using weatherproof seals where cables pass through housings. Ensure the panel is clean, free of dust and leaves, and that the mounting surface is stable and vibration-free. Keep a proactive eye on the camera’s battery health and power draw; smaller batteries will show faster depletion under higher activity, so you may need to periodically adjust placement to maintain a balance between sun and shelter. Finally, document your sun hours with a simple field log so you can correlate battery performance with weather patterns across seasons.
Compatibility, limitations, and pairing strategies
The Edge 2 solar panel is designed for compatibility with standard wildlife camera inputs in the 6V to 12V range and commonly used connector types. Before purchase, verify that your camera’s input voltage and connector match the panel’s output. Some cameras may require a specific connector size or weatherproof seal; in these cases, an adapter cable may be necessary. It’s important to note that solar charging is a supplement, not a replacement for reliable batteries. For best results, pair the solar panel with high-quality rechargeable AA cells or a purpose-built lithium pack that matches the camera’s consumption profile. Additionally, consider environmental factors like heat and moisture, which can affect efficiency and long-term performance. If you operate in extreme weather, ensure you have a robust weatherproof housing for exposed connections and routinely inspect for wear and corrosion.
Installation steps: from unboxing to first charge
Start by inspecting the solar panel and cable for any shipping damage. Identify a mounting point with optimal sun exposure and minimal risk of brush contact or animal interference. Attach the panel securely using appropriate hardware, making sure the surface is clean and dry. Route the cable toward the camera housing, using grommets or weatherproof clips to protect against moisture and abrasion. Connect the panel to the camera’s power input, ensuring a snug fit without forcing the connector. If your camera has an adjustable power setting, start with a conservative charge rate to prevent overcharging; then monitor the battery indicator over the first few days. Check for any flicker or error messages on the camera’s display and verify that the solar input is active during daytime hours. Finally, log the initial days of operation to establish a baseline for future adjustments.
Maintenance, troubleshooting, and common mistakes
Regular maintenance is simple: keep the panel clean, inspect for cracks or clouding, and verify cable integrity. Weatherproof seals should be checked at least quarterly, and any loose connectors tightened to prevent corrosion. Common mistakes include mounting in persistent shade, using an incompatible adapter, or failing to shield connections from rain. If the camera shows inconsistent charging, validate that the panel is receiving direct sun for several hours, confirm the cable routing hasn’t been pinched, and consider repositioning to improve exposure. For troubleshooting, measure the input voltage at the camera port during peak sun; if the reading is significantly below the expected range, re-check connectors and seals or replace aging cabling.
Real-world use cases and performance expectations
In real-world deployments, users typically report noticeable, though weather-dependent, improvements in uptime when a properly installed Edge 2 solar panel is used. During periods with strong sun, the panel provides a steady trickle that can reduce the frequency of battery changes. In overcast weeks or in dense canopies, the gains may be smaller, highlighting the importance of matching expected sun hours with camera activity. Case studies show that alignment with typical sun paths and protection from heat can yield the most consistent results. Remember that every installation is unique, so approach the setup as an iterative process: monitor, log, and adjust for your local conditions.
Edge 2 solar panel compatibility and setup
| Aspect | Edge 2 Solar Panel | Notes |
|---|---|---|
| Power input range | 6V-12V | Matches common trail camera inputs; verify your device specs |
| Connector type | DC barrel / weather-protected | Use adapters if necessary for non-standard plugs |
| Mounting options | Flat surface or tripod | Position for sun exposure and security |
| Weather considerations | Weatherproof seals required | Keep connectors dry and protected |
Frequently Asked Questions
Is the moultrie edge 2 solar panel compatible with other cameras?
The Edge 2 solar panel is primarily designed for Moultrie Edge 2; other cameras with matching input and connector may work, but verify voltage and plug type.
Mostly for Edge 2; check voltage and connector.
How do I install the solar panel safely?
Follow the manufacturer's instructions, keep connectors dry, mount away from high heat, and ensure the panel is angled to catch sun.
Follow instructions, keep it dry, angle toward sun.
What is the expected battery life impact?
Expect fewer battery changes during sunny periods; variability is based on sun hours and camera activity.
In sunny days, expect fewer battery swaps.
Can I use any solar panel with the Edge 2?
Only panels that meet Edge 2's input specs and connector type should be used; verify with the user manual.
Only use panels that match the Edge 2's input spec.
What maintenance is required?
Clean the panel surface periodically, inspect cables for wear, and reseal weatherproof connections as needed.
Keep it clean and check the cables.
Does solar charging reduce environmental impact?
Yes, solar charging can reduce battery waste, but ensure proper disposal of old batteries when needed.
Solar charging helps reduce waste.
“A properly oriented solar panel can noticeably extend field uptime for trail cameras, but real improvements depend on sun exposure, battery health, and installation quality.”
Top Takeaways
- Position the panel for maximum sun exposure.
- Verify camera compatibility before purchase.
- Expect seasonal variability in performance.
- Keep connections weatherproof and clean.
- Regularly monitor power levels and adjust placement