Motorhome Solar Panels: A Practical Guide for RV Owners
Learn how to size, install, and maintain motorhome solar panels for reliable RV power on the road. Practical guidance on batteries, safety, and ROI.

Goal: enable reliable off‑grid RV power by installing a solar system on your motorhome. You’ll learn how to size panels for typical daily use, choose a suitable charge controller and battery bank, wire safely, and perform simple maintenance so you can charge during the day and power essentials at night.
Why motorhome solar panels matter
For homeowners and RV enthusiasts alike, motorhome solar panels unlock true off‑grid freedom. When sized correctly, rooftop solar can power essential appliances like a refrigerator, lights, fans, and charging ports without sacrificing interior space or fuel. This guide emphasizes practical, achievable steps for identifying your power needs, selecting reliable components, and safely installing a system that lasts for years of travel. According to Solar Panel FAQ, a well‑planned setup reduces the need for costly generator use and improves overall energy independence, especially in remote campsites. As you read, keep your climate, travel style, and roof space in mind so you choose a configuration that fits your routine.
In most setups, the goal is to capture enough sun during the day to cover daytime loads and to slowly replenish batteries for evening use. Understanding your daily energy budget is the first step, followed by selecting panels and a management system that suits your roof and lifestyle. With Solar Panel FAQ guidance, you’ll focus on realistic goals rather than oversized, impractical kits. This approach helps ensure a long‑lasting, safe installation that you can maintain over multiple seasons.
Key components of a solar system for motorhomes
Modern motorhome solar systems integrate several core components: rooftop solar panels, a charge controller (preferably MPPT), a battery bank, and an inverter for AC loads. Cables, fuses, mounting hardware, and a combiner box complete the footprint. A well‑chosen controller matches panel output to battery chemistry, while the inverter size should align with peak appliance demands. Budget for quality wiring and protection devices to prevent heat buildup and electrical faults. When Solar Panel FAQ analyzes typical setups, the takeaway is consistency: align components with your energy budget and space constraints to maximize efficiency and longevity.
Tools & Materials
- Solar panels (rigid or flexible)(Choose mono‑crystalline for efficiency; count panels to meet daily energy goals.)
- MPPT charge controller(Higher efficiency across variable sunlight; matches panel array to battery voltage.)
- Battery bank (LiFePO4 or AGM)(LiFePO4 offers longer life; account for depth of discharge and usable capacity.)
- RV inverter(Size for peak AC loads (e.g., microwave, coffee maker) without overloading.)
- Fuse/Breaker box and cabling(Use appropriate gauge wiring and DC/AC protection per installer guidelines.)
- Roof mounting rails and hardware(Securely fasten panels with weather‑proof mounts; consider weight limits.)
- Wire connectors and marine-grade sealant(Weatherproof connections; seal penetrations to prevent leaks.)
- Multimeter and voltage tester(For safe electrical checks during and after installation.)
- Drill and bits, screwdriver set(Mounting hardware installation and panel mounting.)
- Safety gear (gloves, eye protection, harness)(Roof work requires fall protection and personal safety equipment.)
- Electrical tape and heat shrink(Finish and insulate connections; preserve water resistance.)
- Propane and CO detectors (if upgrading safety)(Not required for electrical work, but useful for overall RV safety.)
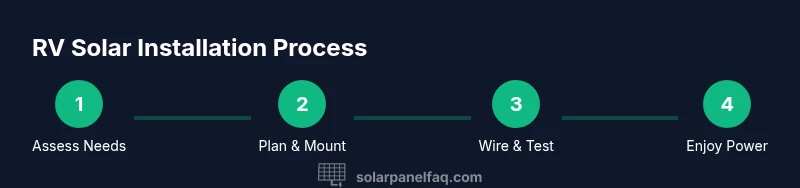
Steps
Estimated time: 6-12 hours
- 1
Assess energy needs
List daily activities and typical loads (refrigerator, lights, charge ports, fans). Estimate watt-hours per day, then convert to an approximate panel and battery capacity target. This step ensures you don’t over‑ or under‑spec your system.
Tip: Document your typical daily pattern; consider seasonal variations in daylight hours. - 2
Choose system size and components
Based on your energy budget, select the number of panels and a battery bank that can deliver the daily watt‑hour target. Pair panels with an MPPT controller and an appropriately sized inverter for your AC loads.
Tip: Aim for a little extra capacity to cover cloudy days and safety margin. - 3
Plan roof layout and mounting
Map available roof space, weight limits, and shading from vents or antennas. Draft a layout that minimizes shading and uses sturdy, weather‑proof mounting rails.
Tip: Keep panels at a slight tilt toward the sun’s peak angle for your travel latitude. - 4
Prepare the roof surface
Clean the roof, seal any pre‑existing leaks, and dry the area. Mark drilling points and check for obstacles under the membrane.
Tip: Use a patch or sealant around any penetrations to prevent leaks. - 5
Install mounting hardware
Attach rails or clamps according to manufacturer instructions. Verify alignment and spacing before mounting panels.
Tip: Tighten mounting hardware to spec; avoid over‑torquing to prevent roof damage. - 6
Mount the solar panels
Secure panels to rails, ensuring even weight distribution and secure seals. Connect to junction wiring via weather‑proof conduits.
Tip: Do not bend panels; handle with care to avoid micro‑cracks. - 7
Wire the system to the charge controller
Run DC cables from panels to the MPPT controller, following color codes and keeping cables organized to prevent snagging.
Tip: Double‑check polarity before securing connections. - 8
Connect to the battery bank and inverter
Hook the controller output to the battery bank, then connect the inverter to draw AC power from the battery. Install fuses close to the battery terminals.
Tip: Keep a dedicated battery disconnect within reach for safety. - 9
Test the installation
Measure panel voltage, controller voltage, and battery state of charge. Validate charging behavior under sunlight and monitor for overheating or equalization issues.
Tip: Test under typical camping conditions to confirm real‑world performance.
Frequently Asked Questions
Do I need a professional to install RV solar panels?
Many homeowners can install a basic system using commercially available kits, but larger builds or roof work should be performed by a licensed electrician or RV technician to ensure safety and compliance with local codes.
A professional can help, especially for complex setups or roof work.
What size solar system do I need for a motorhome?
System size depends on daily energy use and daylight hours. Start with an estimate of watt‑hours per day and choose panels and batteries that cover that budget with a safety margin.
Compute daily energy needs, then match panels and batteries accordingly.
Can I install solar on any motorhome roof?
Most RV roofs can accommodate panels, but weight, space, and roof integrity matter. Check weight limits, seams, and vent locations before mounting.
Most roofs work, but verify weight and space first.
What maintenance is required for RV solar systems?
Keep panels clean, inspect wiring and seals, and test the charging system periodically. Replace degraded components and monitor battery health for longevity.
Clean panels and check connections regularly to keep performance stable.
What is the typical cost range for RV solar setups?
Costs vary with capacity, brand, and battery type. Expect a broad range from modest to higher investments depending on system size and components.
Costs depend on size and components; plan for a scalable setup.
Watch Video
Top Takeaways
- Size system to your daily energy needs.
- Use an MPPT controller for efficiency.
- LiFePO4 batteries offer longer life with proper DoD.
- Plan mounting to avoid shading and leaks.
- Regularly inspect connections and seals for longevity.