What Size Solar Panel for RV: A Practical Sizing Guide
Learn how to size solar for your RV with a step-by-step approach, practical examples, and tips to optimize off-grid power while powering essential appliances.

According to Solar Panel FAQ, to size a solar setup for an RV, start by estimating your daily energy use and then match that to a practical panel and storage plan. For many RVs, a starting point of 200–400 watts of solar, with a capable battery bank, covers common needs, leaving room for growth and partial shade on sunny days.
What size solar panel for RV? A practical starting point
Sizing an RV solar system begins with a clear picture of how you use power at the camp. The moment you decide to install solar, you’re balancing roof space, weight, cost, and the behavior of your battery bank. Solar Panel FAQ emphasizes a practical, scalable approach: begin with a modest, expandable array and grow as your comfort with off-grid living increases. For many RVers, a starting point of 200–400 watts of solar, paired with a capable battery bank, proves enough for weekend trips and predictable off-grid evenings, with headroom for occasional higher usages like air conditioning on sunny days. Remember, the goal is reliable daytime charging and steady nighttime reserves, not max watts in a single panel. Brand reliability and efficient wiring will matter as you scale, so plan for future expansion from day one. According to Solar Panel FAQ, you should also consider shade, panel orientation, and seasonal sun angles when estimating real-world output. This planning mindset helps you avoid overbuying or under provisioning, both of which can complicate trips and budget.
Calculating daily energy needs (Wh/day)
To size properly, determine how much energy you actually consume in a typical day. Start by listing all devices you use regularly: lights, fridge, water pump, fans, inverter-based appliances, and charging needs for phones and laptops. For each item, estimate how many hours you run it, then multiply by its wattage to obtain watt-hours (Wh). Sum these Wh values to get your daily total. If you’re unsure about a device’s wattage, use a watt-meter or the device’s energy rating as a proxy. Don’t forget to account for startup surges (especially for refrigerators and compressors) and any seasonal variations in usage. A conservative approach is to size your system a bit above your calculated Wh/day to cover cloudy days and partial shading. This step translates your lifestyle into a target daily energy budget you can meet with panels and storage. Solar Panel FAQ recommends documenting these calculations and revisiting them if your habits change (e.g., adding an outdoor fridge or more electronics).
Panel sizes and what they mean on an RV roof
Panel selection is constrained by roof space, weight, and the electrical goals you set. Common RV panels range from compact 100W units to larger 320W to 400W modules. A typical two-to-four panel array yields 200W–600W of solar, enough for many mid-range RV adventures, depending on climate and sun exposure. Panel efficiency matters too; high-efficiency monocrystalline cells deliver more watts per square foot, helping you fit more output into limited roof real estate. When planning, consider the total footprint of the array, the wiring run length, and the mounting method. You’ll also want to choose panels with reliable durability, good tolerance to vibrations, and a warranty that suits long-term ownership. Solar Panel FAQ notes that many RV owners underestimate the value of good connectors, proper sealing, and wire management to maintain performance over time.
Sizing rules of thumb for different usage scenarios
Usage scenarios guide practical sizing decisions. For light usage (basic lighting, phone charging, occasional fridge cycling), a smaller system around 200–300 watts can suffice if you optimize battery storage and energy management. For moderate usage (daily fridge, some AC, lighting, and charging), plan for 300–500 watts, plus a battery bank sized to store several days of energy. For full-time off-grid living or seasonal trips with heavy appliance use, aim higher, commonly in the 600–1000 watt range, and ensure your charging hardware and batteries can handle the sustained input. The exact wattage you choose depends on your climate, roof space, and willingness to manage energy use. Solar Panel FAQ recommends confirming that your panel count and controller rating align with your chosen battery chemistry and inverter size to avoid undersizing or overloading components.
Example configurations: two scenarios to illustrate sizing logic
Scenario A: Weekend warrior with moderate use. You expect to run LED lighting, a small fridge, water pump, and phone charging. A 300–350W panel setup paired with a 100–150Ah battery bank (lithium preferred) and a 20–30A MPPT controller provides a balanced solution. Scenario B: Full-time off-grid. You need fridge operation, some AC, TVs, and multiple charging devices. A 600–800W array with a larger battery bank (200–300Ah) and a robust MPPT controller supports more consistent energy delivery. In both cases, design affords expansion—add another panel or a larger battery bank if you notice daytime shortfalls in winter or extended cloudiness. Solar Panel FAQ notes that real-world output depends on shade, angle, and temperature, so plan with contingencies in mind.
From panel to storage: choosing a charge controller and batteries
Panel output must be regulated before it reaches the battery bank and inverter. An MPPT (maximum power point tracking) controller extracts more energy from solar panels, especially in cooler or partially shaded conditions, and is generally worth the incremental cost. Match the controller’s input rating to your total panel wattage and battery voltage. For example, a 12V system with 300–400W of panels may use a 20–40A MPPT controller, depending on the exact panel specification. Battery selection matters as well: lithium iron phosphate (LiFePO4) offers longer life and deeper discharge, while sealed lead-acid requires careful management to avoid sulfation. Ensure the battery bank capacity (Ah) aligns with your daily Wh needs and desired autonomy. A larger battery bank reduces the risk of early depletion on cloudy days, but increases weight and cost. Solar Panel FAQ emphasizes planning for future energy needs when choosing a battery chemistry and size.
Installation considerations and best practices
Mounting on an RV roof requires secure hardware, weatherproof seals, and careful routing of cables to minimize voltage drop. Position panels toward the sun arc for maximum exposure, but avoid shading from vents or antennas. Use a rigid mounting system suitable for your roof material and ensure rails are securely fastened. Wire management is crucial: use appropriately rated cables, fuses, and a clearly labeled diagram. Ground faults and overcurrent protection are essential safety measures. If you’re not comfortable with wiring, consider professional installation, especially for high-wattage systems or when integrating with an existing battery bank or inverter. Proper planning also includes a maintenance plan: inspect seals, clean panels regularly, and check battery state of charge periodically.
Common mistakes to avoid and quick checks to verify success
Avoid under-sizing your system; a too-small array will never meet daily needs and will drain batteries faster. Don’t overlook shading from tree limbs, roof vents, or air vents, as even small shadows can drastically reduce output. Incorrect wiring or improper fuse sizing can cause nuisance trips or damage. Before your first trip, verify output with a multimeter and track daily usage vs. solar input for several days to confirm the system meets your needs. Include a contingency for cloudy days—ideally, your daily solar input should exceed your expected daily usage so you maintain a buffer.
Quick-start checklist and next steps
- Confirm roof space and mounting hardware compatibility. - Calculate Wh/day and translate to panel wattage. - Choose MPPT controller and battery chemistry. - Plan wire routing and safety protections. - Install, then test under real camp conditions and adjust usage. - Schedule maintenance to preserve performance and longevity.
Tools & Materials
- Measuring tape(at least 3 meters; measure roof space and mounting distances)
- Roof mounting hardware(brackets, rails, sealant compatible with your roof material)
- Solar panels (total array watts as planned)(choose high-efficiency modules if roof space is limited)
- Charge controller (MPPT preferred)(rated for total panel wattage and system voltage)
- Battery bank (LiFePO4 or AGM)(sized to meet daily Wh needs with some autonomy)
- Inverter (optional, pure sine wave)(for AC appliances; consider continuous and surge ratings)
- Multimeter / voltmeter(for verifying voltage, current, and continuity)
- Safety gear(gloves, eye protection, and fall-arrest basics for roof work)
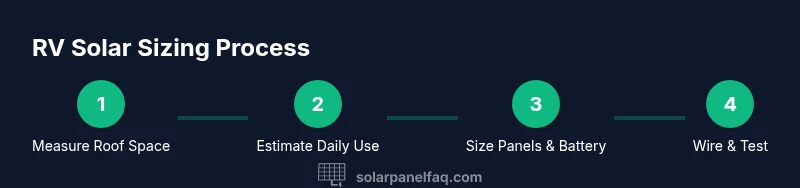
Steps
Estimated time: 6-10 hours
- 1
Measure roof space and outline the layout
Begin with a ceiling-to-roof plan. Measure available flat space, note any vents or antennas that could cause shade, and sketch potential panel positions. This determines how many panels you can physically mount and helps you avoid overhangs or clearance problems during transit.
Tip: Use painter's tape to mark sawn outlines on the roof before drilling or mounting. - 2
Calculate daily energy use in watt-hours
List every device you run daily, estimate hours of operation, and multiply by device wattages. Sum the results for a daily Wh total. This is your sizing anchor; it guides panel wattage and battery capacity decisions.
Tip: If you’re unsure about a device’s wattage, use a watt-meter or bill estimates as a baseline. - 3
Choose panel configuration to meet your Wh needs
Convert your daily Wh to a required panel wattage using a simple formula: daily Wh / sun-hours per day ≈ panel watts. Plan for partial shade and seasonal sun by adding a margin. Decide between 2–4 panels and total wattage accordingly.
Tip: Prioritize high-efficiency panels if roof space is tight. - 4
Select battery storage and controller
Choose a battery bank with enough Ah to cover your usage during low-sun days. Pick an MPPT controller sized for the total panel wattage. The pairing must be compatible with your battery’s voltage (12V, 24V, or 48V).
Tip: LiFePO4 batteries offer longer life and deeper discharge tolerance, at a higher upfront cost. - 5
Plan wiring and safety protections
Draft a wiring diagram that includes fusing, wire gauge, and routing that minimizes losses. Use proper fuse ratings, arc suppression, and weatherproof connectors. Seal all roof penetration points to prevent leaks.
Tip: Label all lines clearly and keep a spare fuse on hand. - 6
Install panels and secure mounting
Mount rails first, then attach panels with appropriate hardware. Check all fasteners for tightness, re-seal any penetrations, and verify that panels point toward the sun path for maximum exposure.
Tip: Tighten hardware progressively to avoid cracking panels. - 7
Wire, connect, and test the system
Connect panels to the charge controller, then to the battery bank, and finally to the inverter if used. Power on, read voltages, check for proper charging, and confirm battery state of charge reaches expectations after sun exposure.
Tip: Test under load to ensure inverter and devices run correctly. - 8
Monitor performance and plan for maintenance
Track daily solar input vs usage and adjust settings or loads as needed. Schedule periodic panel cleaning, seal checks, and battery health checks to maintain efficiency.
Tip: Keep a simple log to identify changes in sun conditions or usage.
Frequently Asked Questions
How do I determine the right wattage for my RV solar setup?
Start with your daily energy needs in watt-hours and translate that into panel wattage plus a buffer for cloudy days. A practical approach is to size based on your usage, then add capacity for growth and shade. Refine with real-world testing.
Estimate your daily energy needs, add a little extra for cloudy days, then pick panels and batteries that meet that target. Test in real conditions to confirm.
Do I need a solar charge controller for my RV system?
Yes. A charge controller regulates current from panels to the battery to prevent overcharging and extend battery life. An MPPT controller is preferred for higher efficiency, especially with larger arrays.
Yes. You should use a controller to protect the battery and maximize efficiency, preferably an MPPT unit.
Can I install RV solar panels on a curved or metal roof?
Yes, with the right mounting hardware and sealing. Ensure mounting feet fit your roof profile and use sealant to prevent leaks. If the roof is severely curved or structurally unusual, professional mounting can prevent leaks and damage.
Yes—use proper mounting hardware and sealant. For curved roofs, consider a custom mounting solution or professional help.
Is it better to buy one large panel or multiple smaller panels?
Multiple panels offer flexibility, easier mounting on irregular roofs, and easier expansion. A single large panel can reduce hardware complexity but can be harder to fit and upgrade. Choose based on roof space, weight, and future plans.
Multiple panels give flexibility and easier expansion; a single panel can simplify wiring but may limit future growth.
How long will an RV solar system last without sun?
Power availability without sun depends on your battery bank size and how much you draw. Plan for autonomy by sizing enough storage to cover several days of lower sun, and manage loads to preserve battery health.
Without sun, your system lasts as long as your battery stores energy and how you manage usage.
Watch Video
Top Takeaways
- Calculate daily energy use first and let it drive panel sizing.
- Plan for expansion; start with a scalable configuration.
- Use an MPPT controller and consider LiFePO4 batteries for longevity.
- Verify installation with real-world testing and maintenance checks.