Mini Solar System: A Homeowner's Step-by-Step Guide
A practical how-to guide for homeowners to plan, size, install, and maintain a mini solar system for small loads, backup power, or off-grid experiments. Learn sizing, safety, and maintenance with practical examples.

You can install a compact home solar setup called a mini solar system to power small loads or charge batteries. This guide shows how to plan, size, install, and safely operate a mini solar system for a DIY-friendly home. Ideal for off-grid cabins or homes seeking backup power. This approach emphasizes safety and scalability. You'll learn practical steps for a reliable, small-footprint setup.
What is a mini solar system?
A mini solar system is a compact, modular photovoltaic setup designed for residential use with smaller energy demands. It typically combines 1–4 solar panels, a charge controller, a small battery bank, and an inverter or DC loads hardware. The goal is to provide reliable, safe power for essential devices or to store energy for emergencies without the scale and complexity of a full rooftop array. According to Solar Panel FAQ, these systems are ideal for homeowners who want hands-on learning, a backup power option, or a portable energy solution for cabins and sheds.
Key differences from larger grid-connected systems include size, installation footprint, and the components' affordability. A mini solar system can be installed on a balcony, a shed, or a sunny section of the yard, and it can be expanded gradually. It typically operates at lower voltages (12V or 24V) which reduces shock risk and simplifies wiring for DIY enthusiasts. However, even small systems require careful planning, proper wiring practices, and attention to local electrical codes. This block should set expectations and demystify core terms.
Why homeowners consider a mini solar system?
Homeowners choose a mini solar system for resilience, energy independence, and the flexibility to scale up gradually. A compact system can power essential loads during a grid outage, charge portable storage, or offset daily electricity use in small living spaces like apartments, tiny homes, or balconies. Its modular nature makes it easier to retrofit into existing roofs or outdoor storage areas without large permits. For many, a mini solar system also provides a tangible pathway to learning about solar energy and battery technology while avoiding the upfront costs of a full rooftop installation. The result is a practical balance between practicality and experimentation that aligns with real-world budgets and timelines.
Core components and how they work
A mini solar system relies on a straightforward chain of energy conversion and protection:
- Solar panels convert sunlight into direct current (DC) electricity. The number and wattage determine how much energy you can capture daily.
- A charge controller regulates the voltage and current going into the battery, preventing overcharging and reducing wear on the storage bank. Depending on the model, you may choose a PWM controller for simplicity or an MPPT controller for higher efficiency.
- A battery bank stores energy for use when the sun isn’t shining. Lithium-based or deep-cycle lead-acid batteries are common choices; sizing depends on daily use and desired autonomy.
- An inverter (optional for AC loads) converts DC from the battery into alternating current suitable for household devices.
- Protective components such as fuses, breakers, disconnect switches, and properly rated wiring ensure safe operation and minimize risk during storms or high current events.
Understanding how these parts interact helps you design a system that matches your goals and fits your space.
Sizing your mini solar system: a practical approach
Sizing a mini solar system starts with your energy goals and the local sun profile. Step one is to list every device you intend to run and estimate average daily energy in watt-hours (Wh). For example, a laptop (60–90 W) used 4 hours daily equals about 240–360 Wh. Add a few LEDs, a phone charger, and a small fan to reach a daily total in the low hundreds of Wh.
Next, pick a system voltage (commonly 12 V or 24 V) and choose a panel that can meet your daily energy target with the available sun hours. If you estimate 5 full sun hours per day and want 300 Wh daily, a 60 W panel provides roughly 300 Wh under ideal conditions. Remember to multiply by a margin (1.25) to account for inefficiencies and cloudy days when sizing the battery.
Battery sizing typically follows: Ah = (Daily Wh) / System Voltage × 1.25. For a 12 V system with 300 Wh daily, that yields about 31–32 Ah of usable capacity. To avoid deep discharges and extend life, plan for a larger bank (e.g., 40–60 Ah) depending on autonomy needs. Finally, size the inverter to handle your peak load, prefer low–idle losses, and allow for safe wire sizing and protection.
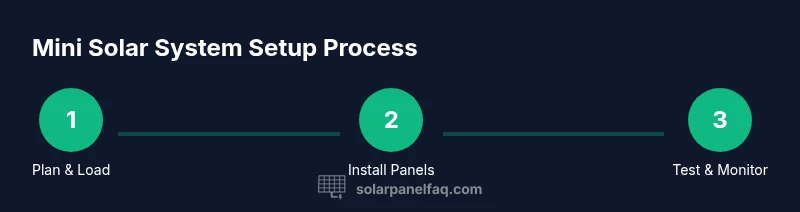
Step-by-step: plan, install, and test
Plan your mini solar system by sketching a layout: panel placement, distance to the battery, and a clear path for wiring. Write down the load list and a target daily energy budget. Gather all components and verify compatibility before any mounting begins.
Install panels using weather-resistant hardware on a stable surface, with proper tilt for your location. Route wiring in conduits or protected channels to prevent damage. Mount the charge controller in a dry, ventilated area near the battery and connect the DC side according to the manufacturer’s diagram. Connect the battery bank last, ensuring correct polarity and bus connections. Then, install the inverter (if using AC loads) and test the entire system, starting with a low-draw load to confirm voltage, current, and battery health. Finally, set up a simple monitoring method (voltage or a basic charge controller display) to track performance over time.
Tip: Keep a detailed wiring diagram and a logbook of measurements. Warning: Never work on live circuits; disconnect power sources before handling cables or batteries. Allow at least a few hours for a first full charge and deep-cycle testing to verify system behavior.
Maintenance, safety, and common pitfalls
A mini solar system requires regular checks to stay reliable. Clean panels lightly with non-abrasive methods, verify that panel mounting remains secure after wind events, and inspect connections for corrosion or looseness. Check battery electrolyte levels (for lead-acid) and monitor voltage and health if you use lithium cells. Keep batteries in a ventilated area and away from heat sources. If you notice rapid voltage drops or unusual heat, pause use and recheck wiring and fusing. Common pitfalls include oversized loads for a small system, neglecting temperature effects on battery performance, and ignoring permit or code requirements for roof-mounted configurations. By staying proactive, you can maximize efficiency and lifespan while maintaining safety.
Tools & Materials
- Solar panels (appropriate wattage for your goals)(High-quality panels with corrosion-resistant frames)
- Battery bank (lead-acid or lithium)(Deep-cycle recommended; size to daily energy + autonomy)
- Charge controller (PWM or MPPT)(MPPT preferable for efficiency, especially in fluctuating temps)
- DC disconnect switch(Safely isolate the array and battery)
- Fuse box/fuses and breakers(Overcurrent protection for safety)
- Inverter (if AC loads are needed)(Choose based on peak load and continuous rating)
- Wiring and connectors (PV wire, MC4, etc.)(Use weather-rated, appropriately sized cables)
- Battery enclosure or rack(Ventilated and secure to prevent spills and damage)
- Safety gear (insulated gloves, safety glasses)(Personal protective equipment for handling batteries)
- Tools (multimeter, wire cutters/strippers, screwdriver set)(For measuring, connecting, and securing wires)
Steps
Estimated time: 6-12 hours
- 1
Define goals and loads
List every device you plan to power and estimate daily energy in Wh. This establishes your target size and helps avoid over- or under-sizing the system.
Tip: Document wattages and daily hours; use a simple spreadsheet to track totals. - 2
Size the system components
Choose system voltage (12V or 24V), panel wattage, battery capacity, and inverter rating based on your load and sun exposure.
Tip: Always include a safety margin (20–50%) to cover cloudy days and aging components. - 3
Gather equipment and verify compatibility
Check that chosen panels, controller, battery, and inverter can be connected with the same voltage and compatible connectors.
Tip: Review efficiency ratings and ensure wire gauges meet current requirements. - 4
Mount panels and route wiring safely
Install panels securely in a sunlit area with a clear path for wiring. Use protective conduits and keep DC runs as short as possible.
Tip: Avoid routes near water sources or heat sources; plan drainage and drip loops. - 5
Make electrical connections and set up protection
Connect the charge controller, battery bank, and inverter as per diagrams. Install fuses/disconnects and verify polarity before energizing.
Tip: Double-check polarity and secure connections; loose leads cause heat and fire risk. - 6
Test, monitor, and adjust
Power up the system with a light load and monitor voltage, current, and battery state of charge. Adjust tilt, wiring, or load distribution as needed.
Tip: Document measurements and perform a full discharge/charge cycle to validate performance.
Frequently Asked Questions
What is a mini solar system?
A mini solar system is a compact, modular photovoltaic setup designed for residential use with smaller energy demands. It includes panels, a charge controller, a battery bank, and sometimes an inverter. It’s ideal for learning, backup power, or powering small loads.
A mini solar system is a small, modular solar setup for homes, including panels, a controller, and batteries, used for learning or backup power.
Can I install a mini solar system myself?
Yes, many homeowners install a basic mini solar system themselves with proper caution and adherence to local codes. Start with a simple, low-risk configuration and gradually expand as you gain experience.
Yes, you can install a basic mini solar system yourself, but follow safety rules and codes and start small.
What loads can a mini solar system support?
A mini solar system typically powers low-wattage devices like chargers, laptops, LEDs, small fans, and other essential electronics. Larger appliances may require a bigger system or alternative power sources.
It can power small devices like chargers and LEDs; big appliances need a bigger system.
How much maintenance does it require?
Maintenance is generally light: clean panels, inspect wiring, monitor battery health, and verify connections every few months. Battery technology will influence maintenance needs, with lithium requiring less water top-up than lead-acid.
Maintenance is light—clean panels and check connections and battery health regularly.
Is it safe to install on a roof?
Roof installs require careful assessment of roof structure and local codes. If rooftop mounting is pursued, ensure proper fasteners, weatherproofing, and adherence to electrical standards; consult a professional if in doubt.
Roof installation should follow safety rules and local codes; consult a pro if unsure.
Are mini solar systems expandable later?
Yes. Most mini solar systems are modular by design, allowing you to add more panels, a larger battery, or a bigger inverter as energy needs grow.
They’re usually expandable—add panels, battery, or inverter as your needs grow.
Watch Video
Top Takeaways
- Plan around daily energy needs first
- Size with a conservative safety margin
- Prioritize safety and compliance in every step
- Regularly monitor battery health and connections
- Expand gradually to grow capability