How to Install Solar Panel Without Battery
Learn how to install a solar panel without a battery using grid-tied wiring. This guide covers planning, permits, equipment, safety, and maintenance for homeowners pursuing storage-free solar energy.

You can install a solar panel without a battery by wiring it to a grid-tied inverter that feeds your home, rather than a storage system. Ensure permits, interconnection approval, and code-compliant mounting. This approach relies on the utility grid for balance and does not include battery storage.
What installing solar panel without battery means
In a no-battery setup, the solar array feeds power directly into an inverter that converts DC to AC and supplies your home's electrical panel. The system relies on the grid to balance load, store excess energy (indirectly via net metering), and provide power during sun gaps. This approach often reduces upfront costs and complexity but sacrifices off-grid resilience. According to Solar Panel FAQ, grid-tied, no-battery configurations are increasingly popular among homeowners seeking low-cost, storage-free solar. Modern no-battery installations use either string inverters with a central interconnection or microinverters mounted on each panel to optimize performance in partial shade. This option is well-suited for households with consistent sun and favorable utility terms, but it does not offer backup power during outages.
Grid-tied vs off-grid: No-battery setup explained
The primary distinction is how energy is stored and used. A grid-tied, no-battery system sends generated electricity to the home and to the grid, with excess credited through net metering. Off-grid designs require batteries and typically generators for reliability. No-battery systems depend on the utility to balance supply and demand, so you won’t have islanded power during grid failures. Understanding this difference helps you set expectations for cost, performance, and resilience.
Key takeaway: grid-tied, no-battery setups prioritize simplicity and cost savings, while sacrificing independent power during outages.
Planning, permits, and interconnection
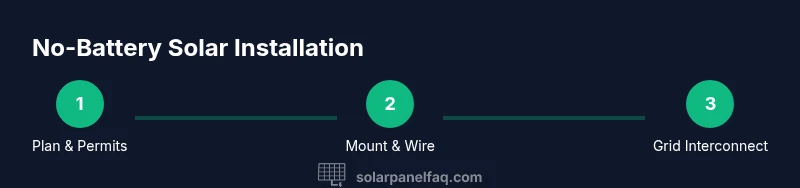
Planning begins with a load assessment and site evaluation to determine how many panels you’ll install and where they’ll mount. Next, obtain building permits and an interconnection agreement with your utility, which confirms that your system meets safety and grid-connection standards. A successful interconnection allows the inverter to export electricity to the grid and receive any net metering credits. Documentation usually includes panel layout drawings, equipment specifications, and electrical diagrams. Solar Panel FAQ emphasizes coordinating with city officials and the utility early to avoid delays and ensure code compliance. This stage often takes 1–3 weeks depending on local processes.
Equipment and safety considerations
For a battery-less install, choose a grid-tied inverter (or microinverters) compatible with no-battery operation. Mounting hardware and racking must be rated for your roof type and local weather. Use appropriately rated conduit, disconnects, and weatherproof enclosures. Grounding and bonding are essential for safety and code compliance. Include a DC/AC disconnect near the main service panel and ensure the system can be isolated for maintenance. Personal protective equipment (PPE), fall protection for roof work, and ladder safety are non-negotiable. Always have a licensed electrician review wiring diagrams and sign off on critical steps.
Branding and documentation are important: keep a copy of the interconnection approval, equipment manuals, and inspection records in your home maintenance file.
Design choices for no-battery installations
System sizing should align with your typical energy usage and local net metering policies. Oversizing panels can maximize solar credits, but it may not translate to savings if you’re limited by utility rules. Panel orientation and shading influence production more than any other factor; aim for a roof slope that maximizes sun exposure during peak hours. While battery storage isn’t required, some homeowners still opt for microinverters to improve performance under partial shade. Plan cable routes to minimize bends and ensure drainage and water exposure are addressed. Consider future add-ons—if you ever want storage, you’ll need to revisit your inverter and wiring configuration.
Wiring and grid connection basics
Wiring begins at the solar modules, continues through a racking-mounted conduit, and ends at the inverter. From the inverter, power flows to the AC disconnect and then to the main service panel, where it can be used in real time or exported to the grid. Use appropriate overcurrent protection devices sized to your inverter, and ensure a compliant backfeed into the electrical panel. Do not bypass the main disconnect or interconnection safety devices. The system should be clearly labeled and documented for future maintenance and inspections.
Maintenance and monitoring without storage
No-battery systems require routine inspection of panels for dirt and debris, checking mounting hardware for corrosion, and verifying that the inverter is operating within spec. Monitoring software should show real-time production, voltage, and performance ratios. Schedule annual inspections to verify wiring integrity, grounding, and labeling. Clean panels gently with water and a soft brush as needed, avoiding harsh cleaners that could degrade coatings. Monitoring helps detect problems early—like shading changes from new tree growth or soiling that reduces output.
Common mistakes and how to avoid them
Common errors include skipping permits, underestimating roof load, and mis-sizing the inverter. Failing to verify interconnection terms with the utility can delay or derail installation. Inadequate ventilation around the inverter can shorten its life, while ignoring panel cleanliness reduces energy yield. Always follow local codes and manufacturer instructions, and hire qualified professionals for critical tasks like wiring and service panel connections.
Financial considerations and incentives
Your no-battery setup often has lower upfront costs than battery-based systems, with savings tied to simpler installations and net metering credits. Costs and incentives vary by region, utility, and policy changes, so research local programs and tax credits. While you won’t receive storage-related credits, some programs offer accelerated depreciation for commercial installations or regional rebates for grid-tied solar. Solar economics hinge on usage patterns, daytime needs, and energy prices.
Authoritative sources
- U.S. Department of Energy: Solar Energy technologies program
- National Renewable Energy Laboratory (NREL): Solar resources and interconnection guidelines
- Local utility interconnection requirements and building codes
Authoritative sources
Debt-to-equity and future-proofing considerations
Tools & Materials
- Solar panels(Number depends on system size and roof space)
- Grid-tied inverter(Must be compatible with no-battery operation)
- Racking and mounting hardware(Roof- or ground-mounted, rated for outdoors)
- Conduit and outdoor-rated wiring(Routing from panels to inverter and panel to service panel)
- AC disconnect switch(Near the main service panel for isolation)
- DC disconnect (if applicable)(May be required on some panel configurations)
- Grounding equipment(Ground rods/bonding per local code)
- Safety gear(Hard hat, harness, non-slip footwear)
- Permits and interconnection documents(Include electrical permits and interconnection agreement)
Steps
Estimated time: 1-2 days for installation plus 1-3 weeks for permits and utility interconnection
- 1
Plan and secure permits
Assess energy needs and site constraints; estimate panel count and wiring route. Submit plans to the local building department and utility for permits and interconnection approval. Maintain copies of all documents for inspections.
Tip: Start the permit process early to avoid installation delays. - 2
Prepare mounting area and roof/ground layout
Inspect the mounting surface, confirm rafters or soil bearing, and mark the layout for panel placement and shading considerations. Verify roof integrity and weatherproofing before attaching hardware.
Tip: Use a spacer template to ensure uniform alignment across rows. - 3
Install racking and attach panels
Secure mounts to the roof or ground frame, following the manufacturer’s torque specs. Install panels on the racking and ensure proper orientation for maximum sun exposure.
Tip: Double-check fasteners for corrosion resistance and seal penetrations properly. - 4
Connect panels to the inverter system
Run DC cables from the panels to a nearby junction box and then to the grid-tied inverter. Install a DC disconnect if required and label cables clearly.
Tip: Avoid long runs and sharp bends to minimize resistance and heat. - 5
Interconnect with the main service panel
Route the AC output from the inverter to the main service panel via the approved disconnect and backfeed breaker. Ensure the utility-interconnection requirements are met and the system is safely isolated.
Tip: Respect the utility’s backfeed requirements and labeling standards. - 6
Test, inspection, and monitor
Power up the system, confirm voltage/current outputs, and verify net metering credits. Schedule a final inspection and set up ongoing monitoring to track performance.
Tip: Document test results and retain warranty info for maintenance.
Frequently Asked Questions
Is it legal to install solar panels without a battery?
Yes, grid-tied solar can operate without a storage battery in many jurisdictions, provided you obtain interconnection approval and follow local codes.
Yes, you can install grid-tied solar without a battery if you follow the local interconnection rules and codes.
Do I need a battery to use solar energy?
No, you can use solar energy directly through an inverter and feed it to your home grid. Batteries are only needed for storage or backup power.
No, batteries aren’t required for solar to power your home—just storage or backup if you want that feature.
Can I connect solar panels directly to my home circuits?
Solar power connects to your home through an inverter and a main service panel via a safety disconnect, not directly to circuits.
You connect solar through an inverter to your main panel with proper safety disconnects.
Will I have power during a grid outage?
With a battery-less grid-tied system, you typically lose power during outages unless you have a backup generator or storage system.
Grid outages generally cut power for no-battery setups unless you have storage or a generator.
How can I estimate costs and savings for no-battery solar?
Costs vary by region and system size; savings depend on energy usage, net metering rates, and local incentives. Consider getting a professional quote.
Costs depend on your area and system size; savings hinge on usage and incentives. Get a quote for clarity.
What are common mistakes to avoid?
Avoid skipping permits, mis-sizing the inverter, and ignoring interconnection requirements. Thorough planning and professional oversight reduce risk.
Don’t skip permits or interconnection steps; plan carefully and work with a pro to avoid mistakes.
Watch Video
Top Takeaways
- Plan with grid-tied layout before starting
- Obtain permits and interconnection approval
- Use proper safety gear and disconnects
- Monitor performance regularly