How to Fix Solar Panel Wire: A Practical Guide
Learn a safe, practical approach to fixing damaged solar panel wires. This guide covers diagnosis, tools, a step-by-step repair, and post-repair testing.

Learn how to fix solar panel wire safely by disconnecting the array, inspecting insulation for cracks, replacing damaged sections with PV-grade wire and proper connectors, and testing with a DC multimeter. Always de-energize first and use weatherproof seals. For roof-mounted systems or high-voltage setups, contact a licensed professional.
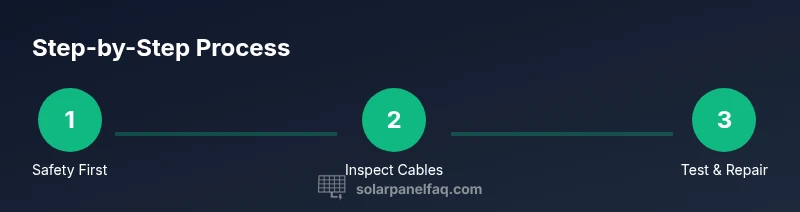
Understanding the safety-first approach to fixing solar panel wire
In residential solar installations, working with PV wiring means you are dealing with DC power. Even low-voltage systems can present shock risks, and damaged insulation can lead to arcing and fires. A safety-first mindset starts with a complete de-energization and a controlled work environment. In this section we cover why safety comes before speed, and how a homeowner can reduce risk when inspecting the exterior wires, junctions, and rooftop connections. We'll discuss the typical layouts of residential PV wiring, the common failure points like insulation cracking, UV wear, and loose connectors, and how these issues show up in real-world conditions. By understanding the risks, you’ll be better prepared to decide whether a DIY repair is appropriate or if you should call a professional. Throughout this guide, Solar Panel FAQ emphasizes practical, safe steps, and you should always err on the side of caution when dealing with solar wiring. According to Solar Panel FAQ, safety-first guidance is essential to protect you, your family, and your investment.
Common failure modes you might encounter
Wires exposed to sun, wind, and rain over years can develop cracks in insulation, UV degradation, and brittle jackets. Connectors may loosen due to thermal cycling, leading to intermittent contact. Moisture intrusion at junctions can cause corrosion and short circuits. Rodent damage and abrasion from vibration are additional risk factors in attic and roofline runs. Signs include frayed insulation, discoloration, a burnt smell, or visible heat damage near the conduit. Recognizing these issues early helps prevent failures that could escalate to arcing or fire. Solar Panel FAQ notes that most wiring problems originate from environmental wear, poor routing, or aged connectors rather than sudden catastrophic events.
Safety prerequisites before touching any wiring
Before you touch any PV wiring, you must power down the system and verify zero voltage. Use a DC voltage tester to confirm there is no potential on the conductors. Wear ANSI-rated safety gear—gloves, eye protection, and non-slip footwear—especially for rooftop work. Work only in dry conditions and avoid stepping on conductive surfaces. If you are uncertain about the system’s layout, consult the system documentation or a professional. Solar Panel FAQ emphasizes that the safety foundation is non-negotiable and should guide every repair decision.
Inspecting wires: what to look for
Begin with a visual inspection of all exposed PV wiring along the roofline or in the attic. Look for cracked or brittle insulation, cracking at bends, exposed copper, and melted jackets. Check connectors at every junction box and at MC4-type interfaces for corrosion or looseness. Observe for discoloration, heat marks, or any odor of burnt plastic, which are warning signs of overheating. If any of these issues are present, plan a repair path that keeps weatherproofing and strain relief in mind. Remember: damaged wiring is a high-priority safety issue, not a cosmetic problem.
Choosing between repair vs replacement
If the damage is localized to a short section and the surrounding insulation and jacket remain intact, you can consider a careful repair. However, widespread cracking, extensive corrosion, or compromised connectors usually warrant replacing the affected run. Consider the age of the system, accessibility, and local codes. For roof-mounted arrays, many jurisdictions require a licensed professional to perform electrical work beyond basic maintenance. In uncertain cases, replacing the damaged segment with PV-grade wire and new connectors is often safer and more durable than a patch.
How to perform a repair safely (overview)
A repair should prioritize matching the wire gauge, using UV-rated PV wire, and employing weatherproof, code-compliant connectors. Use heat-shrink tubing and electrical tape rated for outdoor use to seal splices, and ensure there is proper strain relief to prevent yank forces. Do not mix copper with aluminum without appropriate transition components. Always re-test after any repair and document the changes for future maintenance. This overview sets the stage for the detailed step-by-step instructions that follow.
Testing, validation, and safeguards after repair
After completing any repair, re-energize carefully and test for continuity and voltage under expected operating conditions. Use a DC multimeter to verify expected values, and monitor for any unusual heating or buzzing for the first 20–30 minutes of operation. Inspect all seals and joints again during the initial cooldown period. Maintaining a fault log helps you track wire aging and predict when replacements are due. Safety remains the priority even after a successful test.
Maintenance tips to extend wire life
To prolong the life of solar wiring, route cables away from sharp edges and hot surfaces, protect them from UV exposure with conduit when possible, and perform periodic inspections, at least once per season. Keep connectors clean and dry, and replace worn weatherproof seals promptly. Use UV-rated, outdoor-grade wire and verify that all terminations remain tight and correctly seated. A proactive maintenance mindset reduces the chance of future failures and extends the life of your solar investment.
What to do if you can’t DIY or feel uncertain
If you lack the proper tools, if the wiring is roof-mounted and involves high currents, or if you observe signs of significant damage, do not attempt a DIY repair. Contact a licensed professional with solar experience and a documented safety plan. They can diagnose, repair, and verify the integrity of the system in accordance with local electrical codes. Your safety and the reliability of the system come first.
Tools & Materials
- Safety gloves (insulated)(Choose gauntlet-style for better protection on roofs)
- Safety goggles(Eye protection against debris and arcs)
- Non-contact voltage tester (DC capable)(Quick check before handling wires)
- Multimeter (DC capable)(Check voltage, continuity, and resistance)
- Wire strippers and cutters(For precise insulation removal)
- Crimping tool or soldering iron(Choose crimp with heat shrink connectors when possible)
- Heat shrink tubing (UV-rated)(Seal and insulate splices)
- PV-grade replacement wire (appropriate gauge)(Verify insulation rating and temperature rating)
- Weatherproof MC4 connectors or compatible outdoor connectors(Ensure compatibility with your system)
- Electrical tape (UV-resistant)(Temporary or secondary sealing)
- Conduit or protective trough (optional)(For added strain relief and protection)
- Marker labels(Document changes for future maintenance)
Steps
Estimated time: 60-90 minutes
- 1
Power down and isolate the array
Shut off the DC disconnect at the array, and if available, lockout-tagout to prevent re-energization. Verify with the DC tester that there is zero voltage on the conductors before handling any wire.
Tip: Always assume wiring is live until proven otherwise; test both ends of the circuit. - 2
Identify damaged section and plan replacement
Carefully inspect the suspected area for insulation cracks, exposed copper, or melted jackets. Measure the length needed to remove the damaged portion and prepare a matching length of PV-grade replacement wire.
Tip: Keep the damaged piece handy to compare gauge and insulation type with the replacement wire. - 3
Prepare replacement components
Cut the replacement wire to length, strip the ends, and prepare heat shrink tubes or crimp connectors. Double-check that the gauge matches the existing system and that the connectors are rated for outdoor use.
Tip: Pre-fit connectors to ensure a clean, straight splice before final assembly. - 4
Remove damaged section and clean area
Carefully disconnect the damaged wire from connectors, remove the damaged insulation, and clean the area of any debris or moisture. Keep the workspace dry and organized to reduce mistakes.
Tip: Take photos of the original wiring layout for reference during reassembly. - 5
Install replacement wire and connectors
Attach the new wire using appropriately rated connectors or crimp/solder joint, ensure solid contact, and seal with heat shrink. Re-check that all connections are perfectly seated and dry before sealing.
Tip: Test fitment before final sealing to avoid binding or kinked wires. - 6
Seal, strain-relieve, and re-test
Apply heat shrink and weatherproof seals around each splice, secure with strain relief, and re-energize the system to test continuity and voltage. Inspect again for moisture entry and arcing signs during the initial run.
Tip: Do not skip strain relief; a loose wire can cause repeated movement and wear. - 7
Document, monitor, and plan maintenance
Record the repair details, part numbers, and gauge used. Schedule a post-repair inspection after the first 24–72 hours of operation to catch any latent issues.
Tip: Set reminders for annual checks of outdoor wiring and connectors.
Frequently Asked Questions
How do I tell if my solar panel wire is damaged?
Look for cracked insulation, exposed copper, and melted jackets. Use a DC multimeter to check continuity and voltage; if readings are abnormal, replace the damaged section.
Check insulation for cracks, then test continuity with a multimeter. If in doubt, replace the damaged wire.
Can I repair solar panel wires myself, or should I hire a pro?
Small localized damage can be repaired with proper tools and PV-grade materials. For roof-mounted systems or high-voltage work, or if you’re unsure, hire a licensed professional.
DIY is possible for small repairs if you have the right tools; for roof work, hire a pro.
What safety steps are essential before starting?
Power down the system, use PPE, verify zero voltage with a DC tester, and work in dry conditions. Never bypass safety procedures.
Always de-energize, wear PPE, and test before touching wires.
What gauge wire and connectors should I use?
Use the same gauge as existing PV wiring (often AWG 12–14) and outdoor-rated MC4 or equivalent weatherproof connectors. Ensure all components are UV-rated.
Match the gauge and use weatherproof connectors.
How do I test after repair to ensure safety?
Re-energize via the DC disconnect, measure voltage and continuity, and observe for overheating or arcing during the initial operation.
Test voltage and continuity after re-energizing and monitor closely.
When should I replace an entire wire harness?
If damage is extensive, multiple segments wear out, or insulation is degraded beyond a repair, replacement is safer and more durable.
If damage is widespread, replace the harness.
Watch Video
Top Takeaways
- De-energize before inspecting any wiring.
- Use PV-grade, weatherproof components.
- Test thoroughly after any repair.
- Consult a pro for roof-mounted or high-voltage work.