Guide to Solar Panels for Home
Learn how to evaluate, size, and install solar panels for your home with practical steps, financing insights, and maintenance tips. A homeowner-focused guide from Solar Panel FAQ that stays vendor-neutral and easy to follow.

By the end of this guide you will know how to evaluate your home’s solar potential, size a system, and navigate installation options. You’ll learn the key steps: assess roof and shading, compare panel types, understand inverters and storage, and consider financing and incentives. This quick answer points you to a practical, homeowner-focused path for reliable solar energy at home.
Why solar panels for home matter
According to Solar Panel FAQ, homeowners increasingly turn to solar panels to stabilize energy costs and reduce environmental impact. A properly sized system can offset a meaningful portion of daytime electricity use, which protects against rising utility rates and helps your home run more independently from the grid. Beyond cost, solar panels offer resilience during outages where local utilities are stressed, and they can increase a property’s market appeal when installed with a solid warranty and clear maintenance plan. This section sets the foundation by explaining why a home solar project makes sense for many households, even before you dive into the technical details.
How solar panels work (basics)
Photovoltaic (PV) panels convert sunlight directly into electricity through semiconductor materials. The generated electricity travels to an inverter, which converts it from direct current (DC) to alternating current (AC) suitable for your home circuits. A typical system also includes a monitoring display and safety disconnects. In grid-tied configurations, energy from the panels can offset your utility usage and can feed surplus electricity back to the grid in exchange for credits where allowed. Understanding this flow helps you evaluate panel efficiency, inverter options, and how different configurations fit your goals.
Assessing your roof and site
Roof orientation, shading, and roof type are the first practical constraints you’ll face. A south-facing roof with minimal shading and good structural condition generally yields higher output. If your roof has multiple angles or significant shade from trees, you’ll want to map out the least productive areas and plan for microinverters or power optimizers to mitigate shading losses. Don’t forget to assess roof age and warranty, as well as local permitting rules that may affect the scope and timeline of your project. A quick site survey now saves delays later.
How to size a system (rough sizing)
Sizing a solar system involves estimating your daily electricity use and balancing it with available sun exposure. A practical approach is to start with your average daily usage, then consider how many hours of strong sun your site receives on a typical day. The goal is to select a system that can cover a substantial portion of daytime needs while leaving room to expand later if desired. Remember that oversizing or under-sizing can affect financial returns and system efficiency, so use a conservative planning mindset.
Panel types and tradeoffs
Panels come in several core varieties, with tradeoffs between efficiency, cost, and durability. Monocrystalline panels are typically compact and high-efficiency, suitable for limited space. Polycrystalline panels offer solid performance at a lower cost but may require more space. Thin-film panels are light and flexible, useful for special applications, but generally lower in efficiency and longevity. Your choice should reflect roof area, local climate, aesthetic preferences, and long-term maintenance considerations. A balanced view helps you pick a configuration that meets both immediate needs and future goals.
Inverters and storage options
Inverters convert DC to AC and come in several formats: string inverters, microinverters, and optimizers. String inverters are common for consistent performance, while microinverters or panel-level optimizers can mitigate shading and uneven wiring. Storage is the next dimension: adding batteries can increase daytime self-consumption and resilience during outages, but it also adds cost and complexity. Decide whether you need storage now or prefer to scale later, keeping in mind maintenance and warranty implications.
Financing, incentives, and payback concepts
Financing options range from cash purchases to loans and leases, with many regions offering incentives, rebates, or tax credits. Net metering policies determine how much you can credit the grid for surplus energy, affecting payback time and long-term savings. Always verify current programs with local authorities and utility providers, since incentives can change and vary by location. A well-documented plan helps you compare offers from installers and make a confident financial decision.
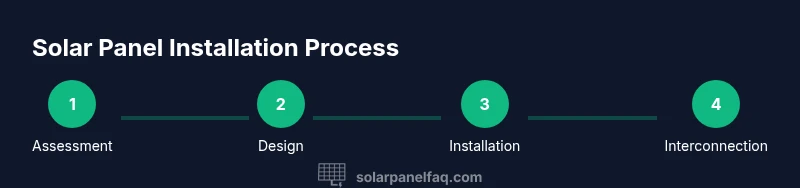
Installation considerations and process
A successful installation depends on selecting a licensed installer, securing permits, and coordinating with utility interconnection. Pre-install tasks include site assessment, electrical plan reviews, and a documented project scope. The actual installation involves mounting racking, wiring, inverter placement, and system testing. Expect a multi-day process for a typical residential project, with inspections at key milestones. A clear contract and a defined timeline reduce surprises and ensure safety.
Maintenance and cleaning
Solar panels require minimal maintenance, but regular checks help preserve performance. Inspect for physical damage after storms, keep panels clean from dust or debris, and monitor performance data for unusual drops. Routine cleaning is only necessary in dusty or pollen-heavy environments, and avoid harsh abrasive cleaners. Most systems come with monitoring software that alerts you to performance anomalies so you can schedule professional service if needed.
Common pitfalls and how to avoid them
Common missteps include under- or over-sizing, underestimating shading impact, and choosing contractors based on price alone. Don’t overlook roof condition or mixing panels from different generations, which can complicate maintenance and warranty. Thorough site assessment, transparent quotes, and a plan for future expansion help prevent these pitfalls and keep the project aligned with your goals.
Real-world planning checklist
Use this practical checklist as you plan: define goals (offset the bill, increase resilience, or add value), document current energy use, map shading, collect multiple quotes, confirm interconnection and permits, review warranties, and plan a maintenance schedule. A written plan helps you compare options clearly and reduces the risk of scope changes or miscommunication during installation.
Authority sources and next steps
For deeper, evidence-based guidance, consult reputable sources in the energy field. In particular, federal and academic resources offer independent information on performance metrics, installation standards, and long-term maintenance considerations. This section provides two to three authoritative URLs you can browse to cross-check what you’re planning and to validate claims made by installers.
Tools & Materials
- Measuring tape or laser measure(At least 5 meters for roof area estimation)
- Smartphone or camera(Document roof layout, shading, and anomalies)
- Ladder and fall protection gear(Ensure safe access to the roof)
- Safety gloves and eye protection(Personal protective equipment)
- Pencil, notebook, and clipboard(Record measurements and observations)
- Roof assessment template or app(Helpful for organizing data)
- Basic tool kit (drill, screws, level)(For mounting hardware if you DIY mounting)
- Voltage tester or multimeter(Used by a professional to verify wiring)
Steps
Estimated time: Estimated total time: 2-4 weeks
- 1
Define goals and constraints
Clarify what you want from solar (offset a portion of usage, maximize resilience, or improve home value) and identify constraints like budget, roof space, and local policies. This helps guide all later decisions.
Tip: Write down priorities to compare against quotes. - 2
Measure roof area and shading
Survey roof footprint, orientation, and shading patterns throughout a typical day. Note any obstructions such as chimneys or vents that reduce usable area.
Tip: Create a simple diagram to visualize available space. - 3
Estimate energy needs
Review past electricity bills to estimate average daily usage. Consider seasonal changes and any planned appliance upgrades that could affect the load profile.
Tip: Avoid over-forecasting to prevent oversizing. - 4
Explore panel options
Compare panel types, efficiency ratings, size, weight, and warranties. Factor in aesthetics and local climate performance when choosing modules.
Tip: Ask for real-world performance data in similar climates. - 5
Choose an inverter/storage approach
Decide between string inverters, microinverters, or optimizers based on shading and roof complexity. Consider whether you want battery storage for resilience.
Tip: If shading is variable, microinverters can help maximize output. - 6
Understand incentives and financing
Research available tax credits, rebates, and net metering policies. Compare loan vs cash scenarios and review total cost of ownership over the system’s life.
Tip: Document program eligibility early to avoid last-minute changes. - 7
Obtain installer bids
Request detailed, itemized proposals from multiple licensed installers. Check scope, equipment lists, warranties, and projected timelines.
Tip: Ask for references and recent project photos. - 8
Review permits and interconnection
Coordinate with your local authority for permits and with the utility for grid interconnection. Understand inspection milestones and required documentation.
Tip: Ensure the contract assigns responsibilities for permit pulls. - 9
Finalize design and contract
Choose a design and finalize the contract with clear milestones, warranties, and a fair contingency plan for delays or changes.
Tip: Get a written change-order process to manage scope changes. - 10
Prepare your site for install
Prepare access paths, confirm roof condition, and designate a work area. Schedule a contingency for weather or access restrictions.
Tip: Keep a backup plan for temporary energy usage if installation overlaps with high demand days. - 11
Install and inspect
The installer mounts racking, wires, and inverters, then completes electrical connections and safety tests. Expect inspections by local authorities and the utility.
Tip: Do not sign off until all test results are documented. - 12
Establish maintenance and monitoring
Set up monitoring dashboards and schedule periodic inspections. Keep records of performance and warranty contacts for future service.
Tip: Schedule annual checks to catch issues early.
Frequently Asked Questions
What is the most important factor when choosing solar panels for a home?
The most important factor is how the panels perform in your climate and how well they fit your roof space. Efficiency, durability, warranty, and performance under shade are key considerations that affect long-term output and value.
The most important factor is how well the panels perform in your climate and fit your roof; consider efficiency, durability, and warranty for long-term value.
Do I need permits to install solar panels?
Most residential solar projects require some form of local permit and utility interconnection approval. Your installer typically handles the permitting process, but you should confirm timelines and who is responsible for each step.
Yes, most homes need permits and utility interconnection approval; your installer usually handles this, but confirm timelines.
Can I install solar panels myself?
Installing solar panels involves high-voltage wiring and structural work. In many places, a licensed professional is required for electrical and structural work. If you are not trained, hire a reputable installer to ensure safety and code compliance.
Solar installations involve high-voltage wiring and structural work, so it’s best to hire a licensed professional for safety and code compliance.
How do incentives affect the economics of solar?
Incentives can significantly influence payback and total cost, but programs vary by location and change over time. Your plan should include current incentives and potential credits to accurately compare offers.
Incentives can greatly affect payback, but programs vary and change; verify current opportunities when comparing options.
What maintenance is required for solar panels?
Solar panels require minimal maintenance. Regular inspections for damage and monitoring performance are usually sufficient; cleanings are only needed in specific climates or if output drops unexpectedly.
Maintenance is minimal: inspect for damage and monitor performance; clean only if needed.
Are there risks associated with solar installations?
Risks include improper installation, electrical faults, and potential shade-related performance losses. Working with licensed installers and choosing certified equipment reduces these risks.
Risks include improper installation and electrical faults; work with licensed installers to minimize them.
Watch Video
Top Takeaways
- Assess roof and shading early to inform design.
- Choose panel type and inverter setup based on site conditions.
- Budget for incentives and know the interconnection process.
- Plan maintenance and monitoring from day one.
- Get multiple licensed bids to ensure value and reliability.