Flexible Solar Panel Mounting: A Practical Home Guide
Learn how to mount flexible solar panels on roofs, walls, or curved surfaces with adhesive mounts, rails, and weatherproofing. This step-by-step guide covers surface prep, mounting options, sealing, and maintenance for homeowners.

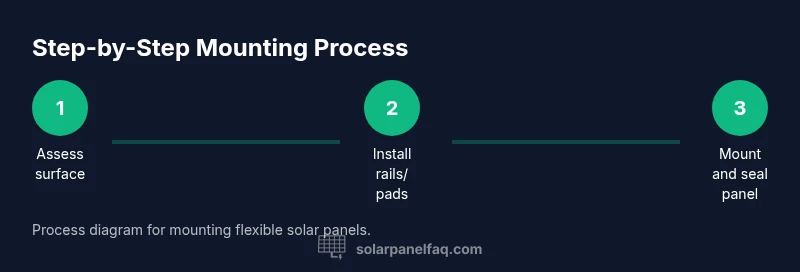
You can mount flexible solar panels on rooftops, walls, or curved surfaces using adhesive-backed or clamp-style mounting systems. Key steps include selecting surface-compatible mounting hardware, preparing and cleaning the surface, applying weather-rated adhesive or track clamps, and sealing edges to prevent water intrusion. Always verify wind-load ratings and ensure the panel weight stays within the mount's capacity.
What is flexible solar panel mounting?
Flexible solar panel mounting refers to attaching thin, bendable photovoltaic modules to surfaces that aren’t flat or rigid, such as curved roofs, walls, or decks. Unlike rigid panels, these modules are lightweight and can conform to complex geometries. According to Solar Panel FAQ, flexible mounting offers lightweight, adaptable installations for curved surfaces and rooftops, but it requires careful surface preparation and weatherproofing to maintain performance. The goal is to keep modules stable, wind-resistant, and securely connected to a power system without compromising the substrate or the panel’s flexibility.
When done correctly, flexible mounting enables innovative placements—on metal roofs with curved contours, on storefronts, or even on porch ceilings. But the approach hinges on choosing the right mounting system, ensuring surface compatibility, and adhering to manufacturer guidelines. This section will walk you through surface prep, mounting options, and best practices to avoid common headaches while preserving the efficiency and longevity of your installation.
Surface Suitability and Prep
The success of flexible mounting hinges on the substrate’s ability to hold fasteners and the adhesive systems selected. Start by identifying the surface type: painted metal, bare metal, wood, plastic, or concrete. Some substrates tolerate adhesive mounting better than others; for example, clean, dry metal surfaces provide excellent bonding conditions, while rough or oily surfaces can reduce adhesion.
Preparation is essential. Thoroughly clean the surface with isopropyl alcohol or an appropriate cleaner to remove dust, oils, and residues. Allow the surface to dry completely before applying any adhesive or mounting hardware. If the substrate is glossy or painted, lightly scuff the area to improve adhesion. For curved surfaces, ensure that rails or adhesive pads can conform without creating air gaps that would weaken bonding.
In some cases, you’ll want to test a small patch of adhesive on a hidden area to verify bonding strength and compatibility with outdoor conditions. Always follow the panel and mounting system manufacturer’s guidelines about surface prep, compatible substrates, and curing times. Proper prep reduces the risk of peeling, shifting, or water intrusion over time.
Mounting Options for Flexible Panels
Flexible PV modules can be mounted using a combination of adhesive mounts, lightweight rails, and mechanical clamps. Adhesive-backed mounting pads or tapes are common for curved surfaces, offering a low-profile solution that minimizes wind resistance. Rails or mounting plates can be used where a standoff is beneficial to create air channels for cooling and to ensure consistent panel alignment. When choosing hardware, verify outdoor-rated adhesives and clamps that are compatible with the panel’s backing and the substrate.
Consider a hybrid approach: use adhesive pads to secure the panel along the edges and lightweight rails for alignment and additional support. This combination helps resist wind uplift while keeping the surface visually clean. Always ensure that any fasteners or clamps do not drill into hidden cables or create vulnerabilities in the substrate. Follow the manufacturer’s torque recommendations and avoid overtightening, which can damage the panel or backing.
Adhesives, Rails, and Mechanical Fasteners
Your mounting strategy should align with the panel’s design and local climate. Outdoor-rated silicone or polyurethane sealants provide edge sealing and UV resistance. For rails, choose lightweight aluminum or plastic profiles designed for curved installations. Mechanical fasteners, when used, should be corrosion-resistant and sized to avoid substrate damage. If you rely on adhesives alone, make sure they are rated for outdoor use and compatible with the substrate. For safety, always keep a buffer around edges to prevent micro-movements from affecting electrical connections.
Document the layout with measurements and alignment marks before applying adhesive. Maintain even pressure during bonding and allow the adhesive to cure fully per the product’s instructions. If you plan to remove or reposition the panels later, select reversible mounting options or schedule a non-destructive removal method.
Weatherproofing and Sealing
Water intrusion is the enemy of any outdoor solar installation. After mounting, seal all edges and joints with a compatible, weatherproof sealant. Use weatherproof tape or sealant around the perimeters of rails or mounting pads to create a continuous moisture barrier. Inspect seals for UV degradation and replace them as needed. If you’re running cables along surfaces, use grommets or protective channels to prevent chafing and water ingress. A well-sealed installation reduces the risk of corrosion and electrical faults over time.
Wind Load and Safety Considerations
Wind loads on flexible panels can be substantial, especially on elevated or exposed locations. Always reference the installer’s wind-load ratings from the mounting system and the panel manufacturer. If in doubt, opt for conservative load margins and add a secondary attachment point. During installation, avoid working on roofs in high winds and wear appropriate fall protection. Never drill into concealed structures or existing electrical lines without proper assessment. Document any deviations from standard guidelines and consult a professional for large or complex installations.
Installation by Surface Type: Roof, Wall, or Curved Surfaces
On metal roofs with curved profiles, adhesive mounts or low-profile rails can secure the panel while following the curvature. For walls or vertical surfaces, you might rely more on adhesive pads and corner clamps to maintain alignment. If the surface is highly curved or irregular, consider custom-fitted rails or flexible mounting clips that distribute weight evenly. Always verify that the mounting method won’t interfere with roof vents, chimneys, or other hardware. After installation, perform a gentle wind- and shake-test to confirm stability.
Maintenance, Inspection, and Lifecycle
Regular inspection is essential for longevity. Check seals, adhesives, and rails at least twice a year and after major weather events. Look for edge lifting, micro-cracks in the panel backing, or discoloration indicating UV wear. Clean the panels gently with a soft cloth and water to avoid damaging the surface. If adhesive performance declines, replace pads or re-seat rails per the manufacturer’s guidelines. Proper maintenance helps sustain performance and reduces the risk of sudden panel failure.
Authority sources
For further guidance, consult authoritative references:
- https://www.energy.gov/eere/solar
- https://www.nrel.gov
- https://www.osha.gov
These sources provide safety best practices, general solar installation guidelines, and industry standards that support best practices for mounting flexible solar panels.
Tools & Materials
- Weather-rated adhesive (double-sided tape or liquid adhesive)(Outdoor-rated; compatible with substrate and panel backing)
- Lightweight mounting rails or adhesive-backed plates(For curved surfaces or to distribute load; track alignment)
- Isopropyl alcohol or surface cleaner(Clean to remove oils and residues before bonding)
- Silicone or polyurethane sealant(Seal edges and joints after mounting)
- Measuring tape and marker(Layout panels precisely; prevent misalignment)
- Cordless drill or screwdriver(Secure rails or fasteners; use appropriate bit size)
- Safety gear (gloves, eye protection)(Outdoor work and elevated surfaces; protect hands and eyes)
- Thermal silicone/adhesive remover (optional)(For future panel removal or repositioning)
- Torque driver (optional)(Maintain consistent fastener torque)
Steps
Estimated time: 2-3 hours
- 1
Assess surface and plan layout
Inspect the substrate for cleanliness, curvature, and load-bearing capability. Measure and mark the intended panel positions, ensuring even spacing and alignment with electrical routing. Confirm that the chosen mounting method won’t interfere with vents, skylights, or fixtures.
Tip: Take photos of the surface and layout for reference and future maintenance. - 2
Clean and prep the mounting surface
Wipe the surface with isopropyl alcohol or a suitable cleaner. Allow it to dry completely. If the surface is glossy or painted, lightly scuff to improve adhesion and reduce the risk of peeling.
Tip: Avoid harsh solvents that could degrade coatings or panel backing. - 3
Apply adhesive pads or set up rails
Place adhesive-backed pads along the marked lines or install lightweight rails following the manufacturer’s guidelines. Ensure pads/rails conform to the surface without gaps that could trap moisture.
Tip: Press firmly and evenly to maximize bonding area; verify alignment before curing. - 4
Mount the solar panel
Affix the panel to the pads or rails, aligning with the layout marks. If using fasteners, distribute them evenly and avoid overtightening to prevent substrate damage.
Tip: Use a helper to hold the panel steady during mounting. - 5
Seal edges and joints
Apply silicone or sealant around rail edges and at joints to prevent water intrusion. Check that all cable entries are sealed and protected with grommets or weatherproof channels.
Tip: Smear a clean bead and smooth with a finger or tool for a tight seal. - 6
Route cables and make electrical connections
Organize DC cables with protective conduits or clips, keeping them away from moving parts and hot surfaces. Use weatherproof connectors and ensure a proper drainage path for water.
Tip: Label cables for easier troubleshooting later. - 7
Check wind-load and stability
Gently test the panel’s stability with a light shake and inspect edge adhesion and rail integrity. If you notice movement, recheck bonding or add additional attachments as needed.
Tip: In high-wind areas, a secondary attachment point is advisable. - 8
Final inspection and testing
Inspect the entire installation for gaps, cracks, or misalignments. Power up the system according to the inverter’s guidelines and verify voltage output under typical conditions.
Tip: Document serial numbers and locations for future service.
Frequently Asked Questions
Are flexible solar panels compatible with all roof types?
Flexible panels work on many surfaces, but require suitable substrate and approved mounting methods. Always follow the panel and mounting system guidelines.
Flexible panels can work on many surfaces, but you should check substrate compatibility and follow the mounting system’s guidelines.
Do I need special adhesives for exterior use?
Yes, use weather-rated adhesives designed for outdoor exposure and the substrate. Avoid inexpensive tapes that may degrade quickly in sun and rain.
Yes, use outdoor-rated adhesives compatible with your surface and panel backing.
Can I install flexible panels myself or should I hire a pro?
DIY is feasible for small installations with proper safety. For roof penetrations or larger systems, professional installation is recommended.
For simple setups you can DIY, but for roof work or big systems consider a professional.
How do I assess wind loading for flexible panels?
Consult the mounting system’s wind-load rating and the panel’s specifications. If unclear, opt for conservative margins or professional support.
Check the wind ratings and follow the manufacturer’s specs; get expert help if unsure.
Will mounting affect warranty?
Mounting must be approved by the panel and mounting system manufacturers. Improper mounting can void warranties.
Yes, improper mounting can void the warranty; follow guidelines closely.
What maintenance is needed after install?
Inspect seals and adhesives regularly, clean panels, and re-seat fasteners as needed to maintain performance.
Check seals and clean panels regularly to keep performance high.
Watch Video
Top Takeaways
- Plan layout before mounting to ensure alignment.
- Select outdoor-rated adhesives compatible with the substrate.
- Seal all edges and protect cable entries from moisture.
- Check wind-load ratings and apply additional support if needed.
- Maintain panels regularly to preserve performance.