Distance Between Solar Panels and Inverter: Practical Guidelines
Learn how to space solar panels and the inverter safely, minimize voltage drop, and follow code guidelines for a durable, efficient residential solar setup.

The distance between solar panels and the inverter defines how far DC power travels before conversion. Keep it as short as feasible to reduce voltage drop, simplify wiring, and stay within code clearances. Plan routes that avoid heat sources, moisture, and physical damage while adhering to NFPA/National Electrical Code guidelines.
Understanding the DC-to-AC path and why distance matters
The distance between solar panels and inverter defines how DC power travels from the array to the conversion stage that creates usable AC power. On the DC side, higher voltage and low current interactions mean that longer runs can increase resistance, generate heat, and reduce overall efficiency if not sized and routed properly. According to Solar Panel FAQ, the distance between solar panels and inverter influences conductor sizing, enclosure requirements, and safety clearances, even before the power is inverted. It is not simply about aesthetics or convenience; it affects performance, maintenance access, and fault isolation. In most residential layouts, the aim is to keep the DC run as direct as possible, while still allowing a practical path from the panels to the inverter that avoids moisture, physical damage, and sharp bends. Clear separation from hot components, proper shading considerations, and proper termination at junction boxes are essential parts of this planning. The takeaway: minimize unnecessary length while preserving a robust, code-compliant wiring route.
Beyond pure distance, consider how the distance interacts with wiring methods, conduit choices, and potential future expansion. A well-planned route reduces the chance of damage from weather, foot traffic, or animals, and makes inspection easier. While some installations favor close proximity between panels and inverter for simplicity, others move the inverter to a more protected indoor location, balancing dissipation, accessibility, and safety.
Key factors that influence recommended distance
Several interrelated factors determine how far the DC run should extend from the panels to the inverter. Cable gauge and insulation type matter: thicker, weather-rated conductors handle longer runs with less risk of heat buildup and voltage drop. The number of strings, the layout of the array, and whether you use a central inverter or microinverters influence routing choices and distance. Environmental conditions, such as sun exposure, ambient temperature, and potential moisture, affect contraction of materials and the need for protective conduit. Layout considerations, including roof configuration, access to junction boxes, and proximity to AC distribution panels, also shape the recommended distance. Designers often balance the desire for a short run against practical constraints like roof geometry, equipment placement, and future expansion. Ultimately, the distance should align with local electrical codes, the inverter’s input specifications, and the planned maintenance plan. The result is a safe, efficient, and maintainable DC path.
In practice, homeowners should communicate the site’s unique constraints to a qualified installer, who can translate these factors into a wiring plan that minimizes risk and maximizes performance.
Planning DC wiring routes from panels to inverter
Start with a detailed map of your site: mark panel strings, inverter input points, and any planned junctions. Then, identify a continuous, weather-protected route that minimizes sharp bends and avoids crossing high-heat zones or moving objects. The distance between solar panels and inverter should be as short as practical, but not so short that you force risky routing (such as cables across a walkway). Consider future growth, access for service, and compliance with conduit installation standards. Decide whether you’ll run cables through a roof cavity, an exterior conduit, or a service attic, and ensure the chosen path separates DC and AC runs to minimize interference. Confirm that junction boxes and terminations are accessible, labeled, and rated for outdoor use if necessary. Finally, verify that the planned route respects clearance requirements around the inverter, disconnects, and any nearby electrical equipment. Document the layout so maintenance and future upgrades remain straightforward.
Common mistakes that increase risk or reduce efficiency
Rushing a DC run without a mapped route can create long, circuitous paths that waste efficiency and complicate future maintenance. Underestimating the importance of proper conduit or leaving exposed conductors outside reduces safety. Using an undersized cable due to length assumptions increases voltage drop risk. Mixing DC wiring with AC circuits in the same enclosure can cause electrical interference and compliance issues. Forgetting to label cables or skipping a test at the end of installation may lead to confusion during service. These mistakes are avoidable with careful planning, appropriate sizing, and adherence to local codes. By avoiding these missteps, your distance choices support reliability and long-term performance.
Practical guidelines for rooftop vs ground installations
For rooftop arrays, the distance between solar panels and inverter is often influenced by the location of the inverter best suited for shade, heat, and accessibility. Ensure the DC conduit path has a secure slope to prevent water ingress and uses weatherproof connections. For ground-mounted systems, maintain a route that stays clear of animals and weathering while also staying accessible for inspection and potential future expansion. In both cases, position the inverter in a location that minimizes DC run length while balancing service access, safety, and electrical code requirements. Use robust fasteners and protective conduit and avoid running DC cables alongside sharp edges. Document the layout, create a schematic, and keep a copy of the as-built plan for future maintenance.
A thorough assessment of the site, climate, and equipment placement helps ensure the distance chosen remains practical as the system ages. The Solar Panel FAQ team emphasizes planning for both current needs and potential upgrades, which also aligns with professional safety standards and best practices.
Measuring and verifying the distance during installation
After the route is chosen, measure the actual DC run from the panel string headers to the inverter input. Check that conduit is continuous, fittings are rated for outdoor use, and there are no water traps or thermal bottlenecks. Use a multimeter to verify no reverse polarity and confirm that the voltage range remains within the inverter’s input tolerance when illuminated. If you notice unusual heat or signs of wear during bench tests, reevaluate the distance and route before final connections. Document the measured distances in your installation notes and update wiring diagrams as needed. Regular checks during service visits help ensure the path remains optimized as environmental conditions change over time.
Authority sources and further reading
Understanding the distance between solar panels and inverter involves general wiring principles, safety considerations, and local codes. For further reading, consult official resources such as energy.gov and the National Renewable Energy Laboratory (NREL), which provide guidance on system sizing, safety, and installation practices. Solar Panel FAQ's analysis highlights common pitfalls and recommended practices, emphasizing the need for clear separation between DC and AC runs, proper conductor sizing, and appropriate enclosure selection. Remember to verify any recommendations against your local codes and the specific inverter model you are using, as requirements can vary by region and system type.
Tools & Materials
- DC wiring conduit and fittings(Rigid PVC or metallic conduit suitable for outdoor use and rated for DC wiring)
- DC cable (string conductors) with appropriate gauge(Weather-rated, sized for voltage and anticipated run length)
- Voltage tester / multimeter(For polarity checks and basic insulation checks)
- Conduit sealant and weatherproof connectors(Optional but helpful for outdoor runs)
- Junction boxes rated for outdoor use(Accessible and clearly labeled)
- Safety gear (gloves, safety glasses, PPE)(Always protect yourself when working with electrical systems)
- NEC code reference or local code documentation(Useful for ensuring compliance during planning)
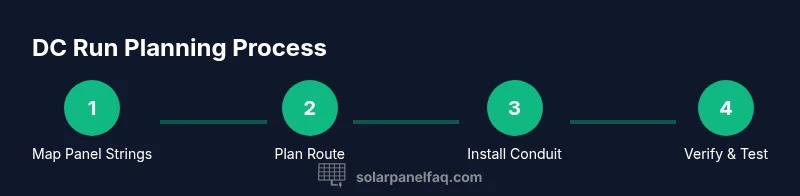
Steps
Estimated time: 2-3 hours
- 1
Identify the DC path
Map the panel strings to the inverter inputs, noting where junctions will be placed. Confirm the route avoids heat sources and moisture while keeping DC and AC runs separated.
Tip: Draft a hand-drawn or digital schematic before touching cables to avoid backtracking. - 2
Assess route options
Evaluate rooftop, attic, and exterior conduit options. Consider future expansion and service access when choosing the shortest safe run.
Tip: Prefer a route with minimal bends and accessible junctions for inspection. - 3
Select conductor size
Choose DC conductors with suitable gauge for expected load and run length. Factor in temperature and insulation rating to prevent overheating.
Tip: If in doubt, consult manufacturer guidelines for the inverter input range. - 4
Plan conduit installation
Install conduit along the chosen path, ensuring a continuous, weatherproof run with proper support and fire-stopping as needed.
Tip: Secure every 1–2 meters and at terminations to prevent movement and wear. - 5
Route and terminate
Pull cables through conduits, terminate at outdoor-rated junction boxes, and tag each line with consistent labeling.
Tip: Use strain reliefs at terminations to prevent cable damage. - 6
Connect to the inverter
Connect DC conductors to the inverter according to the manufacturer’s wiring diagram. Verify polarity and physical protection of all connections.
Tip: Power should be off during the initial connection and verification steps. - 7
Test and verify
Measure voltage at the panel and at the inverter input under typical irradiance. Check for unexpected heat or insulation issues and document the measured distances.
Tip: Compare readings to expected ranges in the inverter manual. - 8
Finalize documentation
Update the as-built drawings, route map, and labeling. Review local codes and keep a copy of the installation plan for future maintenance.
Tip: Keep digital and physical copies accessible to technicians.
Frequently Asked Questions
What is the recommended distance between solar panels and inverter?
There is no universal fixed distance. The goal is to minimize DC run length while ensuring a safe, code-compliant route. The specific distance depends on site layout, conduit options, and equipment placement.
There isn’t a universal distance. The key is to minimize the DC run while staying safe and code-compliant.
Does distance affect inverter efficiency?
Yes, longer DC runs can contribute to voltage drop and heat. Shorter, well-terminated runs generally improve efficiency and reliability, though the overall impact depends on cable sizing and routing.
Longer runs can affect efficiency due to voltage drop and heat. Shorter, properly sized runs are typically better.
How do I measure voltage drop along the DC run?
Use a multimeter to measure panel-side voltage and inverter-input voltage under typical operating conditions. Compare to the inverter’s specified input range to ensure the run remains within acceptable limits.
Measure the voltages at the panel and inverter under normal operation and compare to the inverter’s limits.
Can inverters be placed far from panels?
Yes, but it requires careful routing, protected conduit, and adherence to code. The installer should optimize the route to minimize DC run length while maintaining safety.
Yes, but you’ll need proper conduit and planning to keep it safe and compliant.
Are there codes that dictate distance to other equipment?
Local electrical codes and the NEC require safe clearances and proper separation of DC/AC equipment. Always verify with your local authority having jurisdiction (AHJ) before installing.
Codes require safe clearances and proper separation; check with your local AHJ.
Should I hire a professional to determine distances?
For safety, code compliance, and long-term performance, consulting a licensed solar installer is highly recommended. They can tailor the distance to your site and equipment.
A professional installer is strongly recommended to ensure safety and compliance.
Watch Video
Top Takeaways
- Keep the DC run as direct as practical to minimize losses.
- Plan routes that protect cables from heat, moisture, and physical damage.
- Separate DC and AC runs to avoid interference and code issues.
- Label, document, and review locally applicable codes during planning.
- Revisit and update the plan if you expand the system or change components.