Connect Solar Panel: A Practical Step-by-Step Guide for Homes
Learn how to safely connect a solar panel to your home system with clear steps, safety checks, and best practices from Solar Panel FAQ.

Goal: You will learn how to connect a solar panel safely to your home system, covering wiring concepts, safety checks, and when to seek professional help. This quick answer outlines prerequisites, essential steps, and common pitfalls to avoid, so you can approach the task with confidence. Always follow manufacturer instructions and local electrical codes during the connection process.
Why Connect Solar Panel Safely Matters
Connecting a solar panel to a home electrical system isn’t just about generating power; it’s about safeguarding people and property. A wrong connection can lead to electric shock, arc faults, overheating, or damage to inverters and modules. The long-term reliability of a solar installation hinges on correct wiring, adequate protection, and proper grounding. According to Solar Panel FAQ, adopting a structured, code-compliant approach reduces risk and helps ensure the system performs as intended. Before touching any wire, review the manufacturer manuals, local codes, and the utility interconnection requirements. Clarify goals: how many panels, mounting location, and how the array will connect to the inverter and any storage solutions if used.
Keep in mind that every installation is unique. The roof orientation, shading, and existing electrical service influence wire routing, disconnect placement, and string sizing. A well-planned layout minimizes shade losses, simplifies troubleshooting, and supports future expansion. Always start with a clear diagram of the wiring path and a written plan for where each component will reside. This foundation supports a safer, smoother installation and helps your home stay compliant with safety standards.
Key Concepts: Wiring Configurations for Panels
Residential solar arrays are commonly wired to balance voltage, current, and safety margins. The two foundational configurations are series wiring and parallel wiring. In series wiring, panels are linked end-to-end, increasing the overall voltage while current remains the same. In parallel wiring, panels share the same voltage but combine currents, improving current capacity. A hybrid approach—grouping strings in parallel—lets you tailor the system to the inverter’s input rating and roof geometry.
Understanding these configurations helps you plan string sizing, fuse choices, and disconnect placement. It’s important to verify that your chosen arrangement aligns with the inverter’s input limits and local electrical code provisions. When shading or partial setbacks exist, microinverters or power optimizers may be evaluated as alternatives to traditional string inverters. Always model the expected voltage and current under typical conditions to prevent overloading components.
Required Equipment and Preparations
Successful connection starts with thorough preparation. Gather all components and confirm compatibility with the inverter and mounting hardware. Review the manufacturer manuals for wiring diagrams, torque specs, and required conduit sizes. Prepare a schematic showing wire routes, disconnect locations, and labeling for each string. Label all conductors clearly to ease future maintenance. Have a plan for surge protection, grounding, and bonding, and verify that you have the necessary permits and utility approvals before you begin.
Create a dedicated, dry workspace for splicing and testing. Ensure weatherproof seals where wires exit junction boxes, and prepare protective sleeves or conduit to shield conductors from physical damage. Keeping a digital copy of the wiring diagram and a spare parts list will simplify future servicing or expansion.
Safety and Compliance Considerations
Safety is non-negotiable when connecting solar panels. Always de-energize the system before handling conductors and verify isolation with a suitable voltage tester. Wear appropriate PPE, including insulated gloves and eye protection, and use insulated tools rated for electrical work. Follow lockout/tagout procedures to prevent accidental re-energization.
Compliance matters: adhere to local codes (and codes like NEC in the United States) and respect utility interconnection requirements. Use listed components and validated mounting systems. Grounding and bonding must be correct to prevent shock hazards and stray currents. Keep documentation handy for inspections and warranty validation.
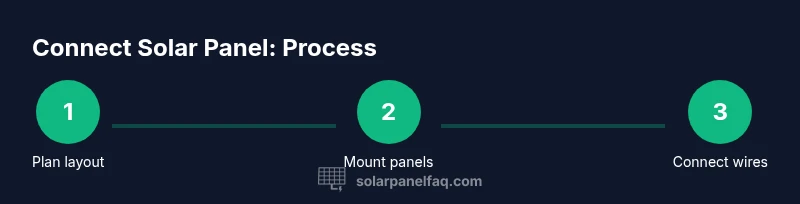
Step-by-Step Overview of the Connection Process
This section provides a high-level roadmap that complements the detailed steps in the STEP-BY-STEP block. Start by confirming site readiness, mounting, and that all components are on hand. Plan wiring routes to minimize exposure and ensure protection from the elements. Route conductors through appropriate conduit, attach disconnects, and connect panels to the inverter via properly sized combiner boxes. Finally, verify the complete system with a controlled power-on and baseline measurements to confirm expected operation and safety.
Aftercare: Testing, Commissioning, and Documentation
After wiring the panels, perform a systematic check of all connections and safety devices. Use a multimeter to verify insulation resistance, check for correct polarity, and confirm that the inverter displays proper status indicators. Conduct functional tests under daylight conditions and compare measured voltages to the expected range from the manufacturer’s data. Document all wiring routes, labels, and test results for future maintenance, warranty claims, and potential resale value. Store manuals and permits in a known location and share the commissioning report with your utility if required.
Tools & Materials
- Safety gear (insulated gloves, safety glasses, hard hat)(ANSI-approved PPE; ensure proper fit)
- Multimeter or voltage tester(For voltage, continuity, and insulation checks)
- DC disconnect switch(Listed for solar applications; ensure accessible placement)
- Conduit and fittings(PVC or metal conduit as required by code)
- Junction boxes and wire connectors(UL-listed; keep connections secure)
- PV cable (weather-rated)(Appropriate gauge for strings and distance)
- Torque wrench and conductor lugs(Follow manufacturer torque specs)
- Grounding equipment (rod, clamps, bonding wire)(Ensure proper grounding path)
- Labeling materials (permanent markers, tags)(Label each conductor clearly)
- Manufacturer manuals and wiring diagrams(Always consult for model-specific guidance)
Steps
Estimated time: 60-90 minutes
- 1
Assess site and plan
Survey the roof layout, shade patterns, and mounting options. Create a Wiring Plan showing string groups, inverter input, and disconnect locations. Confirm roof integrity and weatherproofing needs before mounting.
Tip: Take photos and sketch a rough diagram from different angles to avoid surprises later. - 2
Shut down and isolate
Power down the main service panel and the solar system disconnect. Use a voltage tester to confirm there is no live voltage on any conductors you’ll touch. Tag and isolate all relevant equipment before handling.
Tip: Verify isolation with a second tester or a supervisor if available. - 3
Route wiring and mount panels
Mount the panels securely using approved hardware suitable for your roof type. Route PV cables through conduit or protective channels, securing them to minimize movement and wear. Position junction boxes and disconnects within easy reach and protected from weather.
Tip: Keep wiring away from sharp edges and maximize sun exposure while avoiding shading. - 4
Make electrical connections
Connect strings to the inverter input via the combiner box as per the wiring diagram. Attach grounding conductor to the system grounding point and verify polarity before energizing. Seal any penetrations to prevent moisture ingress.
Tip: Double-check all polarity before connecting to the inverter. - 5
Test, observe, and document
Power up the system in a controlled manner and observe inverter status indicators. Compare measured voltages and currents with manufacturer specifications. Document wiring routes, test results, and operator instructions for future maintenance.
Tip: Keep a commissioning sheet with model numbers and date of installation.
Frequently Asked Questions
Do I need a licensed electrician to connect solar panels?
In many regions, installing or connecting solar panels requires a licensed electrician or at least inspection. Always verify local codes and utility requirements. A professional can ensure proper grounding, connection to the service panel, and compliance with interconnection standards.
Check local codes and utility requirements; a licensed electrician can ensure proper grounding and safe interconnection.
Can I connect panels myself if I have basic electrical knowledge?
Basic electrical knowledge helps, but solar connections involve specialized equipment and code requirements. If you choose to DIY, rigorously follow manuals, use listed components, and have a qualified professional inspect the work.
DIY can be risky; follow manuals and insist on professional inspection afterward.
What safety gear is essential when connecting solar panels?
Essential PPE includes insulated gloves, safety glasses, and a hard hat when working on rooftops. Use non-conductive footwear and ensure your tools are rated for electrical work.
Wear insulated gloves, safety glasses, and protect yourself when working on the roof.
What is the difference between series and parallel wiring for solar panels?
Series wiring increases voltage, while parallel wiring increases current. A combination may be used to match the inverter input and roof layout. Always verify the inverter’s voltage and current limits.
Series raises voltage; parallel raises current. Match to your inverter.
How do I know if my system uses series or parallel wiring?
Your wiring type is determined by the inverter input requirements and the string configuration you planned. Check the wiring diagram from the manufacturer and, if in doubt, consult a qualified technician.
Check the wiring diagram and inverter specs to confirm the configuration.
What documents should I keep after installation?
Keep installation manuals, wiring diagrams, permits, inspection reports, and commissioning data. These documents support maintenance, warranty claims, and potential future expansion.
Store manuals, permits, and commissioning data for future reference.
Watch Video
Top Takeaways
- Plan wiring paths before mounting panels
- Follow NEC/local codes and manufacturer guidelines
- Test connections with proper safety measures
- Document all configurations and test results