Can One Solar Panel Charge Two Ring Cameras? A Practical How-To Guide
Learn how to power two Ring cameras with a single solar panel, including sizing, energy storage, wiring, and practical setup tips for reliable year-round operation.

Yes—one solar panel can charge two Ring cameras, but only if you size the panel to meet their combined draw and account for sun variability. In practice, you’ll need a sufficiently wattage-rated panel and some energy storage, plus proper wiring. For reliability, plan for the worst-case weather and consider a small battery as a buffer.
Can one solar panel charge two Ring cameras
The question can one solar panel charge two Ring cameras? The short answer is yes, but only when you size the panel to meet the combined draw of both devices and account for sun variability. This article explains, in practical terms, how to assess energy needs, sun hours, and storage considerations so you can design a reliable single-panel setup for two Ring cameras. You’ll learn how to estimate daily energy use, compare panel options, and plan for weather and seasonal changes that affect charging performance. By the end, you should have a clear, actionable path to a clean, low-maintenance solar solution for multiple cameras.
Where this approach differs from individual solar setups is the need to balance simultaneous power draw and storage so neither camera starves during overcast days. The guidance here avoids product SKUs and focuses on sizing principles, safe wiring, and verification steps you can perform with common tools. Whether you’re powering two Ring cameras on a fence line or at opposite corners of your home, the same fundamentals apply: match energy supply to demand, protect the electrical path, and monitor real-world performance.
Understanding the power needs of Ring cameras
Ring cameras are designed to operate with sustainable recharging of their internal batteries, and when you add a solar panel, you must accommodate both the cameras’ daily energy needs and the variability of solar input. The cameras’ draw depends on factors like video quality, motion events, night vision use, and standby current. Because two cameras share one panel, you must consider how often both devices are active simultaneously and how long they run between charges. A practical rule is to estimate the total daily energy requirement by adding the two cameras’ typical daily draw and then compare that with the panel’s expected daily energy production given your location’s sun hours. If you cannot precisely quantify draw, plan for a conservative estimate and include a buffer (via storage) to cover poor weather or shorter days. In all cases, ensure you have monitoring in place so you can observe performance over a few weeks and adjust as needed. The Solar Panel FAQ team notes the importance of aligning expectations with real-world sun exposure and daily usage, which helps avoid mis-sizing the system.
How solar panels convert sun into usable power (voltage, current, and storage)
Solar panels convert sunlight into electrical energy via photovoltaic cells. The energy is characterized by wattage (a product of voltage and amperage) and is delivered through a controller to a battery or directly to the device. When you intend to power two Ring cameras from one panel, you must account for energy storage because solar input can fluctuate with weather and time of day. A battery acts as a buffer, smoothing supply during cloudy periods and at night. The key is to size the storage to cover the worst-case sun conditions you might encounter in your region. In practice, a larger storage unit translates to more resilience, but it also adds cost and complexity. By understanding the difference between instantaneous panel output and stored energy, you can design a system that keeps both cameras functioning reliably, even when the sun isn’t shining at full strength.
Sizing a single panel for two cameras (rules of thumb)
Sizing a panel for two Ring cameras involves balancing two main factors: combined daily energy draw and local sun hours. A larger panel increases daily energy production, but you must ensure the charge controller and wiring can handle the current without overheating. If you anticipate extended cloudy periods or higher activity, plan for a panel with enough wattage to meet peak demand on sunny days and rely on storage to cover the rest. A practical approach is to select a panel that can comfortably produce more energy than the two cameras consume during peak sun hours, then pair it with a battery capable of supplying energy during low-production intervals. Remember that actual performance depends on panel orientation, shading, and temperature, so field testing is essential.
As you design, avoid overcomplicating the layout with unnecessary components. The objective is to create a robust, maintainable solution that can adapt to seasonal changes without frequent recalibration. The Solar Panel FAQ team recommends starting with a modest system for two cameras, then expanding storage or panel size only if monitoring shows insufficient performance.
Wiring and storage: do you need a battery buffer?
A battery buffer is highly recommended when powering multiple devices from a single panel. It smooths energy delivery, reduces shutdown risk during brief cloud cover, and helps keep Ring cameras charged overnight. The arrangement typically involves a solar panel feeding a charge controller, which charges a battery bank. From the battery, a regulator or DC-DC converter provides a stable voltage or USB output to the cameras. If your setup uses a direct panel-to-camera connection, you’ll face more stringent requirements for voltage regulation and exposure to fluctuations, which can shorten battery life and increase the risk of camera downtime. Always integrate proper protection, including fuses and weatherproof enclosures, and ensure the controller supports the battery chemistry you choose. The best practice is to model energy flow for typical daily patterns and verify numerically how long the battery can sustain operation during cloudy intervals.
Storage capacity is often the limiting factor in non-grid solar setups. Choose a storage type and capacity that align with your region’s sun profile and the cameras’ usage patterns. A modular approach—starting with a modest battery bank and expanding later as needed—helps you avoid over-investing upfront while still delivering reliable performance.
Real-world setups: two cameras, one panel, and a battery bank
In a typical home setup, you might place a weatherproof solar panel on a roof or fence, connect it to a small, weatherproof charge controller, then route wires to a compact battery bank stored in a sheltered location. The battery powers a DC-DC regulator that provides the appropriate voltage to the Ring cameras, ensuring stable operation. You’ll want to route cables in protective conduits to minimize wear and exposure to the elements. For two cameras, consider placing one camera near each side of the building where sun exposure is different, so the panel can capture sun from multiple angles if possible. Real-world testing is essential: monitor energy production versus demand over several weeks, especially during winter months when sun hours are shorter. If you notice frequent low-charge events, you may need to increase panel capacity or storage. The Solar Panel FAQ team has observed that simpler, well-protected layouts with clear labeling and routine checks tend to perform best over time.
Pitfalls and limits: weather, heat, and shade
Sunlight availability varies with season, weather, and shading from trees or nearby structures. A panel’s orientation and tilt influence its effective output, sometimes dramatically; even a small change can yield noticeable gains in energy production. High temperatures can also affect panel efficiency and battery health, so consider ventilation and heat management in your setup. Shade is especially problematic because even brief cloud cover or a passing tree branch can impact performance. Ensure the panel has as much unobstructed sun as possible during peak hours and design for occasional dips in production. If shading is unavoidable, you may need to increase panel size or storage to compensate for the reduced daily energy generation. The takeaway: design with margins, and test under real conditions to confirm reliability.
Quick design checklist before you buy
- Estimate combined daily energy draw for both Ring cameras.
- Check your local sun hours and expected seasonal variation.
- Choose a panel with sufficient wattage for peak sun days, plus storage.
- Plan for a robust, weatherproof mounting and wiring route.
- Include a charge controller appropriate for your battery chemistry and voltage.
- Use a weatherproof enclosure for all electronics and secure connections.
- Install a monitoring method to track energy production and usage over time.
- Leave room for expansion if you later add more devices or cameras.
This checklist helps ensure you don’t miss critical sizing and safety considerations. When done correctly, a single solar panel can keep two Ring cameras charged with minimal maintenance.
Example layout and configuration notes
A practical example includes a single solar panel mounted to maximize sun exposure, with a short run of protected wiring to a compact charge controller mounted in a weatherproof box. A small battery bank sits nearby, connected to the controller, and a DC-DC regulator provides a stable output to the two Ring cameras (or to a shared power hub). Clear labeling, protective conduit, and routine checks help prevent corrosion and ensure connections remain solid over time. If you are uncertain about wiring or safety, consult a qualified installer or refer to local electrical codes. The main goal is to maintain continuous operation for both cameras while ensuring safety and longevity of the system.
Tools & Materials
- Solar panel (sized for two cameras)(Should be rated for the combined energy needs and sun hours in your area)
- Charge controller(Regulates voltage to battery and devices; choose compatible with battery chemistry)
- Battery storage (lead-acid or lithium)(Provides buffering for cloudy days and night-time operation)
- DC-DC regulator or USB power hub(Regulates output to Ring camera power requirements)
- Weatherproof mounting hardware(Roof or wall mount; includes brackets and tilt adjustments)
- Weatherproof connectors and MC4 cable sets(Waterproof connections; use appropriate gauge for distance)
- Electrical enclosure or junction box(Protects controller and connections from the elements)
- Multimeter or solar-specific monitor(Useful for troubleshooting and performance verification)
Steps
Estimated time: 2-3 hours
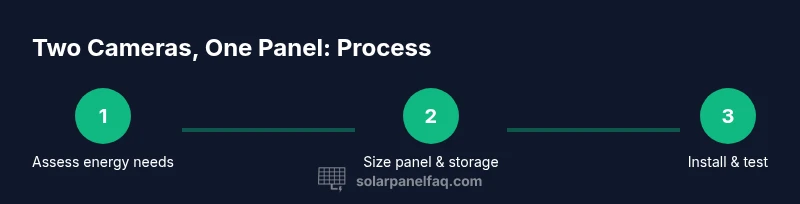
- 1
Assess energy needs
Identify the two Ring cameras being used and estimate their combined daily energy draw based on usage patterns and manufacturer guidelines. Document typical activity levels, standby current, and any features that increase power use (like motion-triggered recording). This baseline will guide panel sizing and storage requirements.
Tip: If exact numbers aren’t available, use conservative estimates and plan for storage to cover several cloudy days. - 2
Choose panel size and battery storage
Select a solar panel rated to meet peak sun energy for the two cameras and add a battery bank large enough to buffer several low-output days. Ensure the charge controller supports the chosen battery chemistry and the expected load. Remember: more storage and higher panel wattage generally improve reliability.
Tip: Prioritize a modular approach—start with a modest system and scale up if monitoring shows insufficient charging. - 3
Plan wiring route and protection
Map a safe wiring path from the panel to the charge controller and battery, using weatherproof conduits and sealed connections. Plan for a weatherproof housing for the controller and keep cables clear of moving parts or heat sources. Confirm all components are rated for outdoor use where applicable.
Tip: Avoid long cable runs where possible; shorter runs reduce voltage drop and improve efficiency. - 4
Mount the panel and route cables
Install the solar panel on a sturdy mount facing the sun’s optimum path, with adjustable tilt if feasible. Run cables through weatherproof conduits to the controller, ensuring strain relief and protection from wind and debris.
Tip: Seal all entry points into enclosures to prevent water intrusion. - 5
Connect charge controller to battery
Wire the panel to the charge controller, then connect the controller to the battery bank following the manufacturer’s polarity and safety instructions. Configure charging parameters if your controller supports it, such as float/absorption voltages appropriate for your battery type.
Tip: Double-check polarity before powering; a reversed connection can damage components. - 6
Set up power path to the Ring cameras
Route the regulator’s output to a common power hub or directly to the cameras’ supply input, ensuring a stable voltage within their operating range. If using two cameras, consider separate branch connections to minimize voltage drop across a shared line.
Tip: Use a power hub with fuses to protect each camera branch. - 7
Power on and test operation
Power up the system and verify that both cameras receive steady voltage from the battery via the regulator. Check panel output, battery voltage, and the cameras’ charging indicators. Run a few test events (motion, live view) to ensure no drops occur during activity.
Tip: Keep a multimeter handy during the first 24–72 hours to catch any drift early. - 8
Monitor performance and adjust
Over the first weeks, monitor energy production versus consumption. If you observe frequent low-charge events, consider increasing panel wattage or battery capacity, or optimizing camera activity to reduce power draw. Document seasonal changes and adjust tilt or orientation to maximize sun exposure.
Tip: Set up a simple log or alert for low battery voltage to act quickly.
Frequently Asked Questions
Can one solar panel reliably power two Ring cameras year-round?
Reliability depends on panel size, storage capacity, sun exposure, and weather. A well-sized panel with adequate battery storage can maintain operation through most seasonal variations, but you should monitor performance and be prepared to scale up if needed.
A properly sized panel with storage can power two Ring cameras most of the year; monitor performance and adjust as needed.
Do I need a battery if I use a single panel for two cameras?
A battery buffer is highly recommended to smooth energy delivery during cloudy days and at night. Without storage, charging can be inconsistent, leading to camera downtime during low sun.
A battery buffer is recommended to smooth supply when sun is not available.
What panel wattage should I choose for two cameras?
Choose a panel wattage that comfortably exceeds the two cameras' peak daily draw based on your sun hours. If in doubt, start with a larger panel and verify performance with real-world monitoring.
Start with a panel that covers peak demand and test performance in your location.
How do weather conditions affect charging performance?
Weather directly affects solar input. Cloud cover, shading, and temperature reduce output. Plan with a buffer and seasonal testing to maintain reliability.
Cloudy weather reduces output; a buffer helps maintain reliability.
Is it safer to use two smaller panels than one large panel?
Two smaller panels can offer flexibility and redundancy, but they require more wiring and protection. For two Ring cameras, a single well-sized panel plus storage is often simpler and reliable.
Two panels can work, but a single well-sized panel plus storage is usually simpler.
Can I power the Ring cameras directly from a solar panel without a battery?
Direct panel-to-camera powering is possible but uncommon and riskier due to voltage fluctuations. A regulated path through a charge controller and battery reduces risk and increases reliability.
Direct powering is possible but less reliable; use a regulated path with storage.
Watch Video
Top Takeaways
- Size panel and storage to cover peak load plus cloudy days.
- Use a charge controller and proper protection for safety and longevity.
- Place panels where they receive ample sun with minimal shade.
- Test and monitor regularly to catch performance gaps early.
- Design for future expansion if you add cameras or devices.