Solar Panel Heaters for Snow: A Practical Guide for Homeowners
Learn how solar panel heaters for snow work, when to use them, and how to safely select, install, and maintain winter-ready systems for rooftops and PV arrays.

Solar panel heaters for snow are electric or fluid-based devices installed with solar modules to melt or shed snow, reducing ice dams and preserving output. This guide explains when to deploy them, how to choose a method, and how to install safely, with maintenance tips for long-term reliability. You’ll compare electric mats, cables, and fluid loops, plus safety and warranty considerations, to plan a best-fit setup.
Why solar panel heaters for snow matter for homeowners\n\nSnow on solar panels can block light, decrease output, and cause ice dams that stress roofing edges. Solar panel heaters for snow are designed to melt or shed snow from PV modules and mounting hardware, reducing downtime and potential damage. For homeowners, a well-chosen system can extend winter production and improve long-term reliability. In this article, Solar Panel FAQ explains when to consider solar panel heaters for snow, how to select a method, and how to install safely. We'll compare electric mats, roof-heat cables, and fluid-based anti-icing loops, with practical tips and safety guidelines. The aim is to help you determine whether solar panel heaters for snow fit your roof type, climate, and maintenance capacity, and to plan a compliant installation that preserves warranties. Remember: not every roof needs heating, and improper installation can create hazards. With careful planning, solar panel heaters for snow can keep your panels productive through heavy snowfall and freezing conditions.
Snow dynamics on solar arrays and how to design for winter\n\nIn winter, the profile of snowfall, wind, and sun angle changes how your solar panel heaters for snow should behave. Dense, persistent snow can insulate panels and reduce performance, while wind-driven snow can uncover portions of the module but expose junction boxes to moisture. When designing a winter-ready system, consider roof orientation, shading, panel tilt, and typical snow depth. Solar panel heaters for snow should deliver reliable heat where ice tends to form, often near edges and along overhangs. A well-conceived approach integrates with your existing PV system, rather than adding competing loads, and accounts for ambient temperatures and the likelihood of freezing rain. By planning around these variables, you can optimize snow shedding without overburdening your electrical service. The goal is to maintain a consistent energy return, even during storms, by choosing a heating strategy that complements your roof and panel arrangement. Regular winter checks are essential to ensure the heating zones stay clear of snow and ice without causing overheating or wiring wear.
Heating approaches: electric mats, roof-heat cables, and fluid-based systems\n\nThere are three main categories for solar panel heaters for snow: electric heating mats or ribbons installed under the module or along the racking, roof-heat cables along critical seams, and fluid-based anti-icing loops circulated by a small pump. Each method has trade-offs in cost, complexity, and effectiveness. Electric mats offer straightforward installation and precise control via a thermostat, but require an outdoor-rated power source and weatherproof connections. Roof-heat cables provide continuous heat along the edges and transition lines but demand careful routing to avoid shading or interference with panel wiring. Fluid-based loops can cover larger areas with fewer discrete elements but need pump maintenance and leak prevention. In practice, many homeowners start with electric mats or cables, adding fluid loops if heavy snowfall recurs. When choosing among these options, prioritize compatibility with your mounting system, panel spacing, and inverter/controller architecture. Proper insulation, sealing, and cable management are essential to prevent moisture ingress and electrical faults. The umbrella term for all of these is solar panel heaters for snow, which captures the goal of keeping panels productive during winter storms.
Sizing and integration considerations\n\nSizing a solar panel heaters for snow system involves balancing intended snow load, roof geometry, and electrical capacity. Start by mapping heat zones where snow tends to accumulate or ice dams form most often, such as drip edges or transitions between roof planes. Determine heat demand per zone, then compare with the power rating of heating elements and the available circuit capacity. Integrate the heating system with the existing PV feed to minimize additional loads and ensure safe shutoff during maintenance. Choose a thermostat strategy that matches your climate; some systems use outdoor sensors to modulate heat, others rely on time-based settings. Ensure that wiring paths respect roof safety and maintainability; use outdoor-rated cable and appropriate conduit. Finally, review warranty terms from both the solar installer and heating component manufacturer to confirm coverage when combining solar panel heaters for snow with your PV array.
Installation considerations and safety best practices\n\nThis section highlights practical actions for safe, compliant installation of solar panel heaters for snow. Plan work during dry weather and use fall protection when on rooftops. Have a qualified electrician review circuit capacity and grounding. Use weatherproof connectors, seals, and enclosures to protect controls exposed to snow and ice. Route heating cables or mats away from panel wiring to prevent overheating and ensure service access. Test the system after installation, confirm there are no shorts, and verify thermostat response. Keep a documented record of all components and wiring diagrams for future maintenance. Don't forget safety: de-energize circuits before handling, wear PPE, and never work alone on a snow-covered roof.
Maintenance, monitoring, and performance tips\n\nRoutine checks are essential for solar panel heaters for snow to remain effective. Inspect seals and weatherproofing around mounting points; verify thermostat settings and sensor positioning; and watch for corrosion on power connections. Periodically measure current and voltage at the controller to confirm efficient operation. Clean snow off panels using safe methods if the heater system temporarily fails, but avoid aggressive scraping that could damage glass or frame. Keep a spare set of fuses or fusing components and test for leaks in glycol loops if used. Maintain clear access to serviceable components so that you can perform quick winter checks and preserve solar panel heaters for snow performance.
Costs, incentives, and long-term value of solar panel heaters for snow\n\nCosts for solar panel heaters for snow vary with method, roof type, and installation complexity. While general guidance suggests considering total lifecycle value, the actual price depends on heat zone count, mounting hardware, and required controls. In many regions, incentives, rebates, or tax credits may apply to snow-melting improvements that support energy efficiency. Evaluate the long-term value by comparing winter energy losses avoided with the up-front investment, expected system life, and maintenance needs. A well-planned installation can improve year-round energy yield, reduce roof damage risk, and preserve warranty terms, making solar panel heaters for snow a sensible option for suitable homes.
Tools & Materials
- Personal protective equipment (PPE)(gloves, non-slip boots, hard hat, safety glasses)
- Ladder and roof-safe fall protection(stabilized ladder with tie-off, harness if needed)
- Multimeter / voltage tester(outdoor-rated device for verification)
- Electrical heater mats or cables(ensure outdoor rating and compatibility with mounting system)
- Thermostat or controller(outdoor-rated, weatherproof enclosure)
- Weatherproof conduit, connectors, sealant(protects joints from moisture and cold)
- Insulation tape and cable clamps(secure and insulate wiring paths)
- Wire cutters/strippers(proper tools for outdoor wiring)
- Electrical supply and circuit protection(ensure circuit is sized and protected for outdoor use)
- Fall protection gear and PPE(optional for added safety on steep roofs)
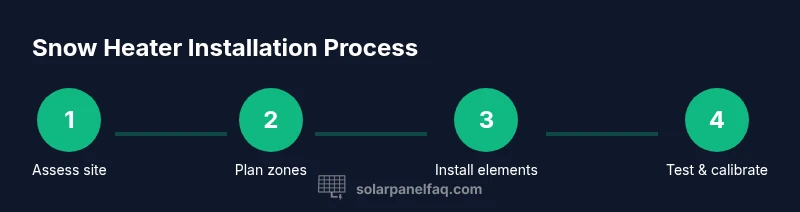
Steps
Estimated time: 3-8 hours
- 1
Prepare safety gear
Put on PPE, inspect ladder, and set up fall protection if working on a roof. Confirm weather conditions are safe for outdoor electrical work. This initial step reduces risk before any other action and keeps you compliant with basic safety practices.
Tip: Always have a buddy on site during roofing work. - 2
Assess roof and electrical capacity
Check roof condition, panel layout, and access to a suitable outdoor-rated power source. Verify service panel capacity or plan a dedicated circuit with proper grounding. This ensures the heating system won\'t overload your existing PV or electrical system.
Tip: Document current panel amperage and available spaces before wiring. - 3
Decide heating method and zones
Choose between mats, cables, or a fluid loop, and determine heat zones where snow and ice form most. Align zones with roof edges or high-risk areas to maximize effectiveness of solar panel heaters for snow.
Tip: Start with one zone to simplify initial testing. - 4
Plan wiring routes and controller location
Map safe, weatherproof routes for cables, run conduits away from moving parts, and select a thermostat location that is accessible but protected from direct weather. Ensure routes won\'t interfere with panel cleaning or maintenance.
Tip: Label cables and keep diagrams for future maintenance. - 5
Install heating elements
Secure mats or cables per manufacturer instructions, avoiding overlap with PV wiring. Connect to thermostat and power source, ensuring outdoor-rated connectors are sealed. Verify mechanical integrity before energizing.
Tip: Double-check clearance to prevent contact with hot components. - 6
Weatherproof, test, and calibrate
Seal all joints, install sealant where needed, and perform a controlled test. Observe thermostat response and ensure heating elements initiate smoothly. Adjust temperature setpoints for your climate and snowfall patterns.
Tip: Test on a dry, calm day first. - 7
Document maintenance plan and warranty notes
Record component models, wiring diagrams, and service intervals. Note warranty terms and vendor recommendations to preserve coverage when performing future work on solar panel heaters for snow.
Tip: Keep a digital backup of all installation documents.
Frequently Asked Questions
What are solar panel heaters for snow and what do they do?
Solar panel heaters for snow help melt snow and ice on solar modules to maintain light exposure and prevent ice dams. They can improve winter output when installed safely and in suitable climates. Always weigh climate, roof type, and warranty terms before proceeding.
Solar panel heaters for snow melt snow and ice on panels to protect performance and reduce ice dam risk. Consider climate, roof type, and warranty terms.
Are solar panel heaters for snow safe for my roof and panels?
When properly installed with outdoor-rated components and correct weatherproofing, solar panel heaters for snow can be safe for roofs and PV panels. Avoid sharp edges, maintain proper clearance, and follow manufacturer guidelines. Have the installation reviewed by a licensed professional if you’re unsure.
With proper installation and outdoor-rated parts, snow-heating systems can be safe for roofs and panels. Get professional guidance if in doubt.
Will heating systems affect solar output or warranty?
Any heating system adds electrical load and potential warranty considerations. Choose compatible components and confirm with the installer and panel manufacturer. Document all changes to preserve warranty coverage and monitor performance to ensure net gains in winter output.
Heating systems add load and can affect warranties. Verify compatibility and document everything to protect coverage.
How do I size and place a heater system?
Size by identifying snow-prone zones and matching heat output to those areas. Place heaters where ice forms most, typically at edges and near overhangs. Ensure wiring routes avoid panel wiring, and keep controls accessible for maintenance.
Identify snow-prone zones, match heat to those zones, and keep wiring and controls accessible.
Can I install solar panel heaters for snow myself?
DIY installation is possible for some simpler mats with proper safety training, but many projects require a licensed electrician for the electrical work. Assess local codes and warranty implications before proceeding.
DIY is possible for simple parts, but electric work usually needs a licensed pro. Check local codes.
What maintenance is required?
Regularly inspect seals, sensors, and cables; test thermostat function and power connections; and clean panels as needed. Schedule annual checks to ensure continued performance and to catch corrosion or moisture ingress early.
Inspect seals, test sensors, and keep connections tight. Schedule annual checks for best results.
Watch Video
Top Takeaways
- Assess roof safety and electrical capacity first
- Choose the heating method that matches climate needs
- Prioritize safety; use weatherproof, outdoor-rated components
- Test and calibrate; document maintenance needs
- Consider long-term value and warranty implications