Should Solar Panels Be Horizontal or Vertical? A Practical Guide
Explore how orientation affects performance, shading, and installation. Learn when horizontal or vertical layouts make sense for your roof, climate, and budget.

Whether to mount solar panels horizontally or vertically isn’t a universal rule. It depends on your roof shape, shading, wind exposure, and installation goals. In many homes, horizontal rows align with long, shallow roofs for cleaner wiring and easier maintenance, while vertical stacks can fit narrow facades or optimize wind resistance in certain locales. The best choice balances performance, cost, and practicality.
Why orientation matters
Orientation is a foundational design choice that shapes how many panels you can fit, how evenly they’re shaded, and how wiring is routed. According to Solar Panel FAQ, the question of should solar panels be horizontal or vertical hinges on roof geometry, sun path, wind loads, and maintenance practicality. A well-chosen orientation can improve energy yield, reduce shading losses, and simplify mounting. There is rarely a one-size-fits-all answer; instead, homeowners should model multiple layouts to compare potential gains and costs. In practice, the orientation you pick should harmonize with your roof lines, solar access, and local climate while staying within code requirements and warranty terms.
Key factors to consider
To decide between horizontal or vertical orientation, start with the facts about your roof: its length, pitch, and edge conditions; the direction it faces; and any features that create shading or interference. A clear sun-path map helps predict when different parts of the roof will receive peak sunlight. Wind exposure matters, too—some regions experience uplift that makes mounting orientation and rack design more critical. Aesthetic preferences and year-round maintenance access also influence the decision. Finally, evaluate how the orientation affects electrical wiring, inverter configuration, and potential future expansions. The overarching aim is to minimize shading and maximize the total usable panel area while keeping installation straightforward.
Horizontal orientation: when it shines
Horizontal layouts often work best on long, shallow roofs where rows can run parallel to the roof ridge. This arrangement aligns with most standard racking systems, simplifies wiring, and makes cleaning easier because access aisles run along the roof edge. In climates with frequent snow or debris buildup, horizontal rows can facilitate shed-off behavior and reduce wind uplift on some roof shapes. If your building’s structure and local codes permit it, horizontal orientation provides a clean, scalable path for expansions and service.
Vertical orientation: when it shines
Vertical layouts excel on narrow or irregular roof footprints where horizontal rows would create awkward gaps or require excessive shading avoidance adjustments. They can maximize the number of panels on a limited horizontal span and may better fit architectural features such as dormers or skylights. In windy coastal or high-altitude environments, a vertical stacking approach paired with appropriate wind baffles or robust mounting can help mitigate uplift. Implementation often requires careful planning of splice points and wiring runs to maintain efficiency and reduce losses.
How to evaluate your roof and climate
Begin with a site survey that records roof dimensions, slope, and orientation, plus nearby shading sources like trees or chimneys. Use sun-path modeling or smartphone apps to simulate sun incidence across seasons. Map potential shading hours and identify times when panels would be most illuminated. Assess wind exposure by consulting building codes and local climatology; this informs mounting height, tilt, and rake angles. Consider future needs—home expansions, battery storage, or upgrading inverters—as these plans influence whether a horizontal or vertical layout is more adaptable. Finally, involve a licensed installer or structural engineer to validate your plan and ensure it meets safety and warranty requirements.
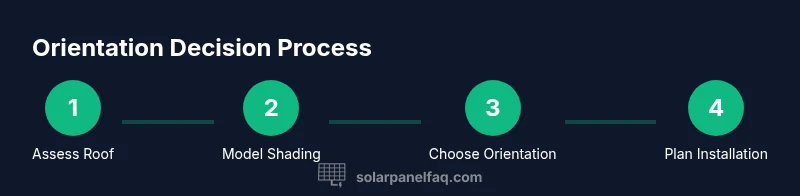
Practical workflow for deciding and implementing
Start with a simple sketch of the roof showing length, width, and key features. Mark possible panel rows in both horizontal and vertical orientations, estimating the number of panels per layout and the expected shading. Run a quick energy model for typical days to compare output and identify trade-offs. Check local permitting requirements and roof-load limits. Once you choose an orientation, document exact mounting coordinates and wiring pathways to streamline installation and future maintenance.
Tools & Materials
- Tape measure(to measure roof dimensions and spacing in inches)
- Safety gear (harness and lanyard)(for fall protection when on the roof)
- Ladder or access equipment(stable and rated for your height)
- Level(to ensure straight rows and proper tilt)
- Chalk line or string(for laying out panel positions)
- Mounting hardware kit(per roof type and racking system)
- Sun-path/ shading app or diagrams(to model sun incidence)
Steps
Estimated time: 1-2 days
- 1
Assess roof geometry
Measure roof length and width; note pitch, edge conditions, and obstructions. Create a scaled sketch to visualize potential panel grids in both orientations.
Tip: Use a helper with a measuring wheel for accuracy. - 2
Analyze shading and sun path
Map shading from trees, chimneys, and nearby structures. Use sun-path data to predict which roof sections receive peak sun during winter and summer.
Tip: Record sun angles at solstices for better tilt planning. - 3
Evaluate wind loads
Consult local codes or a structural engineer about wind uplift. Decide if horizontal or vertical layouts better align with the prevailing wind direction.
Tip: If in a high-wind zone, prioritize robust mounting and edge clearance. - 4
Estimate panel count and spacing
Compute how many panels fit in each orientation, accounting for edge clearance and access aisles. Include wiring and inverter considerations.
Tip: Plan for expansion and choose a layout that minimizes shading over time. - 5
Decide orientation and draw a plan
Select the orientation that yields maximum usable area with minimal shading. Create a final layout sketch with coordinates for mounting points.
Tip: Include emergency access and service routes in the plan. - 6
Plan permits and installation steps
Check permitting requirements and schedule installation with a licensed contractor. Prepare a simple diagram for inspectors and plan for post-install tests.
Tip: Document measurements and have a contingency for weather delays.
Frequently Asked Questions
What factors determine whether horizontal or vertical orientation is better?
Choice depends on roof shape, shading, wind exposure, and local codes. A careful assessment of sun path and space constraints helps decide which orientation yields the best balance of output and ease of installation.
Orientation depends on roof shape, shading, wind, and codes; assess sun path and space to pick the best layout.
Will orientation change my solar panel efficiency?
Yes. Orientation affects how much sunlight the panels receive and how consistently they stay free from shading. The goal is to minimize shading and maximize the total area collecting sun.
Orientation affects efficiency through shading and sun exposure; minimize shading for best results.
Is there a universal best orientation?
No universal best. The optimal orientation depends on your roof geometry, climate, and goals. Compare layouts and energy projections for your specific home.
There isn't a universal best orientation; it varies by home.
How does wind affect horizontal vs vertical layouts?
Wind uplift is a key factor. Vertical layouts may be more wind-resilient on some rooftops, but proper mounting and spacing are essential for any orientation.
Wind is a major factor; proper mounting affects resilience.
Can I change orientation after installation?
Changing orientation after installation is usually costly and may require rework of mounting and wiring, plus permits. Plan carefully before mounting.
Changing orientation later is possible but costly; plan ahead.
Do I need to consult a professional?
Yes. A licensed installer or structural engineer can assess your roof, climate, and goals to optimize orientation and ensure code compliance.
Definitely consult a professional to optimize orientation.
Watch Video
Top Takeaways
- Evaluate roof geometry before choosing orientation
- Minimize shading to maximize output
- Vertical layouts fit narrow roofs; horizontal layouts fit long roofs
- Plan for permits and safety
- Engage a licensed installer to confirm the final layout