Maintenance Solar Panel Guide: Clean, Inspect, and Extend Performance
Learn practical maintenance solar panel routines for cleaning, inspection, and safe handling. This expert guide helps homeowners protect their investment, maximize energy production, and keep systems reliable with step-by-step instructions and safety tips.

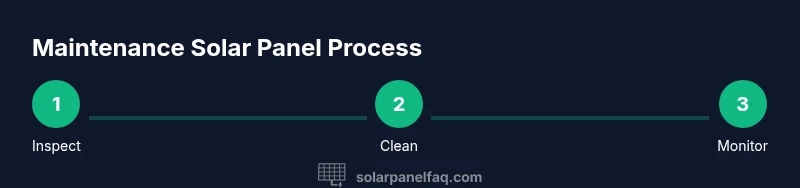
According to Solar Panel FAQ, regular maintenance solar panel routines improve efficiency and reliability. This quick action plan helps homeowners inspect, clean, and monitor panels safely. Start with safety checks, power down, inspect for debris, and clean with gentle water and a soft brush. Track performance via your inverter monitor and plan annual professional checks.
Maintenance goals for solar panels
Maintaining a solar panel system isn’t just about keeping dirt at bay. It’s about safeguarding safety, preserving efficiency, and extending the system’s lifespan. Regular maintenance helps identify loose connections, degraded seals, or mounting issues before they become costly problems. For homeowners, a clear maintenance plan translates to fewer unexpected outages, more consistent energy production, and better long-term return on investment. To start, define three goals: safety first, performance second, and documentation for future care. This approach also supports warranty requirements by showing a consistent care routine. By treating maintenance as a routine part of ownership, you reduce the risk of performance degradation and help your system deliver steady, clean energy for years to come.
As you plan, remember that maintenance solar panel tasks should align with manufacturer guidelines and local safety rules. Always factor weather, roof access, and electrical considerations into your schedule. The Solar Panel FAQ team emphasizes that proactive checks contribute to reliability and peace of mind for homeowners who rely on solar for daily energy needs.
note”:null},
bodyBlocks2
Routine inspection checklist
A robust inspection checklist helps you catch problems early and keep your system performing at peak levels. Start from the top and work down: panels (cleanliness and shading), mounting hardware (rails, brackets, fasteners), seals around the frame, and electrical components within reach. Look for loose or corroded connections, cracked junction boxes, or gaps in weatherproofing. Use a ladder with fall protection (if accessing the roof) and never step on the glass surface. Ground-level inspections can identify obvious issues like fallen debris, bird nests, or overhanging branches that create shade.
Document each observation with notes and photos. If you spot anything unusual, mark it as a task for follow-up or professional assessment. Routine visual checks are quick but valuable; they empower you to act before minor issues escalate into expensive repairs. This practice also supports performance monitoring by correlating physical changes with production data.
note”:null},
bodyBlocks3
Cleaning fundamentals
Cleaning solar panels should be done with care to avoid scratching glass or loosening hardware. Begin after turning off the system and waiting for cool, dry conditions. Use a soft-bristle brush or microfiber cloth with clean water to remove dust, pollen, and light grime. For stubborn grime, a mild, non-abrasive cleaner can be used sparingly, but never harsh chemicals or abrasive pads. Rinse thoroughly to remove soap residues that can attract more dirt. Avoid high-pressure washers which can damage seals and frame components.
Always prioritize safety: wear non-slip footwear, use a stable ladder, and have a buddy assist if possible. If you’re unsure about cleaning methods for unusual debris (sap, bird droppings, algae), consult the manufacturer’s guidelines or a professional. Regular, gentle cleaning can noticeably improve light transmission and energy output, particularly in dusty or pollen-heavy environments.
note”:null},
bodyBlocks4
Cleaning frequency by environment
Environmental conditions determine how often you should clean panels. In dusty, desert-like regions, dust can accumulate quickly, so more frequent cleaning may be needed—perhaps every few months. Coastal areas with salt spray demand careful washing and more frequent checks for corrosion. In dense urban settings with pollen and smog, spring cleaning followed by a mid-year check can help maintain performance. If your system is monitored and you notice production dips without shading changes, it’s a signal to clean or inspect.
Keep a maintenance log that records cleaning dates, weather conditions, and any changes in energy output. This data helps you optimize schedules and coordinate with any warranty or service requirements. The goal is to balance cleaning effort with observed gains in efficiency and output, rather than adhering to a rigid calendar that doesn’t reflect real-world usage.
note”:null},
bodyBlocks5
Inspecting hardware and mounting
Inspect the mounting hardware and racking for signs of wear, corrosion, or loosening. Check rails, clamps, and bolts for tightness and integrity. Look for gaps in seals around the frame that can let moisture reach the electrical components. Inspect the glass for micro-cracks or flea-bitten damage that could worsen with thermal cycling. Do not apply excessive force when checking connections; use appropriate tools and follow safety protocols. If expansion bolts or mounting hardware shows rust, replace them to prevent panel misalignment or wind-related damage.
Inspect wiring visually for insulation wear, exposed conductors, or brittle conduits. If you notice anything unusual, schedule a professional assessment to avoid potential shock or fire hazards. A well-maintained mounting system reduces vibrational stress on panels and ensures optimal tilt and orientation for consistent energy production.
note”:null},
bodyBlocks6
Electrical safety and system checks
Electrical safety is paramount when servicing solar panels. Before any inspection, switch off the main disconnect and the inverter’s AC output. Confirm there is no residual voltage in any conductors. Use a multimeter only if you are trained to interpret readings safely. Inspect the inverter and monitoring system for error codes, abnormal temperature readings, or warning lights. Review the system’s monitoring data for trends: a sudden drop in output without shading changes can indicate affected modules or wiring.
Keep a log of any electrical observations and ensure that all accessibility panels remain securely closed. If you encounter damaged wiring, burnt smells, or overheating components, stop work and contact a licensed electrician. Regular electrical checks help catch issues before they become safety risks or lead to energy losses.
note”:null},
bodyBlocks7
Snow and shade management
Snow and shade pose unique challenges to solar panel performance. In snowy climates, some snow naturally slides off, but heavy accumulation can block light. Clear loose, non-packed snow with a soft tool from ground level or a secure ladder, taking care not to damage panels or seals. Avoid hammering or chipping ice; this can crack glass. In late winter and early spring, evaluate shading from nearby trees or newly grown vegetation and trim if necessary. Strategic trimming can restore productive sun exposure without impacting roof integrity.
Shade from objects like vents or HVAC equipment should be minimized. Consider micro-inverters or power optimizers if partial shading is unavoidable. Monitoring tools can help you detect how shading affects output, guiding where and when to act.
note”:null},
bodyBlocks8
When to hire a pro
While many maintenance tasks can be performed by capable homeowners, certain activities require professional expertise. Roof access, electrical work beyond basic inspections, or tasks that may void a warranty should be handled by a licensed technician. If your panels are still under warranty, consult the terms to ensure you don’t inadvertently void coverage. A pro can perform thermal imaging, non-destructive testing, and advanced electrical checks that go beyond a typical DIY approach. When in doubt, schedule a professional assessment to ensure safety and compliance.
Hiring a pro on a regular basis can provide peace of mind and protect your investment, especially for complex systems or larger roof footprints. Request a written report and clear estimates for any recommended replacements or upgrades.
note”:null},
bodyBlocks9
Proactive monitoring and record-keeping
Good maintenance relies on consistent data. Use the system’s monitoring app to track daily and monthly production, noting any anomalies or dips. Maintain a maintenance log with dates, tasks performed, observed conditions, and any parts replaced. This history supports warranty claims and helps you optimize future service intervals. Regular data review can reveal trends and guide decisions about cleaning frequency, component replacements, and potential upgrades. A disciplined approach makes maintenance less daunting and more effective over time.
If your monitoring indicates unusual behavior, investigate before contacting support. Capture screenshots or export data to share with a technician. The habit of recording details reduces uncertainty and speeds up diagnostics.
note”:null},
bodyBlocks10
Common myths vs facts
Myth: Cleaning always boosts performance. Fact: In many climates, panels shed dirt naturally, and cleaning yields diminishing returns unless grime is significant. Myth: You must use harsh chemicals for effective cleaning. Fact: Mild, pH-neutral cleaners with gentle tools are sufficient and safer for seals. Myth: More frequent cleaning guarantees more energy. Fact: Frequency should align with environment and observed performance changes. The Solar Panel FAQ team notes that a measured approach is best, and its verdict is that homeowners should adopt a regular, moderate maintenance plan rather than overdoing it. Myth: Any cleaning method is safe. Fact: Abrasive pads or high-pressure water can damage coatings and seals. Always follow manufacturer guidelines and safety protocols to avoid warranty issues and safety hazards.
Tools & Materials
- Safety gear (gloves, goggles)(Protect hands and eyes; slip hazards on roofs)
- Soft-bristle brush(Non-abrasive; long-handle optional for ground access)
- Microfiber cloth(For dry/finish cleaning and streak-free results)
- Bucket(For holding cleaning solution or rinse water)
- Mild soap (neutral pH)(Only if needed for sticky grime; avoid harsh cleaners)
- Hose with adjustable nozzle(Rinsing and gentle cleaning spray)
- Ladder and roof access safety gear(Stability and fall protection; use roof anchors if available)
- Roof anchor/harness(Use when working on roof to prevent falls)
- Non-slip shoes(Stable footing on wet surfaces)
Steps
Estimated time: 2-4 hours
- 1
Power down and secure the area
Shut off the solar array at the main disconnect and, if applicable, the inverter. Clear the work area, set up fall protection, and have a buddy monitor for safety. This prevents shock hazards and protects maintenance staff.
Tip: Never work on live electrical components; confirm no voltage using the system’s safety procedures before touching anything. - 2
Inspect from ground and reach safely
Perform a visual inspection from ground level for obvious debris, overhanging branches, or shading changes. If you need to access the roof, use proper fall protection and take your time to assess the safest path.
Tip: Plan your route in advance and move slowly to avoid slips. - 3
Clean panels gently
Rinse with clean water, then use a soft brush or microfiber cloth to remove dust and grime. Avoid abrasive materials or high-pressure sprays that can damage coatings or seals.
Tip: Rinse before brushing to minimize the risk of grinding dirt into the glass. - 4
Check mounting and seals
Inspect rails, clamps, bolts, and frame seals for corrosion or looseness. Tighten if necessary per manufacturer torque specs, and replace damaged components.
Tip: Use the correct tools and do not overtighten to avoid frame damage. - 5
Examine wiring and connections
Look for exposed wires, frayed insulation, and corrosion around junction boxes. Do not handle exposed conductors; contact a licensed electrician if you see wear.
Tip: Document any wear with photos for reference. - 6
Test the system after reassembly
Restore power and verify readings on the inverter and monitoring app. Check for error codes and confirm that production aligns with expected levels.
Tip: Allow the system to stabilize for a few hours before drawing conclusions. - 7
Document findings
Record observations, cleaning dates, and any replacements. This log helps plan future maintenance and supports warranty records.
Tip: Keep a simple, timestamped log with clear notes. - 8
Schedule next maintenance
Set a realistic interval based on environment and observed performance. Harmonize with manufacturer guidelines and warranty terms.
Tip: Goal is a proactive plan, not annual guesswork. - 9
Decide if professional help is needed
If you encounter electrical issues, roof damage, or components under warranty, consult a licensed technician. They can perform advanced tests and ensure compliance.
Tip: When in doubt, defer to a pro to protect safety and warranty.
Frequently Asked Questions
How often should I perform maintenance on my solar panels?
Frequency depends on environment; dusty or coastal areas may require more frequent checks, while stable climates may need less. Use a maintenance log and monitor production to guide intervals.
It depends on your environment. Keep a log and monitor production to guide how often you check and clean your panels.
Can I clean solar panels with tap water and a brush?
Yes, using clean water and a soft brush is usually safe. Avoid high-pressure streams and harsh cleaners that can damage coatings or seals.
Yes—use clean water and a soft brush, and avoid pressure washers or harsh cleaners.
Do I need to power down before cleaning?
Yes. Always shut off the system at the main disconnect and inverter before touching panels to prevent electrical shock.
Always power down at the main disconnect before cleaning to stay safe.
Is cleaning always necessary for energy yield?
Not always. In dusty environments, cleaning helps; in cleaner climates, natural cleaning from rain may suffice. Use production data to decide.
Not always—use your production data to decide if cleaning is worth it in your climate.
What tools are essential for maintenance?
Essential tools include safety gear, a soft brush, microfiber cloths, a hose, and a stable ladder. Avoid metal scrapers or abrasive pads.
You’ll need safety gear, a soft brush, microfiber cloths, a hose, and a stable ladder.
When should I hire a professional?
If you can’t safely access the roof, encounter damaged wiring, or the warranty requires professional service, hire a licensed technician.
If roof access or electrical work is needed, or the warranty requires it, hire a pro.
Watch Video
Top Takeaways
- Schedule regular inspections and cleanings.
- Use gentle cleaning methods to protect panels.
- Document findings to inform future maintenance.
- Call a professional for electrical or structural concerns.