How to Know If a Solar Panel Is Good
Learn practical steps to evaluate solar panel quality, from visual checks to datasheet readings and warranties, so you can buy with confidence and maximize long-term performance.

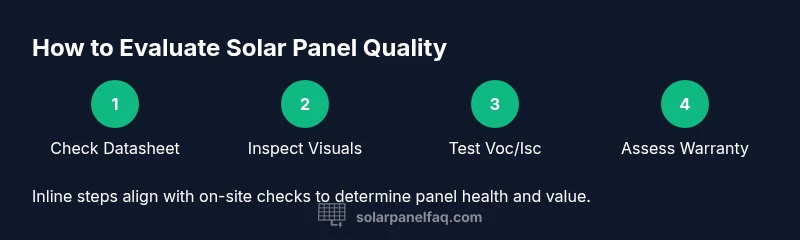
This guide shows homeowners how to know if a solar panel is good. You will learn to evaluate electrical performance, physical condition, datasheets, warranties, and real-world conditions. By following practical checks and simple tests, you can gauge panel quality before buying or replacing modules, avoiding underperforming setups. This quick overview prepares you for the deeper sections that follow.
What makes a solar panel good?
Determining whether a solar panel is good involves more than a single metric. A high-quality panel should deliver reliable electrical performance across a range of operating conditions, resist environmental stresses like heat and humidity, and come with solid manufacturer support through warranties. According to Solar Panel FAQ, a good panel should not only meet its rated power under ideal conditions but also degrade gracefully over time and maintain structural integrity after years of exposure. In practice, this means looking at three broad pillars: performance, durability, and value. Performance covers how close the panel comes to its rated output under typical sun. Durability considers the robustness of the glass, frame, and backsheet against weather and microcracks. Value encompasses warranty coverage, longevity, and the reputation of the maker. When you assess these areas together, you gain a reliable sense of whether a panel will perform well in your home over the lifecycle of your solar system.
Homeowners should also consider long-term factors such as compatibility with their existing inverter and racking, potential shading changes over time, and the likelihood of recourse if defects arise. The Solar Panel FAQ team emphasizes balancing upfront cost with projected lifetime performance. In short, a good panel is not just about the sticker on the back; it’s about how the panel performs in real conditions, how it ages, and how easy it is to service or replace if needed.
Reading the datasheet: key specs to check
Datasheets are the playbook for understanding what a panel should do. Start with the rated maximum power (Pmax) and the voltage and current at STC (Voc, Vmp, Isc, Imp). Compare these values to the panel you’re considering and to your system’s inverter and mounting configuration. Temperature coefficient matters because performance changes with temperature; a smaller coefficient means the panel loses less power on hot days. Look for the type of cells (monocrystalline vs polycrystalline) and the warranty terms. A solid datasheet will also show the physical dimensions, packaging, and the expected degradation rate per year. Warranties aren’t glamorous, but they’re your safety net: a robust warranty signals the manufacturer’s confidence and provides a baseline for future service.
When you review the numbers, keep the context in mind: real-world output is influenced by weather, age, and shading. If you see a panel with a high Pmax but an unusually high temperature coefficient, you might expect bigger power losses on hot afternoons. Likewise, compare the datasheet values to the panel’s actual measured performance after installation to gauge how closely your system tracks its spec sheet. The goal is to confirm that the panel’s behavior aligns with what you’re paying for and can rely on year after year.
Visual inspection: signs of a healthy panel
A quick visual pass can reveal many potential issues before you commit to a purchase or a service call. Check for visible cracks in the glass, delamination along the edges, and chips that could let moisture seep into the laminate. Look at the backsheet for signs of moisture, discoloration, or bulging. Inspect the frame for corrosion, loose mounting holes, or bending. Busbars should be intact and evenly seated; any lifted wiring or exposed connectors warrants professional attention. While a panel may look fine on the surface, subtle cracks or microcracks inside cells can silently reduce output. It’s also wise to examine the sealant around the edges and any signs of mold or residue, which can indicate moisture ingress.
Document any irregularities with photos and notes. If you’re buying used panels, ask for a prior performance report or recent maintenance history. Regular visual checks are a practical habit for keeping a solar array healthy, particularly in climates with heavy hail, wind, or UV exposure. A well-maintained appearance often correlates with better reliability, but never substitute a data-backed test for a full assessment.
Basic electrical tests you can perform (with safety in mind)
Electrical tests provide objective data about a panel’s health. Start by safely isolating the panel from the system using the appropriate breakers and PPE. A digital multimeter (DMM) set to measure voltage (V) and current (A) lets you confirm Voc and Isc, while a solar-IV tester or IV curve tracer can map V-I characteristics across the operating range. In bright sun, measure Voc with the panel open-circuit and Isc with a direct short, following the meter’s safety instructions. Compare the measured values to the datasheet’s Voc and Isc at standard test conditions; deviations can indicate aging, shading, or connection problems. If you have access to an IV curve, look for a smooth, clear knee in the curve and a Pmax near the datasheet value. Small deviations are normal, but large gaps suggest an underperforming module or mismatched components.
If you’re testing in a combined solar array, take measurements for individual panels when feasible to isolate underperformers. When in doubt, pause the test and consult a licensed electrician or solar technician. Keep records of all readings, including weather conditions and time of day, so you can track changes over time. Remember: safety first. Do not attempt complex electrical work without proper training or supervision.
Interpreting results and deciding on action
Interpreting results involves context. A panel that reads near its rated output under ideal conditions but falls short under real-world sun may simply reflect weather or heat, especially if shading is variable. Compare your readings to the rated peak power and to typical losses from temperature, soiling, and wiring. If most panels show consistent underperformance, shading analysis, soiling cleanup, or replacing aging modules may be warranted. If a single panel drifts far below its peers, it could indicate a microcrack, insulation issue, or degraded bypass diode. In this case, a professional inspection or a warranty claim is prudent. Document all readings and incidents to support any warranty discussions or service visits. Remember that performance does not exist in a vacuum; system design, inverter compatibility, and array layout all shape the final output.
When deciding whether to replace a panel, weigh the cost of replacement against projected lifetime energy savings. In many cases, repairing or rebalancing a system with newer, higher-efficiency modules may yield a better return than keeping an underperforming unit in service. This is why a comprehensive evaluation—combining datasheets, visual checks, and test results—is essential before making a purchase or a repair decision.
Warranties, standards, and when to replace
Warranties are your safety net for long-term performance. Most residential solar panels come with a 25-year performance warranty, guaranteeing a minimum level of output over time, and a 10- to 12-year product warranty against manufacturing defects. While warranties don’t guarantee perfect performance, they provide a mechanism for replacement or remediation if a panel fails prematurely. Look for certifications from recognized standards bodies and ensure the panel is compatible with your local grid and safety codes. The degradation rate—how quickly a panel’s output declines—varies by brand and type but is typically a few percent per year; lower degradation rates translate to more energy later in the panel’s life. If you’re evaluating second-hand panels or refurbished modules, demand complete performance data, a recent test report, and clear documentation of any prior repairs.
Ultimately, the decision to replace or repair hinges on your expected energy goals, payback period, and the cost of replacement versus continued operation. A good warranty, clear performance data, and a panel that passes both visual and electrical tests together provide a strong signal that you’ve chosen well. The best panels are not only efficient but durable and well-supported by the manufacturer.
Practical steps for buying or replacing panels
When buying or upgrading, insist on a complete datasheet for each panel, compare power ratings under similar conditions, and verify warranty terms. If you’re replacing aging panels, consider newer technologies with higher efficiency and better low-light performance. Evaluate system compatibility, space constraints, and mounting requirements. Ask the installer to perform a baseline performance test after installation to establish a reference for future checks. Finally, maintain a routine inspection and cleaning schedule to preserve performance, and budget for periodic upgrades as part of your solar plan.
Summary of how to know if a solar panel is good
A good solar panel balances strong electrical performance with robust durability, transparent warranties, and reliable manufacturer support. Visual inspections, datasheet checks, and safe electrical testing together form a rigorous evaluation protocol. Remember to assess the panel not in isolation but as part of your entire solar system, including inverter, mounting, shading environment, and climate exposure. By following these steps, you’ll be well-positioned to make informed decisions about buying, keeping, or upgrading solar panels for optimal home energy generation.
Tools & Materials
- Digital multimeter (DMM) with solar settings(Measure Voc and Isc; verify readings against datasheet)
- IV curve tracer or solar IV tester(Optional but helpful for full I-V curve analysis)
- Safety gear (gloves, safety glasses)(Protective equipment for electrical testing)
- Panel datasheet or model number(Compare measured values to spec; needed for accuracy)
- Camera or notebook for documentation(Record visual signs and measurement results)
- Insulated screwdriver and basic insulation gauge(For mounting or wiring checks if part of service)
Steps
Estimated time: 45-60 minutes
- 1
Gather datasheets and safety gear
Collect the panel datasheet, model number, and any warranty papers. Put on PPE (gloves, glasses) and ensure the area is safe for electrical work. This prepares you to compare real measurements with manufacturer specifications.
Tip: Having the exact model number makes it easier to pull the correct Pmax, Voc, and Isc values. - 2
Perform a visual inspection
Look for cracks, discoloration, moisture intrusion, or loose frames. Check the backsheet for damage and confirm wiring is intact. Document any issues with photos and notes for later follow-up.
Tip: Take before-and-after photos to track changes over time. - 3
Measure open-circuit voltage (Voc) and short-circuit current (Isc)
With the panel exposed to sun, connect the DMM to measure Voc (no load) and Isc (short-circuit). Compare values to datasheet figures at standard test conditions. Note large deviations, which may indicate issues.
Tip: Do not touch live terminals; follow the meter’s safety guidance. - 4
Evaluate the I-V curve (if you have a tracer)
Use an IV curve tracer to map voltage vs. current across the operating range. Check for a smooth knee and a peak close to the rated Pmax. A jagged or shifted curve can indicate microcracks or internal faults.
Tip: A clean knee line usually means solid panel health. - 5
Cross-check with the system in operation
If possible, compare the panel’s real-time output using your inverter’s monitoring data under similar sun conditions. Look for consistency across panels and time-of-day variations. Inconsistent results could reveal shading, wiring, or inverter issues.
Tip: Use multiple time stamps to account for sun angle changes. - 6
Assess warranties and plan next steps
Review the warranty terms for coverage duration and what constitutes a valid claim. If measurements show meaningful drift or physical damage, consider replacement or repair, guided by your budget and energy goals.
Tip: Keep a running logfile of measurements and warranty dates.
Frequently Asked Questions
What does a 'good' solar panel look like on inspection?
A healthy panel should be free of cracks, corrosion, moisture, and bulging backsheet; the frame should be solid and mounting points intact. Subtle signs like slight microcracks may not be obvious but can affect performance over time. Always verify with measurements when possible.
Look for cracks, moisture, or bent frames. If the panel looks damaged or wet, have it checked before use.
Can a panel look fine but underperform?
Yes. A panel can appear pristine yet underperform due to shading, soiling, microcracks, or aging. Always compare measurements to the datasheet and consider real-world conditions.
Yes. Good-looking panels can still underperform because of shading or aging, so test them properly.
How important is the warranty when buying panels?
Warranty protects your investment. Look for a long-term performance warranty (around 25 years) and a solid product warranty to cover manufacturing defects.
A strong warranty helps protect your energy investment over time.
What tests show panel health?
Visual inspection, datasheet comparison, and electrical tests like Voc and Isc are essential. For a full picture, use an IV curve tester if available and consult a solar professional for interpretation.
Check the physical condition and readings from Voc and Isc to judge health.
How long do solar panels last?
Most residential panels are designed to last 25-30 years, with gradual degradation in output. The rate varies by brand and type but is typically modest with high-quality modules.
They’re built to last decades, with performance slowly declining over time.
What is STC rating and why does it matter?
STC rating provides a standardized performance baseline under lab conditions. Real-world output will vary with temperature, shading, and installation, but STC helps you compare panels fairly.
STC gives a standard benchmark, but real-world results depend on conditions.
Should I replace panels that underperform?
If measured output is consistently well below expectations and cannot be improved with cleaning or shading mitigation, replacement may be justified, especially if energy savings justify the cost.
If underperformance persists, replacement could be the best long-term option.
Can a module from a reputable brand still fail early?
Yes. Even well-made panels can fail early due to manufacturing variances or installation issues. Always correlate field results with warranty terms and seek professional evaluation when in doubt.
Even trusted brands can have early failures; verify with tests and warranties.
Watch Video
Top Takeaways
- Evaluate performance, durability, and warranty together
- Use datasheets to ground your measurements
- Visual checks can reveal issues early
- Keep organized records for warranties and future tests
- Plan replacements or upgrades based on cost and expected gains