How to Run Christmas Lights with a Solar Panel System
Discover how to power holiday lights with solar panels, including sizing panels and batteries, wiring safely, and maximizing daylight for a reliable, energy-efficient display.

According to Solar Panel FAQ, you can run Christmas lights off a solar panel by pairing a small, weatherproof panel with a rechargeable battery and a low-voltage string. The key requirements are adequate panel wattage, sufficient battery storage for overnight use, and a reliable charge controller. LED strings maximize run time with minimal energy, making seasonal displays practical in many climates.
Understanding the concept of a solar-powered light show
Powering Christmas lights with a solar panel hinges on a simple chain of energy conversion: sunlight is captured by a panel, stored in a battery, and released to drive a low-voltage lighting string when the sun goes down. This approach is especially appealing for homeowners who want a festive display without pulling power from the grid. The core components are a weatherproof solar panel, a rechargeable battery, a charge controller, and the LED light strings themselves. When designed correctly, the system can provide predictable evening light for many hours, even on cool winter nights. In practice, most setups rely on LED strings because their low current draw makes them ideal for solar storage. Solar Panel FAQ’s guidance emphasizes safe, weatherproof installation and choosing components that match your display goals.
Why LEDs are a smart match for solar-powered holiday lighting
LEDs consume a fraction of the energy of traditional incandescent bulbs and maintain brightness at lower voltages. This efficiency translates into longer run times from a modest solar array and battery. A solar-powered display won’t look as bright as a large mains-powered setup, but well-planned arrangements can deliver a memorable effect with far less energy consumption. When you plan, consider string length, color temperature, and the desired lighting pattern (steady, twinkle, or chase). A well-designed LED plan reduces energy needs while keeping the display impactful for guests.
The energy flow: panel → controller → battery → lights
The typical chain starts with the solar panel converting sunlight into DC electricity, which is regulated by a charge controller to safely charge the battery. The stored energy then powers the LED strings through a DC circuit. The charge controller protects against overcharging, reverse polarity, and deep discharge, extending battery life. For safety and reliability, you should enclose the battery in a weatherproof box and use connectors rated for outdoor use. This setup allows you to run lights at dusk and into the night with minimal power waste and reduced risk of electrical faults.
Real-world layout considerations for your outdoor space
Think about sunlight exposure, shade, and the angle of the sun across the day. A south-facing installation in the northern hemisphere often yields the best daily energy harvest. Place the panel where it won’t be easily knocked or damaged by weather, yet remains accessible for occasional maintenance. Run the wiring along sheltered paths to minimize wear and protect connections from moisture. If you intend to display lights along a fence line or a tree canopy, plan for a longer battery run and possibly multiple smaller strings rather than one long circuit. The goal is to balance energy input with lighting output for consistent performance.
Safety and long-term reliability are non-negotiable
Weatherproofing is essential for outdoor solar systems. Use IP-rated enclosures, waterproof connectors, and corrosion-resistant hardware. Keep all wiring off the ground and away from sharp edges. Regular checks for loose connections, battery swelling, or panel dirt buildup will help maintain performance throughout the season. With proper care, a solar-powered holiday display can operate reliably year after year, reducing energy costs and providing a greener alternative to conventional grid-powered lights.
Quick-start plan for most homes
If you’re new to solar, start with a small test setup: one panel, one battery, a few LED strings, and a basic controller. Verify that the system comfortably powers the lights for your desired hours. If you’re satisfied, you can scale by increasing panel area or battery capacity to cover more strings or longer run times. Keep records of your energy production and consumption so you can refine the setup in subsequent seasons. Solar Panel FAQ encourages starting small and expanding as you gain experience.
Tools & Materials
- Solar panel (6V or 12V, weatherproof)(Choose a panel sized to meet your total daily lighting need (see energy calculation section))
- Rechargeable battery pack (sealed lead-acid or Li-ion)(Prefer deep-cycle type; ensure weatherproof enclosure)
- Charge controller(Prevents overcharge and protects battery)
- Low-voltage LED light strings(DC-powered strings; avoid high-voltage mains strings)
- Weatherproof enclosure for battery(IP-rated; keep venting in mind)
- Outdoor-rated wiring and connectors(Use in-line fuses where appropriate)
- Dimensional cable clips or cable ties(For neat routing along eaves or fences)
- Multimeter or volt-ohm meter(Useful for troubleshooting)
- Electrical tape or heat shrink tubing(Waterproof seals on exposed connections)
- Timing device or smart controller (optional)(Can automate dusk-to-dawn lighting)
Steps
Estimated time: 1-2 hours
- 1
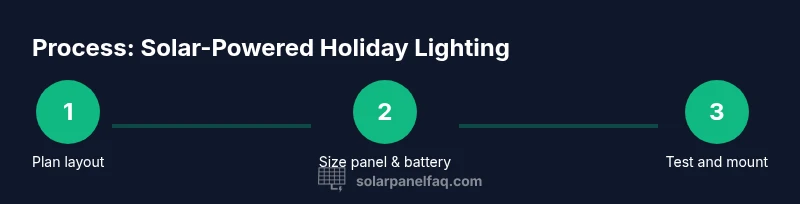
Plan your layout and lighting goals
Sketch where you want lights and visualize the day-to-night energy flow. Decide how many strings you’ll run and which areas need the most brightness. Document your layout to guide panel placement and battery sizing.
Tip: Map the highest sun exposure area for panel installation. - 2
Estimate energy needs and storage
Estimate total wattage by summing each string’s rating and multiply by the intended nightly hours of operation. This informs the required battery capacity and panel size needed for overnight use.
Tip: Aim for a buffer: oversize battery modestly to handle cloudy days. - 3
Select panel, battery, and controller
Choose a panel with enough wattage to replenish the daily energy use. Pair it with a deep-cycle battery and a controller sized to handle peak current without overheating.
Tip: Prefer a controller with low-temperature operation for winter months. - 4
Mount the solar panel securely
Install the panel where it will receive unobstructed sun for most of the day. Use weatherproof mounting hardware and non-corrosive fasteners. Run a conduit path to the battery box to protect wires.
Tip: Avoid placing the panel under tree branches that shed leaves in winter. - 5
Wiring: panel to controller to battery
Connect the panel to the charge controller input, then connect controller output to the battery. Ensure correct polarity and secure all connections in the weatherproof box.
Tip: Double-check polarity before energizing to avoid damage. - 6
Connect LED strings to the battery circuit
Attach LED strings to the battery output with appropriate connectors. Use short runs and daisy-chain only if the controller and battery specs support it; avoid overloading any single connector.
Tip: Keep strings in dry, protected channels to reduce exposure. - 7
Test daylight and dusk operation
Simulate day-night cycle by covering the panel to verify it charges and lights come on at dusk. Check for even brightness across strings and notice any dead sections.
Tip: Record dusk-to-dawn performance for future adjustments. - 8
Seasonal maintenance and adjustments
Periodically clean the panel surface, check connections, and inspect for moisture ingress. Adjust tilt or orientation if daylight patterns shift with seasonal sun angle.
Tip: Plan a quick pre-season check to prevent surprises.
Frequently Asked Questions
Can I plug standard Christmas lights directly into a solar panel?
No. A solar panel should charge a battery through a controller, and the lights should run off the battery or a regulated DC supply. Direct connection can overload the panel and damage lights or cause safety issues.
No. Use a battery and controller so the lights run on safe, regulated power.
How many strings can I run on a solar setup?
The number depends on the total wattage, battery capacity, and daily sun. Calculate by summing wattage of all strings and comparing to your system’s daily energy budget. Avoid overloading the battery or controller.
It depends on your energy budget; calculate total wattage and compare to storage.
Do solar lights work in winter?
Yes, but daylight is shorter and sun is weaker. You may need a larger panel or additional battery capacity, and ensure the system is optimized for low-angle sun and potential shading from trees.
They work in winter, but you may need enhancements for shorter days.
Is a charge controller necessary?
Yes. A charge controller protects both the battery and the panel from overcharging, voltage spikes, and reverse current at night. It’s a standard component in solar lighting systems.
Yes, it prevents overcharging and protects your battery.
What maintenance is required?
Regularly inspect for moisture, clean the panel surface, verify connections, and test the dusk-to-dawn operation. Replace worn seals and aging batteries as needed.
Check connections, clean the panel, and test the system seasonally.
Can I reuse existing solar garden lights?
Yes, if they are compatible with the battery voltage and current. Check the ratings on the lights and ensure they match your controller output and battery capacity.
You can reuse them if they match your system’s voltage and current needs.
Watch Video
Top Takeaways
- Plan around daylight hours and storage capacity
- Choose LEDs over incandescents for efficiency
- Weatherproofing is essential for reliability
- Start small and scale up with experience