How to tell if solar panel is 12v or 24v
Learn a practical method to determine if your solar panel is 12V or 24V through labeling, datasheets, and safe testing. This guide from Solar Panel FAQ walks homeowners through checks, measurement steps, and wiring considerations for accurate voltage identification.

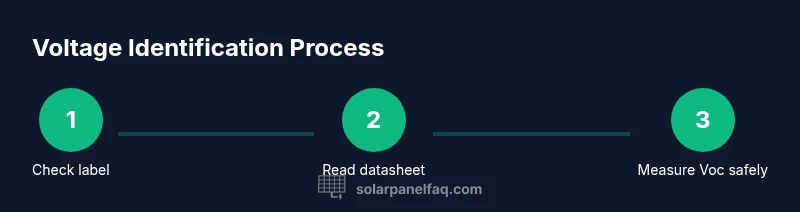
To tell if a solar panel is 12V or 24V, start by checking the label or datasheet for voltage naming, then verify the open-circuit voltage (Voc) with a multimeter across the panel, and cross-check the rated system voltage in the installer documentation. In most residential setups, panels are 12V or 24V; use the label to confirm before wiring.
What 12V vs 24V really means in solar panels
Understanding the voltage class of a solar panel is essential for safe and effective installation. The difference between 12V and 24V panels affects how you wire panels, select a charge controller, and size cables. This guide on how to tell if solar panel is 12v or 24v will walk you through identifying the voltage class using labels, datasheets, and simple measurements. According to Solar Panel FAQ, voltage class is determined by design and is not just a marketing label; it dictates how panels convert sunlight into usable electrical energy. When you know the class, you can plan a compatible system with a battery bank and inverter that match the panel's voltage. In practice, many homeowners encounter both 12V and 24V panels, depending on the era of installation and the system size. The goal is to avoid mixing voltage classes in ways that require unsafe or inefficient wiring.
Why the difference matters for your system
Choosing between 12V and 24V panels is not just about a number on a label. The voltage class influences what charge controller you need, how many panels you can string together, and what battery bank you can charge safely. A 24V system typically benefits higher efficiency in larger arrays and reduces current in conductors, which can lower heat and losses. The Solar Panel FAQ team emphasizes planning around your existing battery setup and inverter ratings to prevent overvoltage or insufficient charging. In short, matching panel voltage to the rest of the system reduces wiring complexity, improves safety, and helps achieve predictable performance.
How to read the marking on the panel (labels and datasheets)
Look for a label on the back or side of the panel that lists its nominal voltage, such as 12V or 24V. The datasheet from the manufacturer provides the official voltage class, Voc (open-circuit voltage), and Vmp (voltage at maximum power). If the panel lacks a clear voltage label, search the model number online for the datasheet. Compare the listed voltage class to your system components before purchasing or connecting. Always verify both the panel’s labeled voltage and the recommended system voltage to avoid misconfiguration.
Quick field test: open-circuit voltage (Voc) vs nominal voltage
Voc is the maximum voltage the panel can produce when not connected to a load. It is higher than the panel’s nominal voltage and varies with temperature and sunlight. A 12V panel generally has a lower label voltage than a 24V panel, but Voc values can overlap across models. The purpose of checking Voc is to confirm compatibility with the charge controller and battery bank, not to force a fixed nominal voltage. Use Voc as a cross-check against the label and datasheet.
How to measure Voc safely with a multimeter
Before touching any wiring, turn off any connected equipment and wear PPE as needed. Set your digital multimeter to the DC voltage range, then connect the probes to the panel’s positive and negative terminals without touching metal parts. Read the Voc value and compare it to the system voltage you intend to use. If the measured Voc is within the expected range from the datasheet, the panel aligns with your voltage class. If not, reassess or seek expert help.
Voltage vs current: understanding Vmp and Imp
Vmp is the voltage at which the panel produces maximum power, and Imp is the corresponding current. In practice, Vmp is closer to the nominal voltage than Voc, but real-world values depend on temperature and irradiance. When combining multiple panels, the total string voltage depends on how panels are wired (series vs parallel). Understanding Vmp helps you size the charge controller and inverter for the expected load.
Wiring implications: series vs parallel configurations
Series wiring increases voltage while keeping current roughly the same; parallel wiring increases current while keeping voltage about the same. For determining whether a panel is 12V or 24V, consider how many panels you plan to connect in a string and what your charge controller supports. Mismatched voltages can lead to undercharging or overloading the controller. Design your array to stay within the controller’s voltage and current limits.
Safety considerations when handling solar panels
Always shut off system power before handling panels. Use insulated tools and avoid standing on wet surfaces. Solar panels can deliver dangerous currents even when shaded, so hand-testing under supervision is recommended. Store and transport panels safely to avoid damaging the cells or connectors. Safety should guide every step of identifying panel voltage to prevent shocks or equipment damage.
When in doubt: hiring a pro and verifying warranty terms
If you’re unsure about a panel’s voltage class, consult the manufacturer’s datasheet or a licensed installer. A pro can verify compatibility with your battery bank, charge controller, and inverter and document the findings for warranty coverage. Always check the warranty terms for coverage related to incorrect voltage connections and improper configurations. Informed decisions save time and prevent costly mistakes in the long run.
Tools & Materials
- Digital multimeter (DC voltmeter)(Set to DC voltage; measure across panel positive and negative terminals; use PPE.)
- Panel datasheet or model number(Use official voltage class, Voc, and Vmp values.)
- Safety gloves and eye protection(Protect from sharp edges and potential short circuits.)
- Insulated tools(Keep tools insulated; avoid bridging terminals.)
- Non-conductive mat or dry work surface(Reduces slip risk during testing.)
- Optional clamp meter(For measuring current in a module or array in operation.)
Steps
Estimated time: Estimated total time: 30-60 minutes
- 1
Check the panel label
Locate the voltage label on the panel; note whether it states 12V, 24V, or a voltage class. This is the fastest indicator and sets your initial expectation for the rest of the test.
Tip: Take a clear photo of the label for reference during later steps. - 2
Find the official datasheet
Use the model number to pull the datasheet from the manufacturer. The datasheet confirms the voltage class, Voc, and Vmp, which are essential for accurate identification.
Tip: If the datasheet isn’t readily available, contact the manufacturer support line. - 3
Compare with your system voltage
Match the panel’s voltage class to your battery bank and charge controller ratings. This cross-check helps prevent misconfiguration and equipment strain.
Tip: Ensure your battery bank voltage aligns with the panel’s voltage class to avoid charging inefficiencies. - 4
Measure Voc with a multimeter
With power disconnected, set the meter to DC volts and place probes on the panel’s terminals. Record the reading without touching metal parts.
Tip: Do this in daylight under shade if possible to minimize glare and avoid overheating the panel. - 5
Interpret Voc in context
Compare the measured Voc to the datasheet’s Voc specification and the panel’s nominal voltage class. Temperature and sunlight affect Voc, so use the datasheet as the authority.
Tip: If Voc significantly deviates from the datasheet, recheck connections and consider a professional review. - 6
Check Vmp and Imp (if available)
If the datasheet provides Vmp and Imp, verify they align with a 12V or 24V system. This helps confirm whether the panel supports the intended configuration.
Tip: Use Vmp as a practical guide when sizing controllers for real-world operation. - 7
Evaluate wiring options
Consider whether you’ll connect panels in series or parallel and what total voltage and current that will yield. Ensure the design stays within the controller’s limits.
Tip: Plan your strings to avoid exceeding the controller’s maximum input voltage or current. - 8
Assess safety and labeling after test
Document the voltage class clearly on your system plan and keep labels legible. This helps future maintenance and warranty validation.
Tip: Store test results with photos and model numbers for quick reference. - 9
Decide on pro help or DIY
If there’s any doubt about voltage class, consult a licensed installer or the manufacturer. A professional review can protect warranty terms and ensure safe operation.
Tip: When in doubt, investing in a professional check can prevent costly mistakes later.
Frequently Asked Questions
Can I mix 12V and 24V panels in the same string?
Mixing panels of different voltage classes in a single string is generally not recommended because it can cause uneven charging and stress the controller.
Mixing different voltage-class panels in one string is not recommended; use the same voltage class per string.
Will a 12V panel work in a 24V battery bank?
Not effectively; you may undercharge the battery and waste energy. Use the correct voltage class or a suitable converter.
A 12V panel will not efficiently charge a 24V bank; use the proper voltage class.
Does every solar panel have a voltage rating on its label?
Most panels include a nominal voltage label and datasheet; if not, look up the model online for the official rating.
Most panels have a nominal voltage on the label; if not, search the model online.
How can I identify the voltage class without the datasheet?
Use the label as the primary indicator and perform a careful Voc test as a cross-check, but the datasheet remains the authoritative source.
Rely on the label and a careful VOC test; the datasheet confirms it.
What safety steps should I take when testing panel voltage?
Wear PPE, avoid touching live terminals, test in shade to reduce glare, and disconnect before wiring.
Wear PPE and avoid live wiring; disconnect before making changes.
Watch Video
Top Takeaways
- Identify the voltage class from the label or datasheet.
- Use Voc as a cross-check against nominal voltage.
- Match panel voltage to system components to avoid misconfiguration.
- Document findings for safer maintenance and warranty validation.