Optimal Spacing: Distance Between Solar Panels to Avoid Shading
Learn how to space solar panels to minimize shading across seasons. A practical guide with calculations, layout strategies, and safety tips for rooftop installations.

By the end, you will determine the minimum distance between solar panels to avoid shading for most of the year. You will learn a practical method to calculate spacing based on panel height, sun angle, and roof layout, plus how to verify results with seasonal shading checks. Necessary inputs include roof dimensions, panel height above the roof, and the chosen module orientation.
Why spacing matters for shading avoidance
Shading is the energy thief of any solar array. The distance between solar panels to avoid shading directly impacts how much of each module receives direct sunlight across the day and throughout the seasons. When rows are too close, even small shadows cast by neighboring modules, roof edges, or mounting hardware can reduce production noticeably. For homeowners, properly spaced rows translate into more energy during peak sun hours and more consistent performance in winter when the sun sits lower in the sky. This section explains the core reasons spacing matters and how to think about it as a long-term design decision rather than a one-time measurement. You will learn how roof geometry, panel tilt, orientation, and the sun’s path combine to produce a reliable, evenly illuminated array rather than a patchwork of shaded cells.
Key variables that influence panel separation
Several variables dictate how much space you need between rows. The panel height above the roof plane determines how far shadows project. The width and length of each module influence how much shadow a neighboring row might cast. The roof pitch and azimuth orientation affect sun angles across the year. Geographic location, especially latitude, sets the seasonal sun path you must plan for. Tilt angle of the array (if not fixed) and the presence of roof obstructions also matter. Finally, future expansion plans and maintenance access should guide your spacing decisions so you don’t box yourself into an inefficient layout later. In practice, you balance engineering constraints with real-world usability to avoid a hard-to-service design.
Understanding sun angles and shading risk
To avoid shading, you must understand how the sun travels across the sky. The critical factor is the minimum sun elevation angle (θ_min) that occurs on your site during the year. Spacing decisions hinge on θ_min because shadows from one row project across the next row when the sun is low. A practical rule is to ensure enough clearance so that the projected shadow length from the upper row does not reach the lower row at any time of day during the worst-season sun. You can estimate θ_min from latitude tables, solar calculators, or local meteorological data. Then translate that angle into a distance with a simple trigonometric relationship using the height of the panel above the mounting surface.
Practical methods to calculate recommended distance
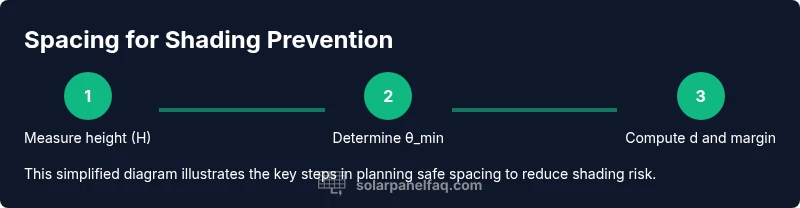
Follow these steps to compute a defensible spacing: 1) Measure H, the vertical distance from the roof to the centerline of the panel plane in the intended layout. 2) Determine θ_min for your site using a solar path chart or calculator for the winter solstice noon position. 3) Compute the basic shade clearance d = H × tan(θ_min). 4) Add a safety margin, typically 10–20%, to cover seasonal variation and to accommodate small misalignments. 5) Round up to a practical spacing that accommodates mounting hardware and walking access. 6) Translate these results into a floor plan or drawing to confirm that every row retains shade-free exposure across modules. Verification via software or field checks is recommended before final installation.
Guidelines for different roof configurations
For pitched roofs, rows typically run parallel to the roof plane, with spacing adjusted for the sun’s height during winter and summer. For flat roofs, spacing must account for the sun’s path at several elevations and may require multiple tilts or staggered rows. Orientation also matters: east- or west-facing arrays experience different shading patterns than south-facing ones in the northern hemisphere. If you have nearby structures or trees, you’ll need extra clearance to avoid late-day shadows. Because every roof and climate is different, treat spacing as a design parameter rather than a fixed rule, and revisit it when changes are planned.
Tools and measurement practices
Accurate spacing starts with good measurement discipline. Use a tape measure or laser distance meter to capture panel height, row-to-row distance, and edge clearances. Sketch the layout on graph paper or a digital map to maintain a record. A calculator or smartphone app helps you compute tan values and quickly test alternate spacing scenarios. Always mark reference lines on the roof with chalk or tape and verify level alignment with a spirit or laser level. Keep notes of assumptions, as you will reference them when reviewing after installation or performing maintenance.
Seasonal shading checks and verification methods
After the initial spacing design, validate it by examining the site at multiple times of day and across seasons. Use sun-path diagrams or online tools to simulate shading for winter and summer conditions. If micro-shadowing occurs near edges, consider slight adjustments or adding a small lateral offset between rows. Physical verification with a reflective target or temporary shading templates during dawn or late afternoon can help you see potential problem zones before mounting. Finally, factor in potential growth of nearby vegetation that could alter shading over time.
Safety considerations and professional help
Roof work carries fall risks. Wear proper PPE, use a harness when required, and never work alone on elevated surfaces. If you are unsure about safety or structural implications of mounting spacing, consult a licensed professional. Electrical considerations, mounting hardware compatibility, and local code requirements are important, and miscalculations can lead to performance or warranty issues. When in doubt, prioritize safety and seek expert guidance.
Planning for future expansions and maintenance
Spacing decisions should anticipate near-term expansion or cleaning access. If you plan to add more panels later, design a modular spacing plan that preserves service paths and leaves room for additional rows. Regular inspection after installation helps catch shifts caused by weather, wind, or thermal cycling that might alter shading patterns. Maintain clear documentation so that future technicians can verify the original spacing logic and adjust if necessary.
Common myths about panel spacing
Myth: Spacing is optional if your panels are shaded only seasonally. Reality: shading for even a portion of the day reduces energy; consistent spacing minimizes risk. Myth: Taller panels always require less distance. Reality: distance depends on sun angle and row height, not just panel height. Myth: You can rely on software alone. Reality: field checks are essential to account for real-world obstructions and weather.
Quick-start checklist
To get started quickly, use these steps: 1) Gather roof dimensions and panel height. 2) Look up θ_min for your latitude. 3) Compute d = H × tan(θ_min). 4) Add 15% margin. 5) Draft a simple layout showing row spacing and walking paths. 6) Validate with a sun-path tool. 7) Document all measurements for future reference.
Tools & Materials
- Tape measure or laser distance meter(For measuring panel height, row spacing, and roof dimensions)
- Graph paper or digital mapping tool(To sketch layout and track distances)
- Calculator or smartphone app(To compute tan values and test spacing scenarios)
- Marker and level(Label positions and ensure level alignment)
- Safety gear (gloves, eyewear, harness as needed)(Rooftop work safety)
- Measuring pole or markers(Optional for rooftop measurements)
- Notebook or digital notes app(Record dimensions and assumptions)
- Drill or mounting tools (optional)(If planning to install spacers or hardware)
Steps
Estimated time: 30-60 minutes
- 1
Measure key dimensions
Begin by measuring the height H of the panel plane above the roof and the distance to the nearest potential shadow source. Record roof dimensions and the intended panel layout on paper or a digital plan. This data feeds the spacing calculation and helps you compare alternative layouts.
Tip: Double-check measurements from multiple points to reduce error. - 2
Determine site sun angles
Find θ_min for your location using a solar path calculator or local solar charts. Identify the minimum sun elevation during winter solar noon, which strongly influences shading risk for rooftop arrays.
Tip: If your latitude varies seasonally, use a conservative θ_min to cushion uncertainty. - 3
Compute basic shade clearance
Compute d = H × tan(θ_min). This gives the initial shadow clearance distance between rows. Treat this as a starting point rather than a final value because hardware and access needs may require adjustments.
Tip: Remember that tan values grow quickly as θ_min increases, so small changes in θ_min can affect spacing substantially. - 4
Add safety margin
Increase the calculated distance by a margin (commonly 10–20%) to accommodate seasonal variability and installation tolerances. This helps ensure shade-free exposure across year-round conditions.
Tip: A conservative margin reduces risk of late-day shading from wind-shifted components. - 5
Draft layout and verify
Create a layout map showing rows, hardware, and access paths. Use sun-path simulations or field checks to verify that shadow lines stay clear throughout key times of day and seasons.
Tip: Mark reference lines on the roof to guide actual installation. - 6
Document results for future
Save measurements, assumptions, and the final spacing values in a dedicated project file. This documentation helps with future maintenance or expansions and supports warranty compliance.
Tip: Include versioned diagrams if you revise the layout later.
Frequently Asked Questions
What is shading risk in solar installations?
Shading reduces the output of affected modules and can significantly lower system efficiency, especially during morning/evening hours or in winter. Proper spacing minimizes these losses by keeping each panel in strong sun exposure for longer periods.
Shading reduces output; spacing helps maintain consistent sun exposure across the array.
How does panel height affect spacing?
Panel height determines shadow length. Taller panels cast longer shadows, so greater spacing may be needed to prevent shading from adjacent rows at low sun angles.
Height matters because higher panels cast longer shadows when the sun is low.
Can I calculate spacing using online tools?
Yes. Use solar path calculators and sun-angle charts to estimate θ_min for your location. Then apply the spacing formula with your measured height to get a starting distance.
Online tools can give you a good starting point, but verify with on-site checks.
Should I consult a professional for roof-mounted systems?
If you are unsure about roof safety, structural limits, or local codes, consult a licensed solar installer. They can validate spacing against wind loads, mounting hardware, and warranties.
For safety and compliance, professional input is wise.
What factors besides shading influence spacing?
Along with shading, consider roof access, maintenance, wind loads, panel mounting hardware, tilt options, and future expansions when determining spacing.
Don’t overlook access and wind effects when planning spacing.
Is spacing the same for roof-mounted and ground-mounted systems?
Spacing principles are similar, but ground-mounted systems often have more flexibility and might accommodate larger margins for maintenance and vegetation growth.
The basic idea is the same, but implementation differs with mount type.
Watch Video
Top Takeaways
- Plan spacing with sun-path principles.
- Use H and θ_min to compute d with tan().
- Add a margin for safety and growth.
- Verify spacing with seasonal checks before installation.
- Document layout for maintenance and future upgrades